Setting up a dessert table requires a sturdy surface, three distinct height levels, and five to seven dessert varieties in coordinating colors. If you’re wondering how to set up a dessert table for any party, start with a focal point — usually a cake or tiered display — group items in odd numbers, label everything clearly, and add a small floral or greenery accent. Most dessert tables take 45–75 minutes to assemble and cost between $60 and $130 for 20–25 guests.
I still think about Emma’s dessert table from last June.
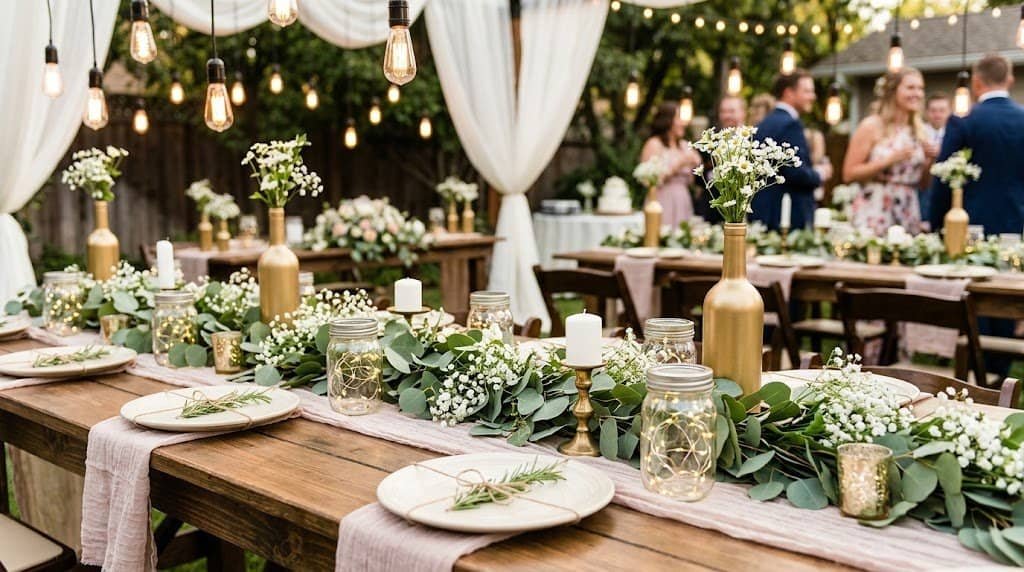
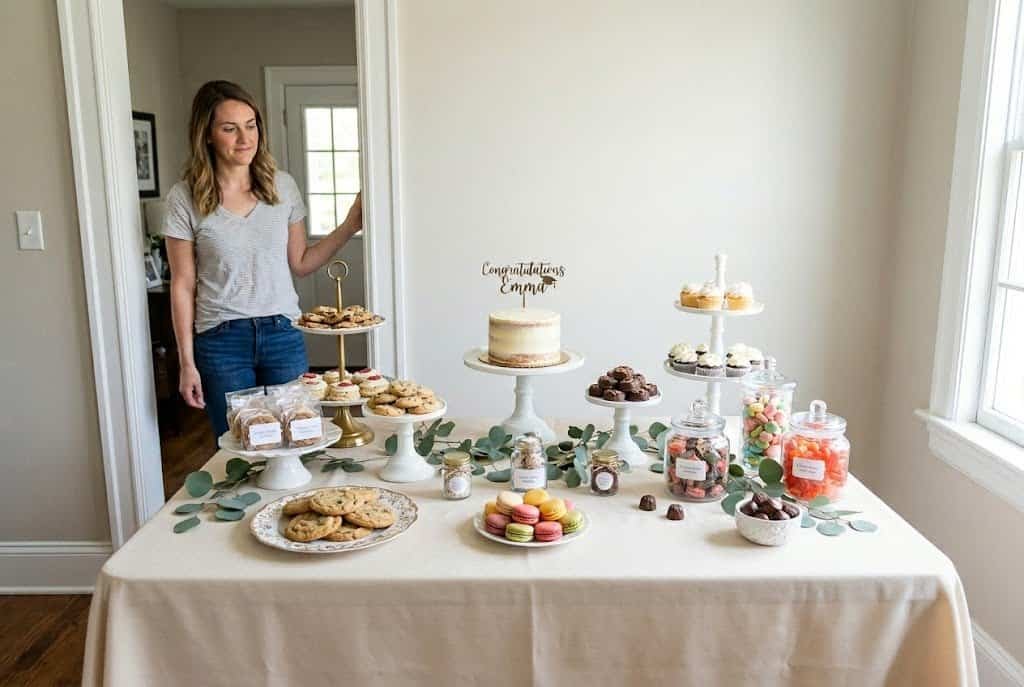
She was setting up her daughter’s graduation party and had exactly 45 minutes before guests started arriving. No professional caterer, no custom-printed backdrop, no hours of Pinterest planning the night before. She grabbed two wooden crates from Dollar Tree, a two-tier cake from the grocery store bakery, a flat of strawberries from the farmers’ market, and three boxes of Costco cookies. She layered them on a white tablecloth — the $1.25 kind, pulled completely taut — with a handful of eucalyptus branches she’d clipped from her backyard.
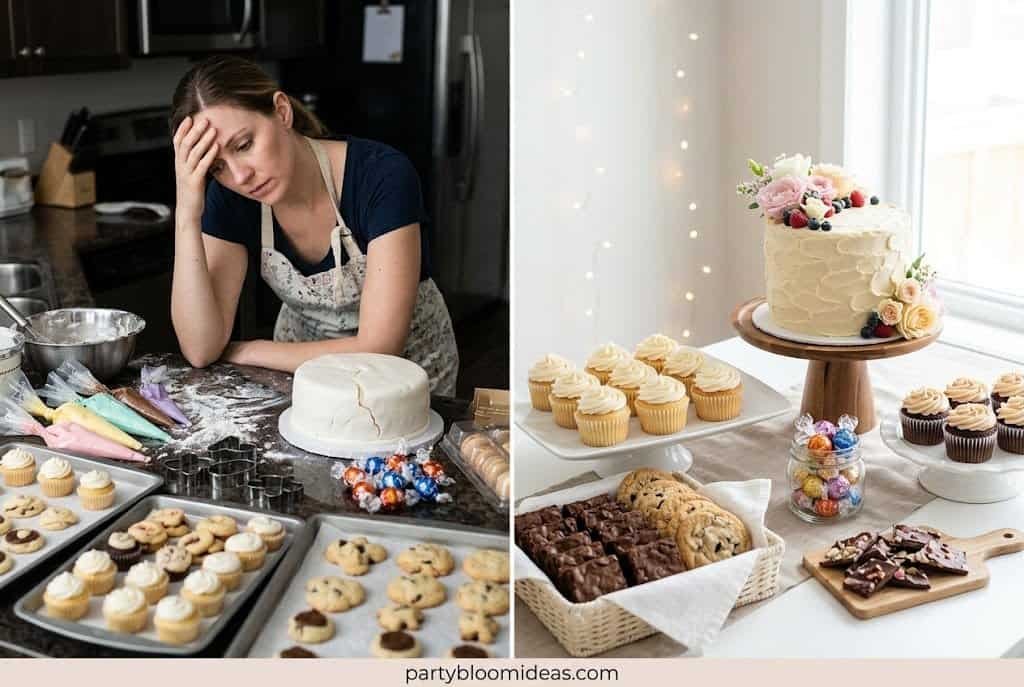
When guests walked in, the dessert table stopped them in the doorway. Shoulders dropped, heads turned. Three separate people asked if she’d hired someone. It looked like a $300 professional spread. It cost $87 and took 45 minutes.
That’s dessert table setup done right — and a perfect example of how to set up a dessert table for any party without overspending.
It’s not about the number of items, the fondant cake, or the balloon arch backdrop. It’s about how the table makes people feel when they walk in — and whether they actually want to eat what’s on it. After hosting and attending over 50 parties in the past decade, here’s what I know about how to set up a dessert table for any party that looks intentional, photographs naturally, and actually gets eaten.
According to a 2023 survey by The Bash, dessert bars and sweet stations rank as the second most-requested food setup at birthday parties, behind only main catered food — which tells you exactly how much guests notice and care about them. According to Pinterest’s 2024 Party Planning Trends report, searches for “dessert table ideas” rose 43% year-over-year, with “dessert table for birthday” landing in the top ten pin search terms in the Celebrations category. And according to a 2023 Eventbrite survey on party hosting habits, 68% of hosts said food presentation made them most anxious — more than décor, more than logistics.
If that sounds familiar, learning how to set up a dessert table for any party can take away much of that stress while creating a memorable experience for guests. By following a few simple styling principles, anyone can master how to set up a dessert table for any party that looks elegant, inviting, and professionally designed.
What Does a Dessert Table Actually Need?
A dessert table is a styled display of sweets that serves two purposes: it feeds your guests, and it becomes a visual anchor for the party. Done well, it photographs naturally, stays abundant-looking as guests help themselves, and requires no professional skills.
What it IS:
- A curated display of 5–8 sweet items in coordinating colors
- A setup that uses height variation, deliberate grouping, and labels to create visual interest
- Something guests both eat from and photograph
- Completely flexible in budget — gorgeous setups exist at $60 and at $200
What it ISN’T:
- A candy buffet (that’s a different setup — a different problem entirely)
- Something that requires a backdrop, a balloon arch, or custom-printed anything
- A project that should take more than 60–90 minutes the day of your party
- A reflection of how much you spent
The trick is understanding what guests actually register: not individual items, but the overall impression — the height, the color cohesion, the fact that it looks like someone thought about it. You can create that impression with grocery store desserts and Dollar Tree supplies. Emma proved it. I’ve proved it. You will too.
Step 1: Choose Your Table and Surface
Best for: Any party, any budget — this is where every dessert table starts
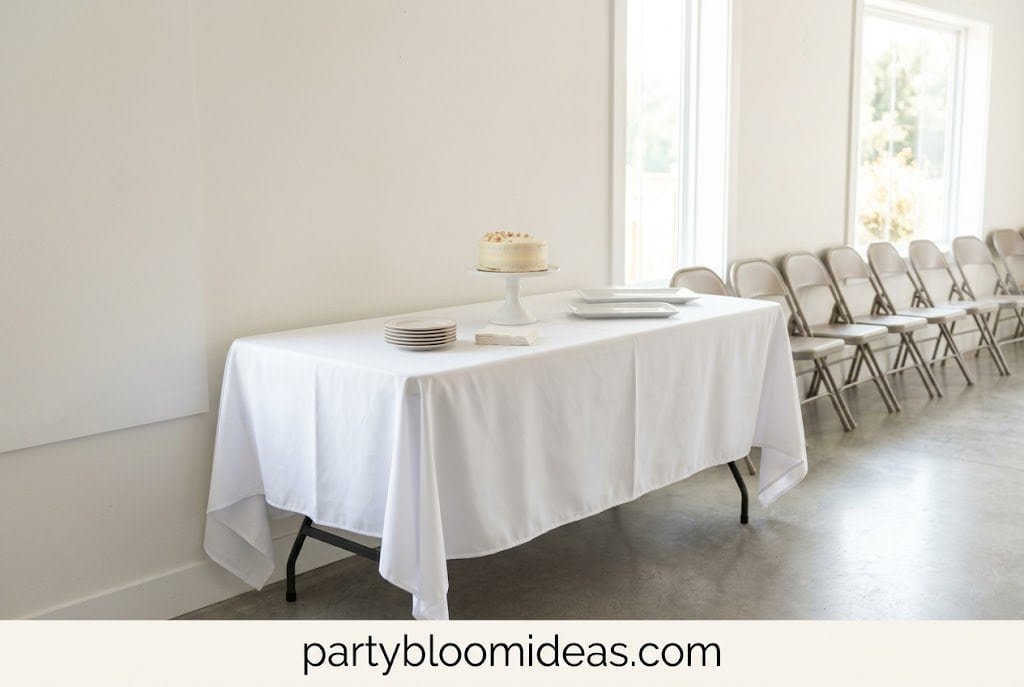
The foundation of your dessert table is the surface itself — and this is where more hosts go wrong than anywhere else. A wrinkled tablecloth tanks the look of everything above it. I learned that the hard way at my niece’s fourth birthday, where I’d focused all my energy on cake decorations and completely forgot to iron the tablecloth. The photos were genuinely painful to look at.
Table size guide:
- 20–30 guests: Standard 6-foot folding table
- 30–50 guests: 8-foot table, or two 6-foot tables arranged in an L-shape
- Avoid going too large — you’ll struggle to make a big table look full
Surface options:
- White fabric tablecloth, pulled completely taut ($8–$15 at Target) — clean, reusable, photographs beautifully
- White plastic tablecloth ($1.50 at Dollar Tree) — works perfectly if you pull it very tight and tape the edges underneath
- Kraft paper roll ($5–$8 from Dollar Tree or Amazon) — gorgeous for rustic or boho setups
- Butcher paper + tape — adequate for kids’ parties
Backdrop options (genuinely optional):
- White twin-size bedsheet ($8 at Dollar Tree) draped over a tension rod
- A clean white or neutral wall you already have — the most underrated backdrop there is
- White fabric ($5/yard at Walmart) clipped to a rod with binder clips
- Your existing garden fence, bookshelf mantle, or stone wall (free)
Let’s be honest: I’ve seen tables with elaborate balloon arch backdrops that looked dated in photos within 18 months. I’ve seen an $8 white bedsheet backdrop look elegant in photos three years later. Save the $50–$80 on the balloon arch and put it into your actual desserts. Guests eat the food. They don’t eat the backdrop.
💡 Pro Tip: Pull the tablecloth as tightly as possible and tape or clip the edges underneath. Folds and wrinkles are the single most common visual distraction in dessert table photos — and they’re completely preventable.
Step 2: How Do You Create Height Levels on a Dessert Table?
Best for: Any dessert table, any style — this single step changes everything
Here’s what I’ve learned after setting up dessert tables at more than 20 parties: a flat table always looks wrong in photos. Everything at the same height registers as a cafeteria counter, not a styled party display. Height variation is the technique that separates a beautiful dessert table from an average one — and it costs almost nothing.
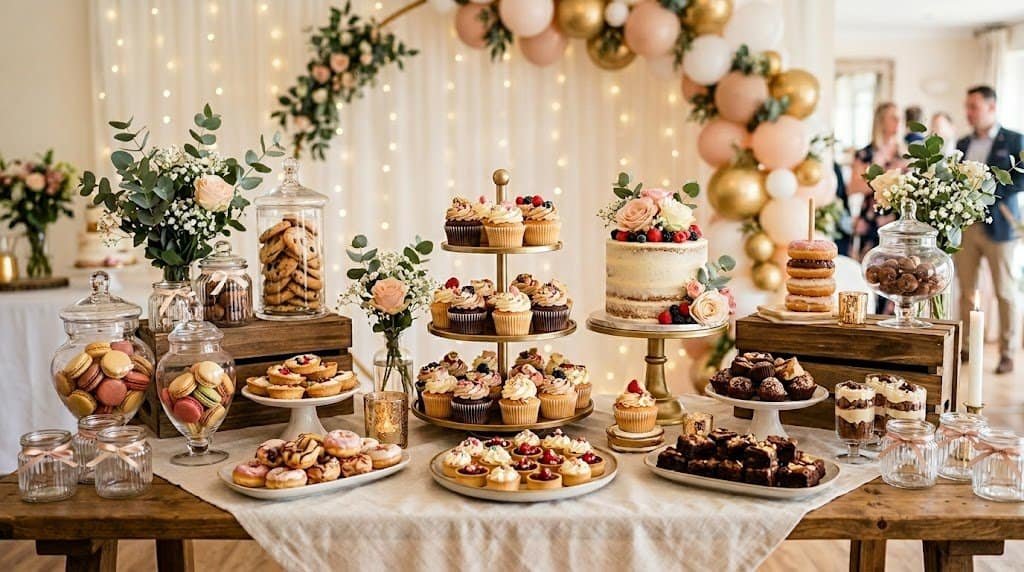
Three levels to build:
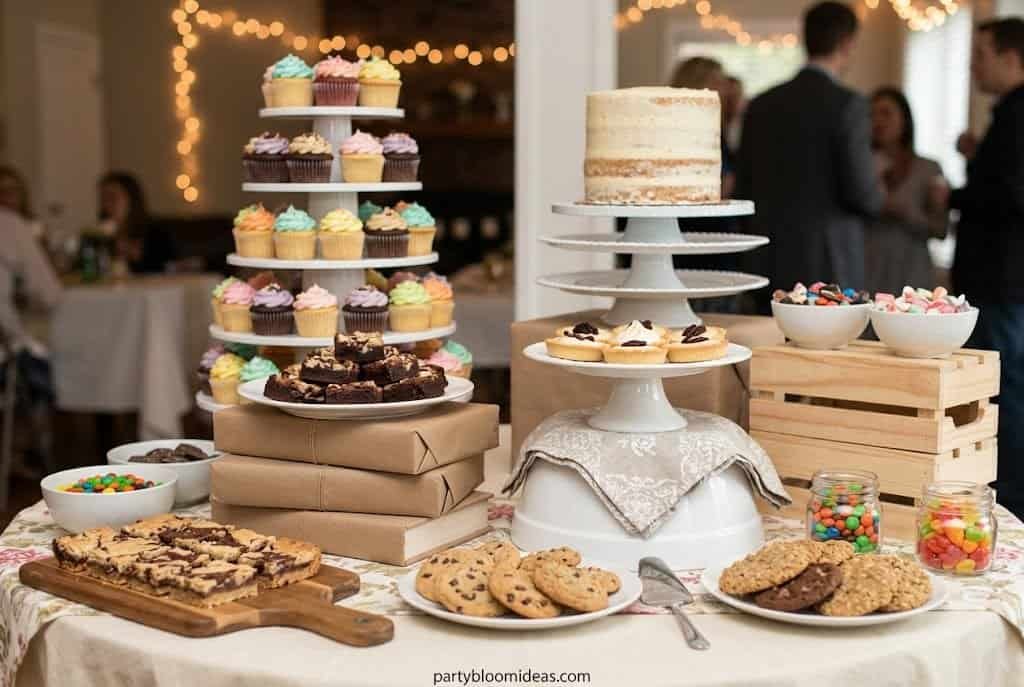
- High (back or center): A tiered cake stand ($12–$18 on Amazon), a 3-tier cupcake tower ($15), or a single tall-layered cake
- Medium (middle zone): A standard cake stand ($8–$12), books covered with a cloth napkin, an inverted bowl covered in fabric
- Low (front): Flat plates of cookies, a cutting board with brownies, candy jars at table level
Free height hacks:
- Wooden crates from Dollar Tree (stacked): $2 for two crates
- Books wrapped in craft paper: free
- Inverted serving bowls with a plate on top: free
- Upside-down cake pans covered with a cloth napkin: free
Place high items in the back third of the table — they stay photogenic longer as guests serve from the front. Medium items fill the middle. Easy-grab items live at the front where they’re accessible.
💡 Pro Tip: Three distinct heights is the minimum. If you have only one or two, no amount of beautiful food will make the photo look right. Add a crate, stack something, borrow a cake stand. This step matters that much.
Step 3: How Many Desserts Do You Need for a Party?
Best for: Planning your shopping list before you spend anything
This is where 9 out of 10 hosts either overthink it or undershoot it. Overthinking means 12 different homemade varieties, each in tiny quantities, none particularly good. Undershooting means one cake and awkward empty space by hour two.
I made every version of the overthinking mistake at a birthday party I hosted four years ago — handmade fondant cake, six homemade dessert varieties, custom-printed labels, a balloon arch backdrop. I spent 14 hours over two days preparing. By the time guests arrived, I was exhausted. I watched people politely eat one bite of the fondant cake (which tastes, as fondant always does, like slightly sweet wax) and make a beeline for the store-bought Lindt truffles I’d thrown in as an afterthought.
Effort is invisible. A single genuinely gorgeous, delicious cake outperforms six mediocre homemade ones every time. Trust me on this.
The framework that works — for 20–25 guests:
- 1 hero dessert (cake, macaron tower, donut wall) — the centerpiece, the thing guests photograph
- 2–3 supporting desserts (cupcakes, brownies, cookies, mini cheesecakes)
- 1 interactive or grab-and-go element (candy jar, chocolate-dipped strawberries)
- 1 grazing item (biscotti, mini eclairs, petit fours, chocolate bark)
Quantity guide: Plan for 3–4 dessert pieces per guest. For 25 guests: approximately 75–100 individual pieces across all items. A dozen cupcakes, 18 brownies, 24 cookies, and a cake that serves 10–12 gets you comfortably there.
Buy vs. make:
- BUY the hero cake. Grocery store bakery cakes run $20–$45 and look genuinely impressive. Put your energy into the styling, not the baking.
- MAKE cookies, brownies, and chocolate bark — items that can be made 1–2 days ahead and travel well
- BUY macarons (Costco: 24-pack for $14.99), Lindt truffles, and croissants
And on fondant: a textured buttercream cake with fresh flowers on top costs the same, photographs just as beautifully, and people actually enjoy eating it. After hosting countless parties where fondant cakes sat largely untouched, I stopped ordering them entirely.
What Budget vs. Splurge Looks Like for a Dessert Table
| Element | Budget Option (Under $80 total) | Splurge Option ($150–$200+ total) |
|---|---|---|
| Hero Dessert | Grocery store sheet cake ($18–$25) | Custom 2-tier buttercream cake from local bakery ($65–$120) |
| Supporting Desserts | Box-mix brownies + Costco cookies ($12–$18) | Petit fours + macarons from specialty bakery ($45–$65) |
| Grab-and-go item | Dollar Tree candy jars + bulk candy ($8–$12) | Chocolate-dipped strawberries + gourmet truffles ($25–$40) |
| Table Surface | Dollar Tree plastic tablecloth ($1.50) | Linen tablecloth rented or purchased ($18–$35) |
| Height Risers | Stacked Dollar Tree crates + inverted bowls (free–$4) | Tiered cake stands + custom wooden crates ($25–$45) |
| Florals/Greenery | Yard cuttings or Dollar Tree greenery ($0–$3) | Fresh arrangement from florist or Whole Foods ($25–$50) |
| Labels | Handwritten cardstock tent cards ($2–$3) | Printed chalkboard-style custom labels ($8–$15) |
| Backdrop | White bedsheet on tension rod ($8) | Rented/purchased backdrop + stand ($40–$80) |
| Total Estimate | $50–$65 for 20–25 guests | $250–$395 for 20–25 guests |
| Verdict | Excellent results — Emma’s $87 table proved this | Worth it for milestone birthdays, weddings, formal events |
Step 4: Style with Non-Food Elements
Best for: Adding visual texture and cohesion to the display
Non-food elements transform “desserts arranged on a table” into a styled display. The goal is visual variety, texture, and cohesion — without ever competing with or obscuring the actual food.
What works:
- Fresh florals: Even a single bunch of eucalyptus from Trader Joe’s ($3–$4) reads as intentionally styled. A small bunch of seasonal flowers ($8–$12) adds color and softness.
- Dried florals: Pampas grass, dried lavender, dried eucalyptus — none wilt, none need same-day setup, all photograph beautifully
- Greenery from your yard: I’ve clipped rosemary, eucalyptus, and olive branches and tucked them around desserts more times than I can count. Natural, fresh-looking, and free.
- Fabric accents: A small linen square under a cake stand adds texture. A burlap runner adds warmth for rustic setups.
- Unlit candles: Pillar candles add height and elegance. Never light them near food — wax drips are a real problem.
What to skip:
- More florals than food (the food is the point — never let décor overshadow it)
- Lit candles anywhere near desserts
- Accent colors that fight with your dessert palette
💡 Pro Tip: Three non-food accents at different heights look intentional. Two looks stiff. Four looks cluttered. Three is almost always exactly right.
Step 5: Add Labels and Signage
Best for: Any dessert table with more than one type of sweet
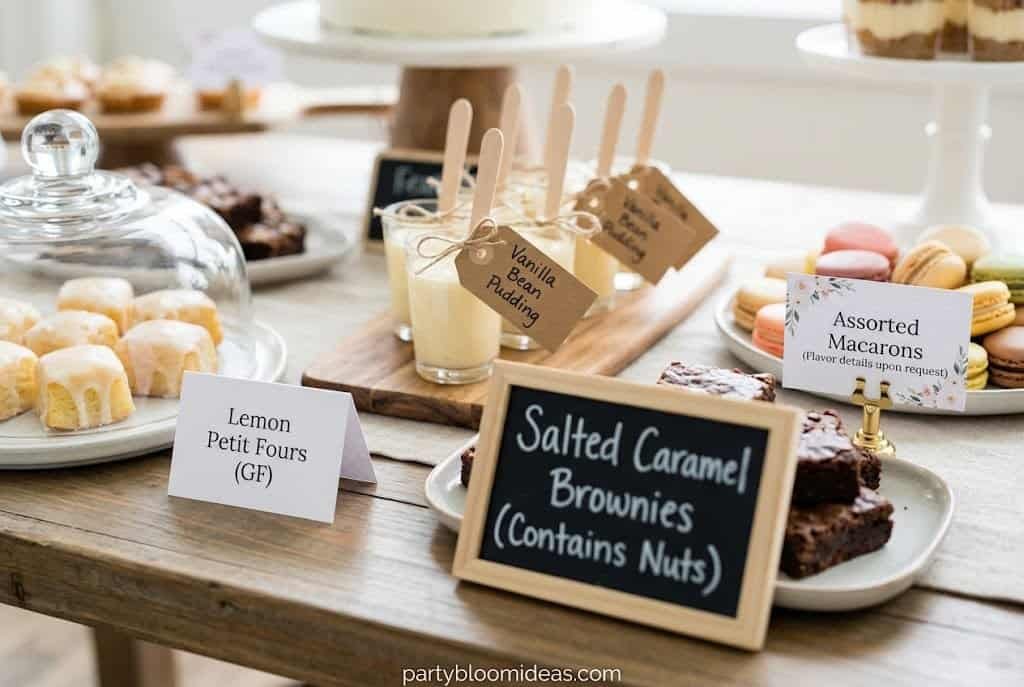
Labels transform a dessert table from “food sitting on a table” to “styled display.” They serve a practical purpose — allergy information, dietary notes — and a visual one: they make the table look thoughtful and professional.
I used to skip labels because they seemed overly formal. After watching guests repeatedly hesitate before unfamiliar items — or avoid them entirely because of potential allergy concerns — I started labeling everything.
Easy labeling options:
- White cardstock folded as tent cards, written with a chalk marker ($3 for a 30-card pack)
- Kraft paper tags tied with twine to a toothpick or lollipop stick ($4–$6 for a set)
- Small chalkboard signs ($5–$8 at Dollar Tree or Amazon)
- Canva-designed labels printed at home on cardstock (free with a printer)
What to label:
- The name of each dessert (“Salted Caramel Brownies,” “Lemon Petit Fours”)
- Dietary notes (“GF,” “Vegan,” “Contains Tree Nuts”)
- The flavor if it isn’t obvious (“Vanilla Bean Macarons,” “Dark Chocolate Bark”)
After hosting countless parties with labels and without: the table always looks more intentional with them. Even handwritten tent cards make a real visual difference.
Step 6: Do the Final Styling Pass Before Guests Arrive
Best for: The 10–15 minutes right before the party starts
This is the step most guides skip, and it’s where a good table becomes a great one. After everything is placed, step back entirely and look at the table from the doorway — the same angle your guests will see first.
Final styling checklist:
- Fill any gap larger than your fist (add a sprig of greenery, a small jar, or a few loose chocolates on a plate)
- Check that no two adjacent items sit at the same height
- Cluster items in odd numbers (3 jars, 5 cookies grouped on a plate, 7 macarons in a tight cluster)
- Smooth and pull the tablecloth one more time
- Face all labels toward the front
- Look from a guest’s standing eye level, not overhead
💡 Pro Tip: Take one photo before guests arrive. The table will never look this pristine again once people start serving themselves — and that’s exactly how it should be. A dessert table that gets completely eaten is a successful dessert table. The photo is your keepsake.
At Emma’s graduation party, she took that photo at 2:03 p.m. By 2:45, guests had eaten through half of it. By 10 p.m., nothing remained but eucalyptus branches and a smear of frosting on the tablecloth. That’s a win.
5 Dessert Table Styles That Work for Any Party
What Does a Modern Minimalist Dessert Table Look Like?
White tablecloth, white cake stand, white cake, and one accent color — sage green ribbon, a terracotta floral stem, or a black chalkboard sign. Maximum three dessert varieties. Resist adding more; the restraint is the aesthetic.
Done right, this style looks designed. Done wrong, it looks like you forgot to add anything. The difference is execution: everything perfectly placed, every gap intentional.
Best for: Bridal showers, adult milestone birthdays, elegant intimate gatherings Budget: $55–$85 for 15–20 guests
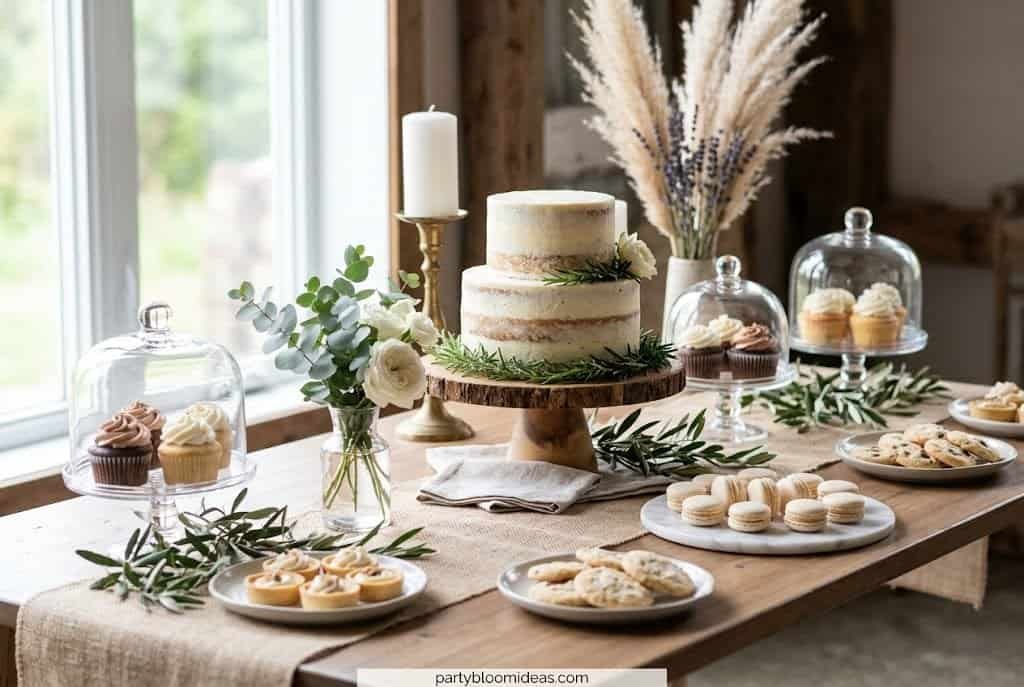
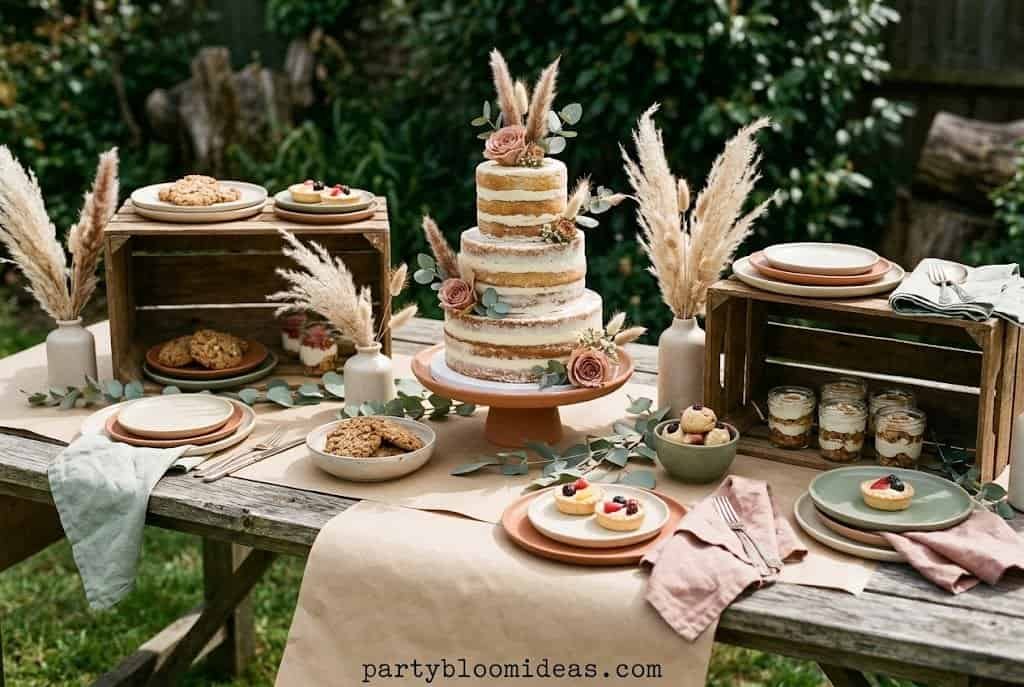
Rustic/Boho Style
Wooden crates, kraft paper table runner, dried pampas grass or eucalyptus, naked cake with visible layers, mixed earthenware plates. Terracotta, sage, cream, and dusty rose palette. This style has the most tolerance for imperfection — slightly-off placements read as charming rather than messy.
Best for: Outdoor graduation parties, boho baby or bridal showers, fall gatherings Budget: $75–$105 for 20–30 guests
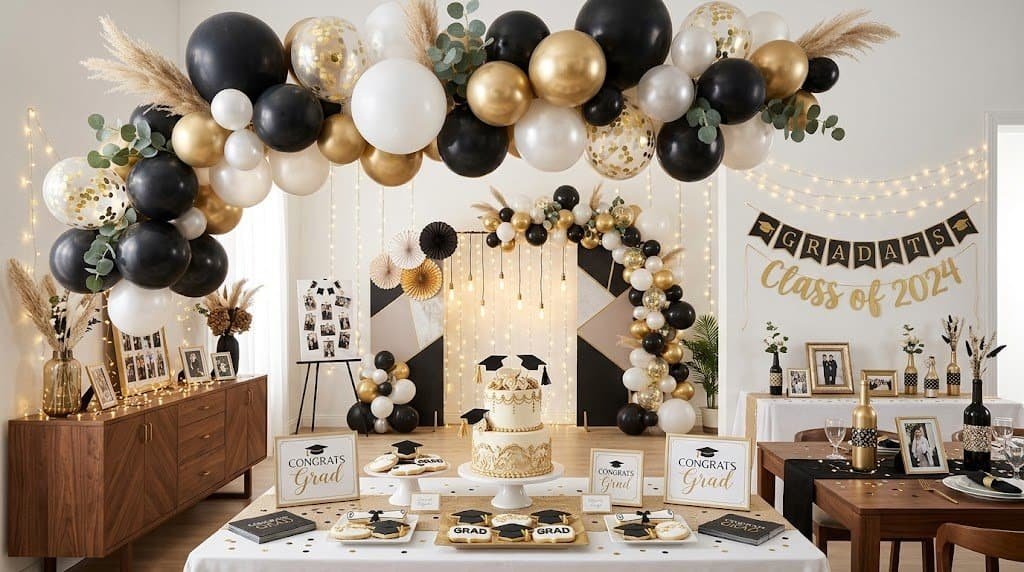
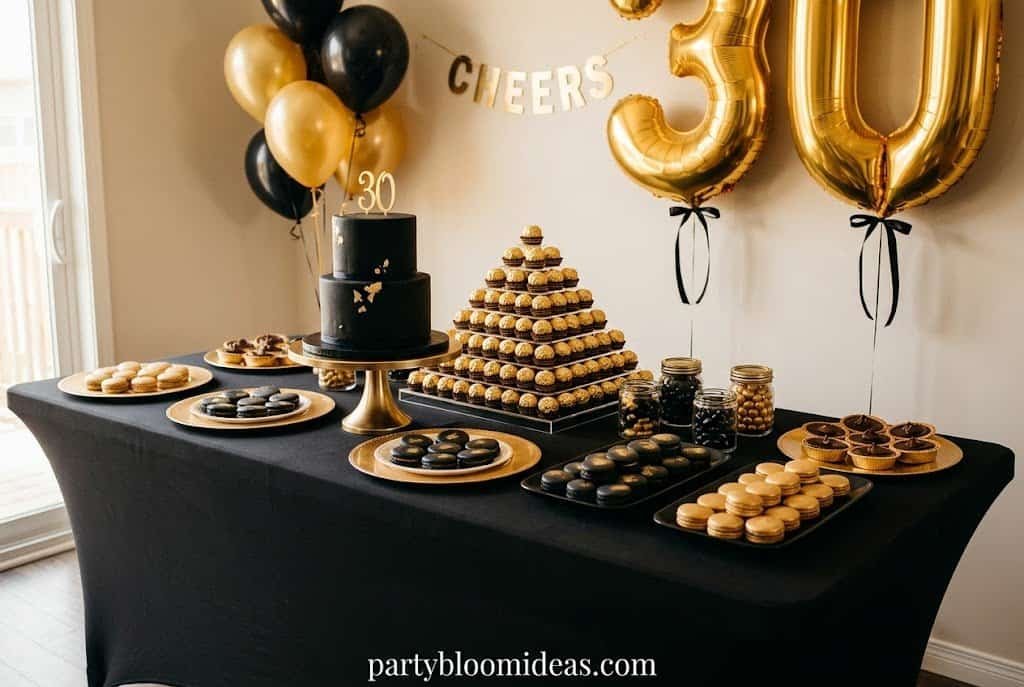
Glam (Gold and Black)
Black tablecloth pulled taut, gold chargers, gold cake stand, macarons in black and gold, Ferrero Rocher pyramid anchoring the back, metallic balloon number accents. High contrast, immediately photogenic.
Done right, this looks luxe and intentional. Done wrong — too many competing metallic finishes, mismatched gold tones — it looks like a Mardi Gras table with a budget conflict.
Best for: 30th, 40th, or 50th birthday parties, New Year’s Eve, milestone celebrations Budget: $90–$130 for 20–25 guests
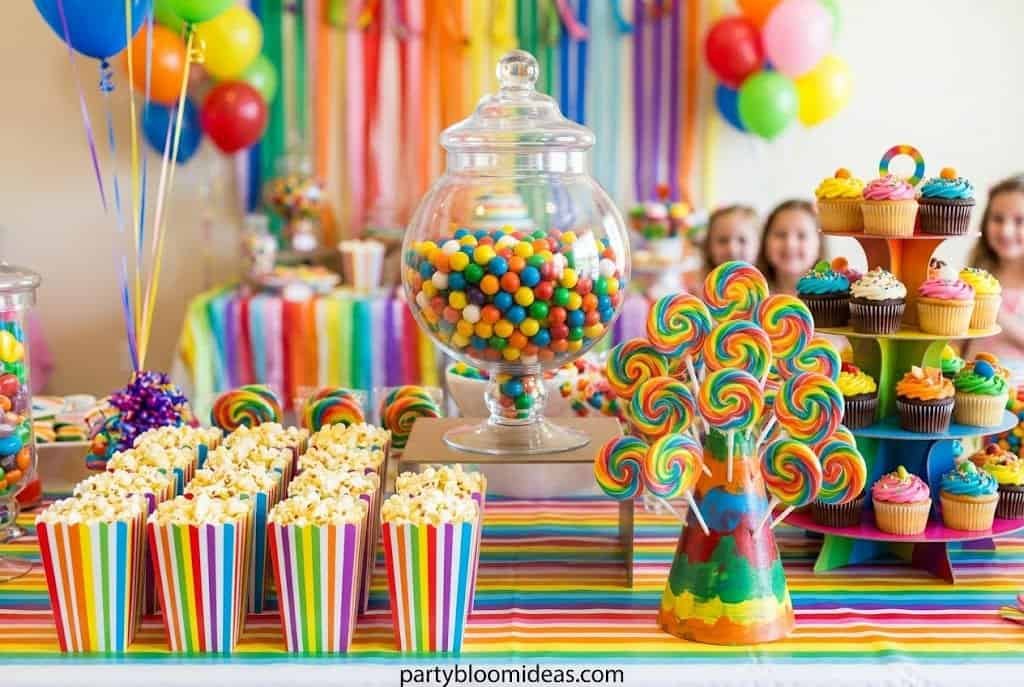
Kids’ Party Style
Bright colors, popcorn box cluster, lollipop tree, cupcakes in a tiered display, one large candy or gumball jar as the centerpiece. High energy, minimal fragility. In my experience across four kids’ birthday party tables: kids don’t care about styling. They care about the candy jar. Keep fragile items high; keep grab-and-go items low and accessible.
Best for: Birthday parties ages 3–10, school celebrations, neighborhood cookouts Budget: $55–$80 for 15–20 kids
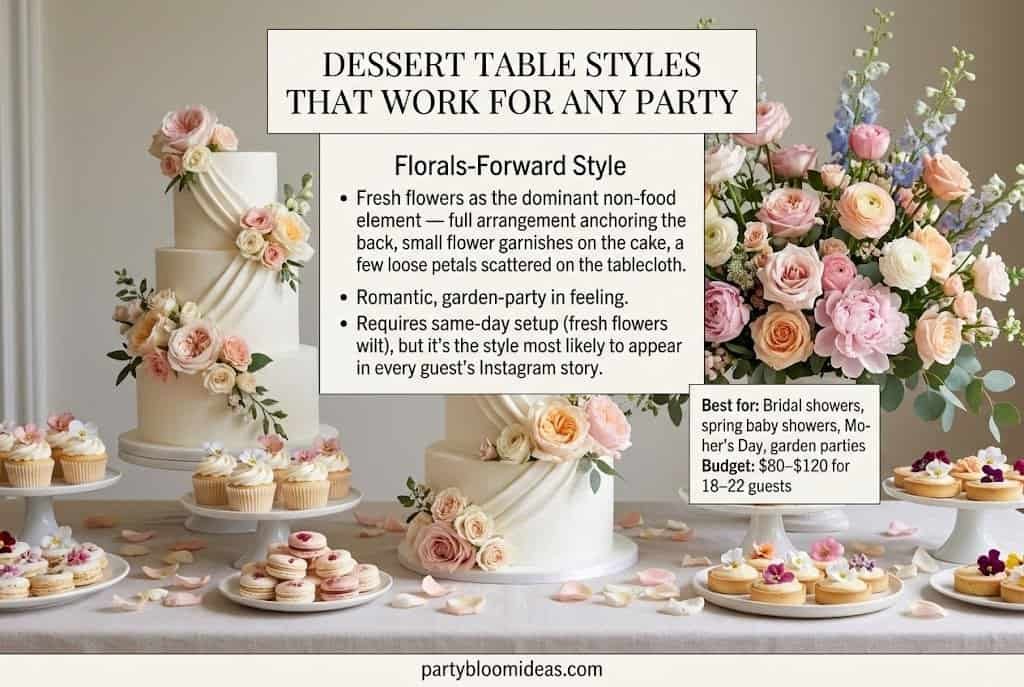
Florals-Forward Style
Fresh flowers as the dominant non-food element — full arrangement anchoring the back, small flower garnishes on the cake, a few loose petals scattered on the tablecloth. Romantic, garden-party in feeling. Requires same-day setup (fresh flowers wilt), but it’s the style most likely to appear in every guest’s Instagram story.
Best for: Bridal showers, spring baby showers, Mother’s Day, garden parties Budget: $80–$120 for 18–22 guests
What Are the Biggest Dessert Table Mistakes to Avoid?
The biggest mistake most hosts make is setting up the table too flat. Everything at the same height is the most common visual error — and the easiest fix. An inverted bowl, two stacked Dollar Tree crates, a pile of books covered in fabric. All free. All immediately effective.
Other mistakes worth avoiding:
- Spacing items too far apart — a visible tablecloth gap between every item makes the table look sparse even when it isn’t; group deliberately
- Too many varieties with too few of each — eight types with four pieces each looks scattered; three types with 25 pieces each looks abundant
- Setting up too early — buttercream and whipped cream decline after 2 hours at room temperature; time your setup accordingly
- Forgetting napkins and small plates — stack them at the front edge; guests won’t take anything they can’t carry gracefully
- Over-matching everything — four identical glass jars in a row looks like a store display, not a party
- Spending the decorating budget on a backdrop instead of desserts — guests remember what they ate; they rarely remember what was behind it
🎉 Quick Summary
✅ Best for: Birthday parties, bridal showers, baby showers, graduation parties, holiday gatherings, any event with 12–50 guests
💰 Budget range: $50–$80 (budget) to $150–$200+ (splurge) for 20–25 guests
⏱ Setup time: 45–75 minutes day-of; non-food elements can go up 2–4 hours ahead
🌟 Top pick: Rustic/Boho style — most forgiving for imperfect execution and most universally loved for indoor and outdoor parties alike
📌 Don’t skip: Three height levels. This single element has more impact on how the table looks in photos — and in person — than any other decision you make.
People Also Ask
What is the rule of thumb for a dessert table? Plan for 3–4 individual dessert pieces per guest, at least three height levels, and no more than three coordinating accent colors. Group items in odd numbers (3 or 5, never 2 or 4) and place the tallest items toward the back so they remain photogenic as the front gets served.
How do you make a dessert table look professional without spending a lot? Three things make the biggest difference: a pristine white tablecloth pulled completely taut, three distinct height levels using inverted bowls or Dollar Tree crates, and handwritten or printed labels on every item. These three steps alone transform grocery store desserts into a styled display.
How much food do you need for a dessert table for 50 people? For 50 guests, plan for 150–200 individual dessert pieces total. A practical breakdown: two cakes (each serving 15–20), three dozen cupcakes or brownies, four dozen cookies, and a grab-and-go item such as macarons or chocolate-dipped strawberries. Set aside 20–25% as refill stock to replenish as the table empties.
What is the difference between a dessert table and a candy buffet? A dessert table features baked goods and sweets — cakes, cupcakes, cookies, brownies, truffles — in a styled display. A candy buffet focuses on bulk candy in glass jars or containers. Candy buffets are popular at kids’ parties but often go largely untouched at adult events.
How early should you set up a dessert table before a party? Non-food elements — tablecloth, risers, stands, labels, and dried florals — can go up 2–4 hours before the party. Fresh flowers and room-temperature desserts can be placed 1–2 hours ahead. Anything refrigerated, whipped, or frozen should be placed no more than 15–20 minutes before guests arrive.
FAQ: Dessert Table Setup Ideas Guide
How do I set up a dessert table step by step? Start with a 6-foot table and a taut white tablecloth. Build three height levels using cake stands, inverted bowls, or wooden crates. Place your hero dessert at the tallest point toward the back. Fill in with supporting desserts at medium and low heights. Add non-food elements (florals, greenery) to fill gaps. Label everything. Do a final styling pass from the doorway before guests arrive.
How much does a dessert table cost for a party of 20–25 guests? A budget setup runs $50–$80 using grocery store and Dollar Tree supplies. A mid-range setup with a custom cake and specialty items runs $90–$130. A splurge version with a custom tiered cake, bakery macarons, fresh flowers, and premium supplies runs $200–$350. The hero cake is the most impactful investment — the rest of the table can remain very budget-friendly.
What supplies do I need for a basic dessert table? A 6-foot table (for 20–30 guests), a tablecloth, at least two height-variation items (cake stand, wooden crates, or inverted bowls), five to seven dessert varieties totaling 3–4 pieces per guest, labels, a non-food accent such as florals or greenery, and napkins and small plates at the front edge.
What desserts work best on a party table? The most crowd-pleasing mix includes a sliceable hero item (cake, pie, or tart), a bite-size item (brownies, cookies, or truffle bites), a novelty or photogenic item (macarons, chocolate-dipped strawberries, or a donut wall), and a grazing item (biscotti, chocolate bark, or petit fours). Avoid anything that requires utensils or complex individual plating.
Can I set up a dessert table the night before? You can set up all non-food elements the night before — table, tablecloth, risers, stands, signage, and non-perishable decorations. Do not place baked goods, fresh florals, or anything perishable until the morning of the party at earliest.
What’s the best backdrop for a dessert table? A clean white or neutral wall you already own is the best backdrop — free, photographs well in any lighting, and never looks dated. A white bedsheet on a tension rod ($8 at Dollar Tree) is the best DIY alternative. Balloon arches are optional extras — budget for them only after you’ve spent adequately on the actual desserts.
How do I keep a dessert table looking full throughout the party? Set aside 20–25% of your desserts in a covered container nearby and use them to refill throughout the event. As the table empties, consolidate remaining items into smaller groupings rather than letting them spread out. Fill visual gaps with a sprig of greenery or a small prop.
What’s the rule for how many dessert varieties to include? For 20–25 guests, five to seven dessert varieties works well. Fewer than four can feel sparse; more than eight becomes hard to manage quantity-wise. Within each variety, plan enough pieces so each guest could take at least two — for 25 guests, aim for at least 50 pieces per variety included.
Do I need special equipment to set up a dessert table? No special equipment is required. A folding or dining table, a tablecloth, and items you likely already own — mixing bowls, books, kitchen crates — are sufficient. A cake stand ($8–$18) is the one purchase worth making if you don’t already own one.
What’s the best way to display a cake on a dessert table? Place the cake on a cake stand at the highest point of the table — ideally at center back. Surround it at a lower level with smaller desserts. Add a small floral accent at the base of the stand. The cake should be visible from across the room and be the first thing guests’ eyes go to.
How do I style a dessert table for a small space or apartment? Use a 4-foot table, a kitchen counter, or a bar cart. Limit to three to four dessert varieties to avoid overcrowding. Use vertical height (tall cake stands, a tiered tower) rather than spreading horizontally. A small dessert table with intentional restraint almost always looks better than an oversized table crammed into a small space.
What’s the biggest mistake people make with dessert table labels? Inconsistent presentation — some items labeled, some not, different handwriting styles, mismatched formats. Either label everything or label nothing. If only some items are labeled, guests assume the others are mystery items and hesitate. Consistent labeling, even simple folded cardstock, looks polished and professional.
How do I adapt a dessert table for dietary restrictions? Label every item with relevant dietary information (“GF,” “Vegan,” “Contains Nuts,” “Dairy-Free”). Include at least one or two naturally allergen-friendly items (fresh fruit, chocolate bark made with dairy-free chocolate, gluten-free cookies). Position allergen-free items slightly apart from other desserts to reduce cross-contamination concerns.
Can I use a dessert table as a centerpiece instead of flowers? Absolutely — and it often works better than a traditional floral centerpiece because it’s interactive, feeds guests, and creates a natural gathering point. Position the dessert table where guests can see it from the main seating area. Add florals to the table itself for the centerpiece visual element, and let the hero dessert serve as the focal point.