🍰 Quick Answer
A great dessert table comes down to a few decisions made in the right order: lock in a two-color palette before buying anything, plan 3–4 bites per guest across 4–6 varieties, build at least three height levels with risers, and add fresh desserts only 30–45 minutes before guests arrive. The budget isn’t what makes it work — layout, color balance, and height variation do. A fully styled table for 25 guests runs about $65–$90 in decor.
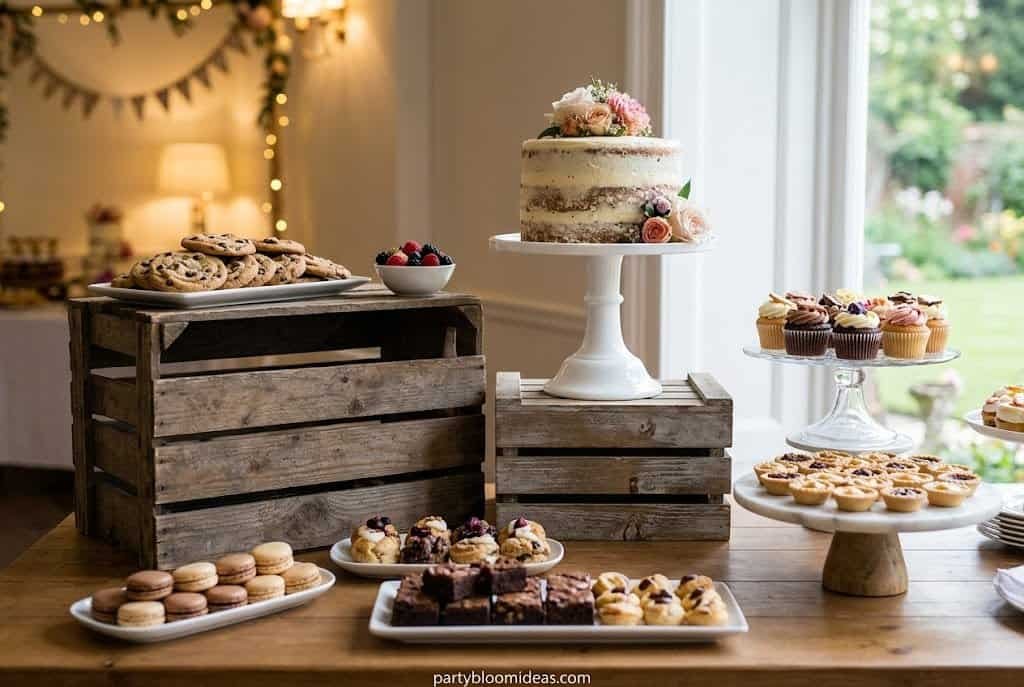
The best dessert tables still look worth photographing two hours into a party — not picked-over and sad. The secret usually isn’t a professional stylist or a $300 centerpiece cake; it’s three wooden crates stacked at different heights, a linen runner, a couple of bud vases, and a handful of desserts locked into one color scheme. A setup like that can come in around $65–$70.
Meanwhile, dessert tables that cost four times as much can look like a supermarket clearance shelf by the time the first guest fills a plate. The difference isn’t the budget — it’s the setup. Setting up a dessert table comes down to a handful of decisions made in the right order before anything touches the table: layout, color balance, height variation, and choosing desserts that actually work together visually. Get those right and even a simple setup looks polished, intentional, and photo-worthy all night. This is the complete step-by-step guide for any occasion — birthday, baby shower, bridal shower, BBQ, or holiday party.
What Is a Dessert Table and What Makes One Actually Work?
A dessert table is a curated, styled display of sweets that functions as both a food station and a visual centerpiece. Done right, it looks like it was assembled by someone with taste and intention. Done wrong, it looks like someone panic-bought everything on the party aisle at 11 p.m. the night before. Searches for “dessert table setup” climb sharply during spring party season, with baby shower and birthday dessert tables among the top related queries — a sign of how many hosts are actively trying to get this right.
What a dessert table IS:
- A styled display built on height variation, color coordination, and intentional spacing
- A curated selection of 4–6 dessert types that complement each other visually and in flavor
- A self-serve station guests can return to throughout the party
- The most photographed spot at most events — your natural photo moment
What it ISN’T:
- A pile of every sweet you could find across three stores
- Twelve dessert varieties for twenty guests — it looks panicked, not generous
- A table where everything sits flat at the same height
- Expensive by default — a well-executed table for 25 guests runs $65–$90 in decor
The trick is restraint. A tight, cohesive 5-item table will outperform a chaotic 12-item spread every single time — visually, and in terms of what actually gets eaten.
Step 1: Plan Your Quantities Before You Buy Anything
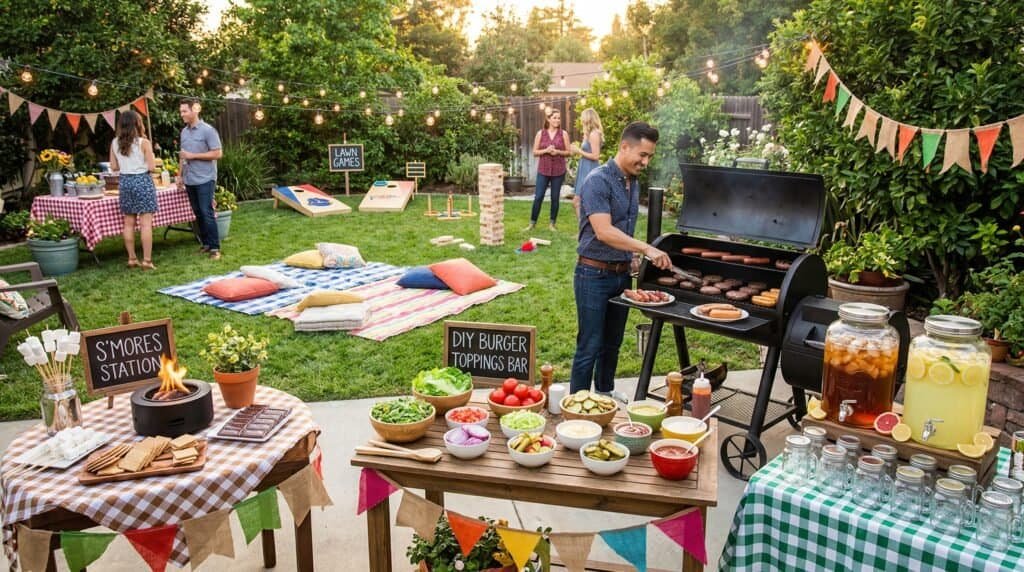
Best for: All party sizes — birthday parties, baby showers, bridal showers, casual BBQs
Overbuying is the most common first-timer mistake — eleven types of sweets for twenty guests means going home with full trays of leftovers and $60 spent that didn’t need to be. Sweets are an expected part of almost any celebration, so guests arrive with dessert expectations already in place; the real question is how much is actually needed.
Plan for 3–4 dessert bites per person, across 4–6 varieties.
For 25 guests, that’s roughly 75–100 total pieces, broken down as:
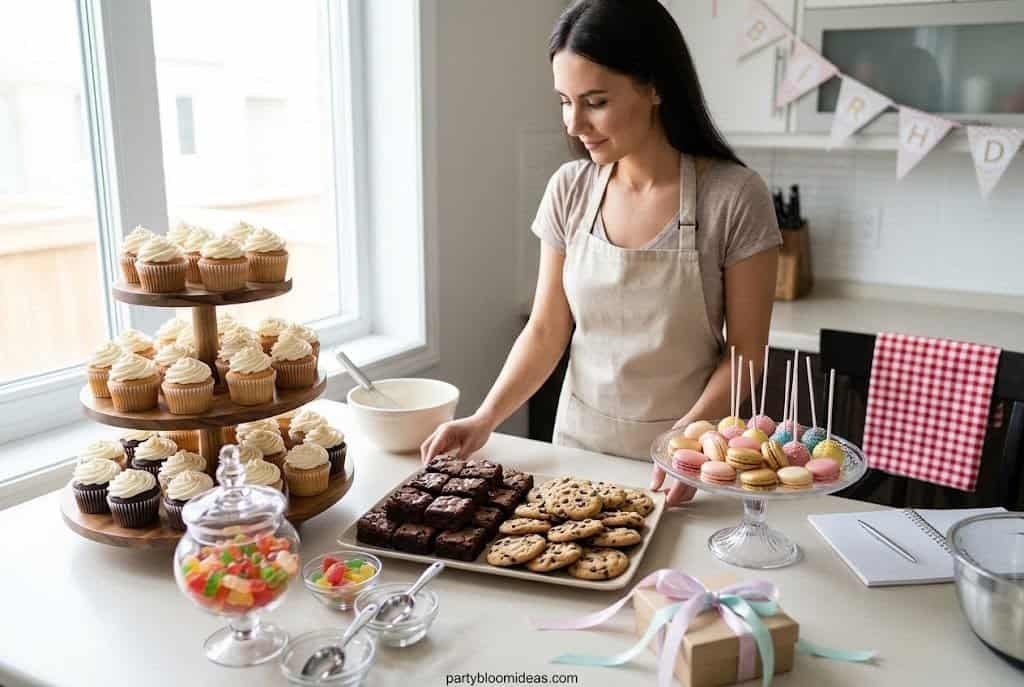
- 1 anchor dessert (cupcakes or a small cut cake): 25–30 pieces
- 2 filler sweets (cookies, brownies, rice krispie treats): 20–25 pieces each
- 1 color pop item (macarons, cake pops, or dipped strawberries): 15–20 pieces
- 1 interactive or nostalgic element (candy jar, s’mores station, or mini parfait cups): open quantity
For 40–60 guests, scale to 6–8 varieties and multiply quantities by 1.5–2x.
💡 Pro Tip: Always keep one anchor dessert that can be cut and served if smaller items run short. A sheet cake from a grocery bakery runs $18–$22 and serves 25 — it keeps the table from looking picked over if the cookies disappear in the first hour.
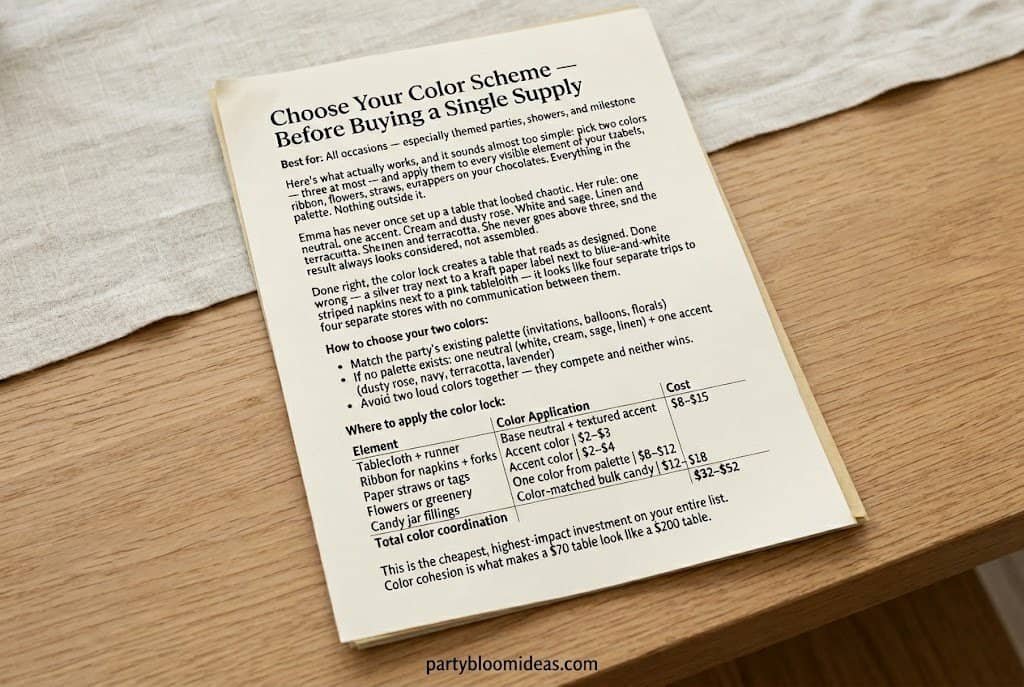
Step 2: Choose Your Color Scheme — Before Buying a Single Supply
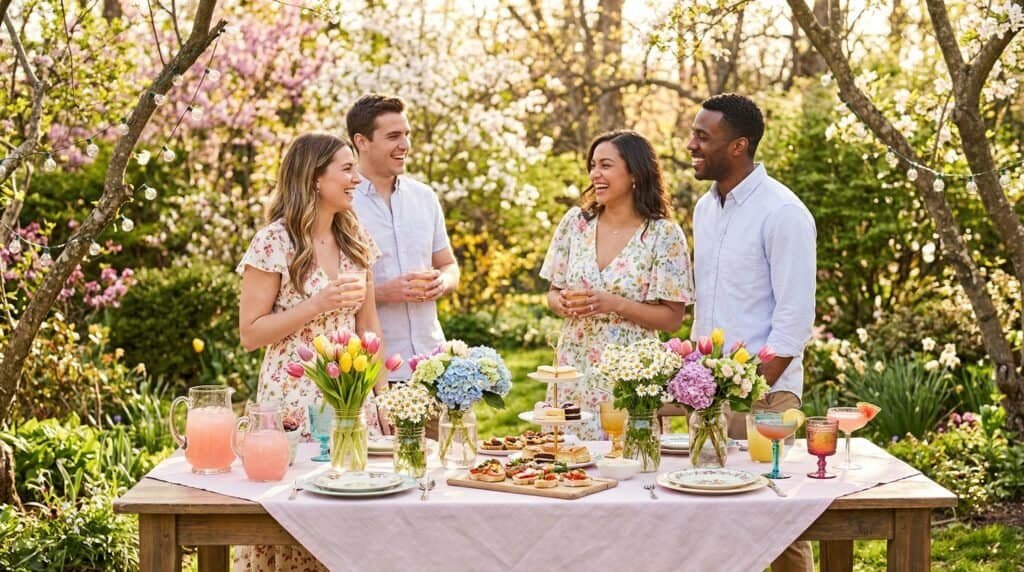
Best for: All occasions — especially themed parties, showers, and milestone birthdays
It sounds almost too simple: pick two colors — three at most — and apply them to every visible element of your table. Linens, labels, ribbon, flowers, straws, even the wrappers on your chocolates. Everything in the palette, nothing outside it. One neutral, one accent — cream and dusty rose, white and sage, linen and terracotta — never above three, and the result always looks considered rather than assembled.
Done right, the color lock creates a table that reads as designed. Done wrong — a silver tray next to a kraft label next to blue-and-white striped napkins next to a pink tablecloth — it looks like four separate trips to four separate stores with no communication between them.
How to choose your two colors:
- Match the party’s existing palette (invitations, balloons, florals)
- If no palette exists: one neutral (white, cream, sage, linen) + one accent (dusty rose, navy, terracotta, lavender)
- Avoid two loud colors together — they compete and neither wins
Where to apply the color lock:
| Element | Color Application | Cost |
|---|---|---|
| Tablecloth + runner | Base neutral + textured accent | $8–$15 |
| Ribbon for napkins + forks | Accent color | $2–$3 |
| Paper straws or tags | Accent color | $2–$4 |
| Flowers or greenery | One color from palette | $8–$12 |
| Candy jar fillings | Color-matched bulk candy | $12–$18 |
| Total color coordination | $32–$52 |
This is the cheapest, highest-impact investment on your entire list. Color cohesion is what makes a $70 table look like a $200 table.
Step 3: Build Height Variation — The Single Biggest Visual Upgrade
Best for: All dessert tables, regardless of size or budget
Height variation is the difference between a styled table and a school-fundraiser bake sale. Set everything flat — every plate, tray, and board at the same level — and even the right desserts, quantities, and color scheme fall flat. Add two wooden crates and a cake stand, and the same table looks completely different.
How Do You Display Desserts at Different Heights Without Expensive Risers?
Here’s the structure that works:
- Tall (10–12 inches): Anchor centerpiece — tiered cupcake stand, macaron tower on a pedestal, or a centerpiece cake on a tall cake stand
- Medium (5–7 inches): Wooden crates, a standard cake stand, or stacked hardcover books under a cloth
- Low (0–3 inches): Flat wooden boards, small trays, mini dessert cups in a row directly on the table
Aim for at least three height levels. Four is better if your table is longer than 6 feet.
Riser options by budget:
| Riser Option | Cost | Where to Buy | Best For |
|---|---|---|---|
| 3-tier metal cake stand | $14 | Online | Cupcakes, cookies, macarons |
| Wooden crate | $8 each | Craft store | Rustic, boho, casual looks |
| Glass cake pedestal | $12–$18 | Discount home-goods stores | Elegant, upscale occasions |
| Terracotta pots, spray-painted | $1 each | Dollar store | Budget-friendly any style |
| Hardcover books under cloth | $0 | Your bookshelf | Any style, any occasion |
vs. the splurge option: A professional tiered display stand runs $45–$80 on specialty party sites. It looks marginally better than the $14 version in person and identically the same in photos. Save the difference for the desserts.
💡 Pro Tip: Place your tallest riser at the back center, medium heights on either side, low items at the front. Guests approaching the table should be able to see every item before they reach it — the display fans outward and downward from center back.
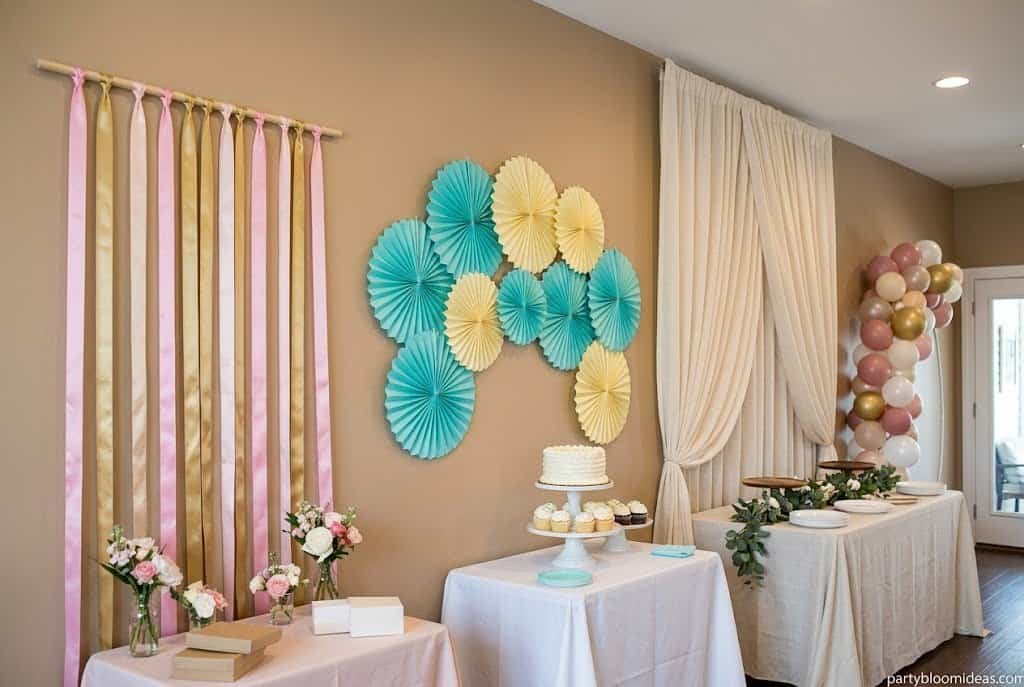
Step 4: Set Up Your Backdrop
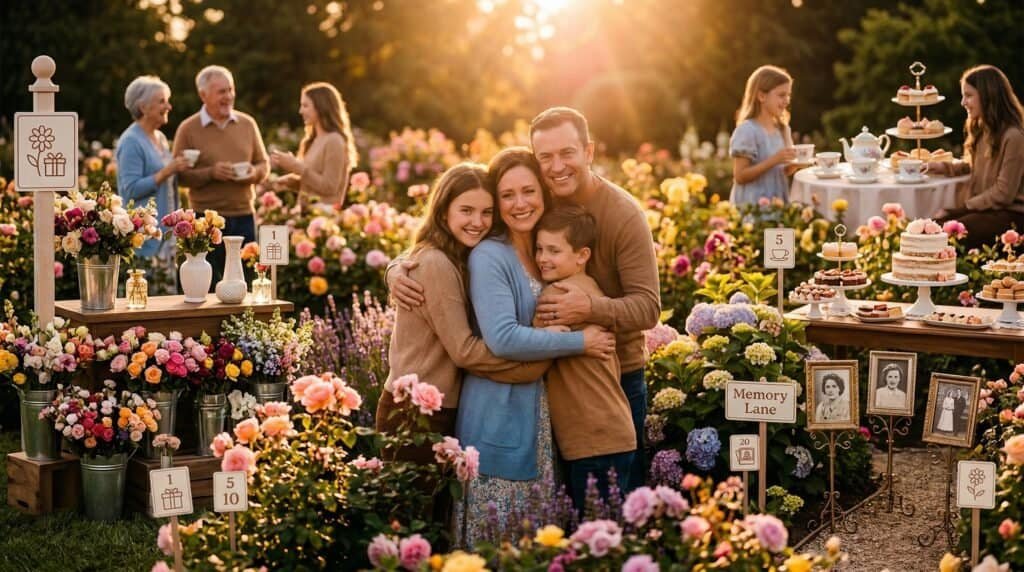
Best for: Showers, milestone birthdays, any event with photos — which is every event
A backdrop isn’t required, but it turns your dessert table from a food station into a visual moment, and most options cost less than $20 and take under 30 minutes.
$0–$5 — The Ribbon Curtain: Six to eight ribbons in your accent color, hung from a tension rod or dowel leaned against the wall. About $3 in supplies and it reads as intentional in photos.
$8–$10 — Paper Fan Set: Twelve paper fans in two coordinating colors, arranged in a half-moon behind the table. Twenty minutes to hang, and it photographs beautifully.
$18–$22 — Fabric Drape: A 5×7 ft panel in white, cream, or linen. The most versatile option — every occasion, every palette, rolls up for storage.
$50+ — Balloon Arch: Balloon arch kits run $15–$25 for supplies plus $10–$15 for color-matched balloons. More impressive in a venue than in a living room; for home parties, the fabric drape or fan set is genuinely all you need.
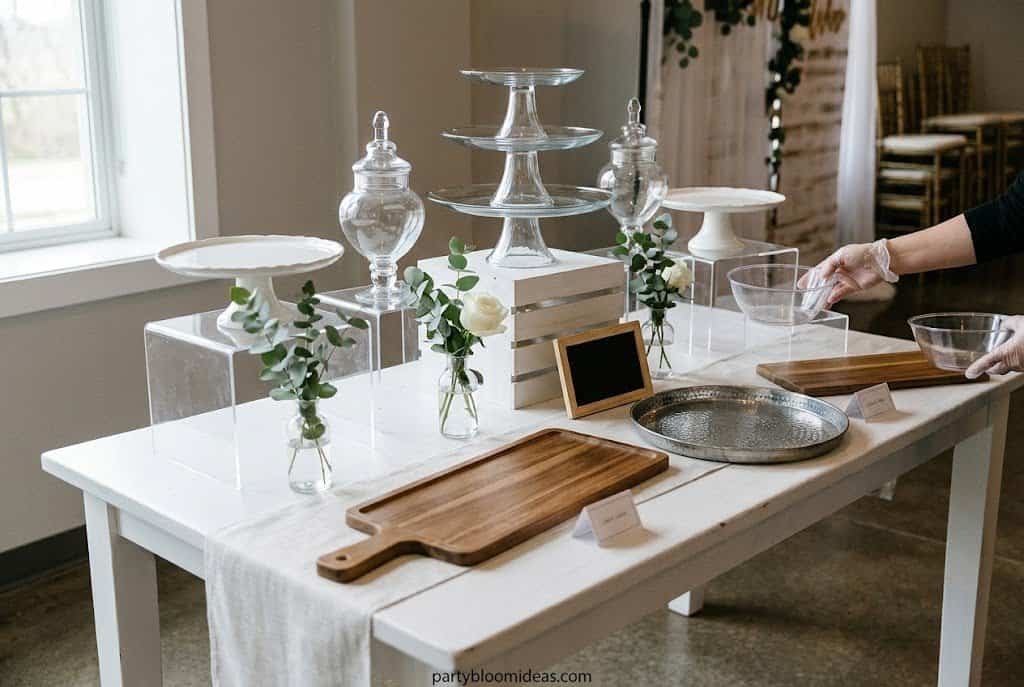
Step 5: Place Your Desserts in This Specific Order
Best for: Anyone setting up a dessert table for the first time, or anyone whose past tables felt stressful to assemble
This is the step most guides skip — the actual sequence. Following this order saves you from rearranging delicate items and cuts setup time by 30–40 minutes. Interactive food stations like dessert tables, candy buffets, and s’mores bars are consistently cited as the element guests engage with most at any event, so the table is working harder than almost anything else at your party — it deserves a proper setup sequence.
The correct order:
- Risers and empty vessels first — structure before anything fragile
- Anchor centerpiece at center back — cupcake tower, tiered cake, or macaron cone
- Non-perishable candy jars and fillers — these can go up 2–4 hours early
- Wooden boards and flat trays (empty) — set surfaces before adding food
- Labels and signage — far easier before the table fills up
- Flowers and greenery — tuck 2–3 bud vases in at different heights; eucalyptus stems ($5/bunch) fill gaps beautifully
- Fresh desserts 30–45 minutes before guests arrive — frosted cupcakes in a warm room start sliding within 45 minutes; most hosts set these out too early
- Napkins, forks, and final details — bundle forks in ribbon, fan napkins, add your welcome sign
💡 Pro Tip: Step back and photograph the table before guests arrive. What the camera sees is what guests see when they walk in — photos reveal gaps, flat spots, and color breaks that are hard to see from two feet away.
Step 6: Labels, Signage, and the Details That Read “Intentional”
Best for: All parties — especially any event where guests don’t know each other well, or where dietary restrictions are a factor
Small details cost almost nothing and do the most visual work. The difference between a table that looks styled and one that looks merely set often comes down to $6 of labels and ribbon.
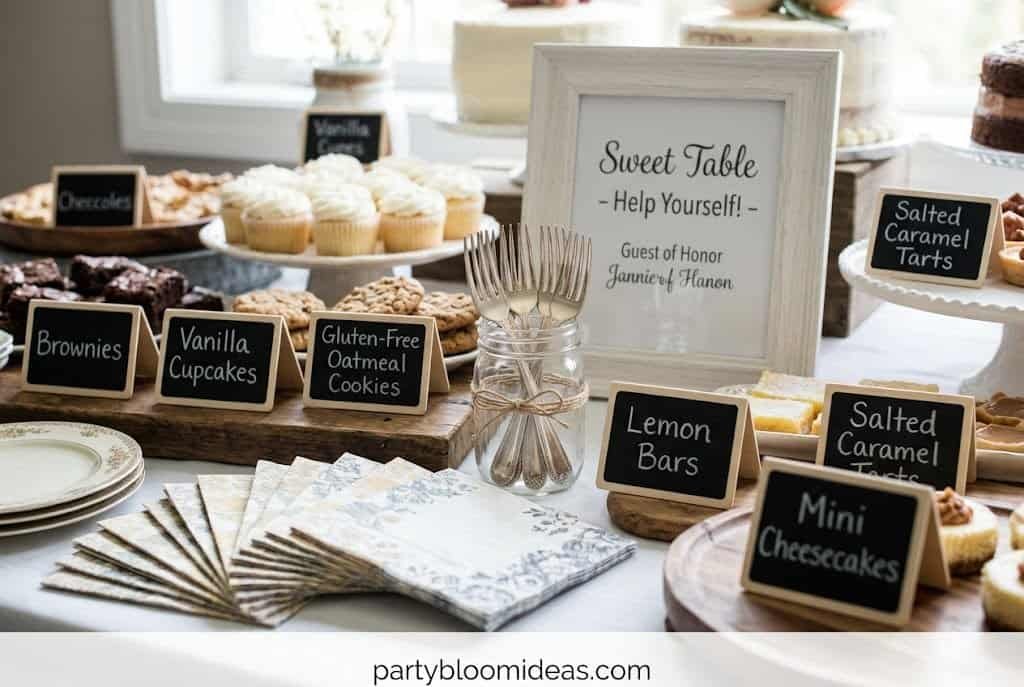
Dessert labels: Name every item. Chalkboard tent cards (24-pack, $4) or kraft tags tied with twine ($2) are both beautiful and functional — they help guests with dietary restrictions and add personality. One style, used consistently across every item. Never three different label types on the same table.
Napkins: Fan them out or fold into neat stacks. Never leave them in the plastic sleeve — it’s the single most common “unfinished” signal on any party table.
Fork bundles: Group 8–10 dessert forks, tie with a ribbon loop, stand in a small mason jar. Costs $2 to style, and makes the whole corner look finished.
Welcome sign: A small printed sign — “Sweet Table,” “Help Yourself!,” or the guest of honor’s name — framed in a $3 frame or clipped to a small chalkboard. Free if printed from Canva, and it gives guests permission to serve themselves.
What Does a Fully Styled Dessert Table Cost? Budget vs. Splurge Breakdown
Dessert tables and dessert bars are one of the fastest-growing celebration elements — a growing share of couples now include one at receptions alongside or in place of a wedding cake. But you don’t need a wedding budget to pull one off well.
Budget Dessert Table vs. Splurge Dessert Table: What Actually Changes?
| Element | Budget Version | Cost | Splurge Version | Cost |
|---|---|---|---|---|
| Risers | Books + dollar-store pots + $14 cake stand | $16 | Tiered display stand + glass pedestals | $75–$90 |
| Backdrop | Paper fans or ribbon curtain | $3–$10 | Full balloon arch with color-matched balloons | $50–$65 |
| Linens | Tablecloth + runner | $14 | Linen rentals or specialty fabric | $40–$60 |
| Florals | Grocery bunch in 3 bud vases | $12–$15 | Florist-arranged accent pieces | $60–$80 |
| Labels | Kraft tags + chalk marker | $5–$6 | Custom acrylic signs | $25–$40 |
| Candy/fillers | Bulk candy, mason jars | $15–$20 | Apothecary jars + premium imported candy | $60–$80 |
| Decor total | $65–$81 | $310–$415 | ||
| Food (25 guests) | Grocery + warehouse club + 1 homemade batch | $55–$65 | Custom bakery order, full suite | $150–$250 |
| ALL-IN TOTAL | $120–$146 | $460–$665 |
The honest assessment: In photos — which is how most guests share and remember the party — the budget version and the splurge version look nearly identical when the setup fundamentals are right. Height variation, color lock, and the correct assembly sequence do more visual work than any individual splurge item.
Common Mistakes to Avoid on Your Dessert Table
The biggest mistake most hosts make is treating variety as a substitute for styling. More desserts doesn’t mean a better table — it means more clutter, more cost, and more food going home in doggy bags. Here’s what to skip:
- Putting everything at the same height. The flat table is the most common and easiest mistake to fix. Two risers and it’s a completely different table.
- Mixing label styles. Three different tag designs on one table signals “last minute,” not “handcrafted.” One style, applied consistently.
- Setting out fresh desserts too early. Frosted items in a warm room start to soften within 45 minutes. Non-perishables only, until 30–45 minutes before guests arrive.
- Skipping the anchor. Without one tall centerpiece, the table has no focal point and everything competes equally — which means nothing stands out.
- Over-buying and over-varying. Four to six varieties is the ceiling for 20–30 guests. The 40% you overbuy is the 40% you carry home.
- The donut wall. Donut walls look incredible in photos and go stale in about 45 minutes of display. If you build one, load it 15 minutes before guests arrive and clear anything uneaten within the hour.
🎉 Quick Summary
✅ Best for: Birthdays, baby showers, bridal showers, BBQs, holiday parties — any occasion with 15+ guests
💰 Budget range: $65–$90 for decor; $120–$150 all-in for 25 guests including desserts
⏱ Setup time: 1.5–2 hours total (non-perishables); add fresh desserts 30 min before guests arrive
🌟 Top pick: 3-tier metal cake stand ($14) — highest-impact single purchase on this list
📌 Don’t skip: Height variation + color lock. These two decisions do more visual work than everything else combined.
People Also Ask
What is the proper way to set up a dessert table for a party? Set up in this order: risers and structure first, non-perishable fillers next, then signage and florals, then fresh desserts 30–45 minutes before guests arrive. Lock in a two-color palette before sourcing any supplies, and build at least three height levels — tall at center back, medium on the sides, low items at the front.
How much does a dessert table cost for 25–30 guests? A fully styled table for 25–30 guests runs $65–$90 for decor (risers, linens, labels, backdrop, florals) and $55–$80 for desserts sourced from grocery bakeries, warehouse clubs, and one or two homemade items. Total all-in: $120–$170, depending on how many items you already own.
What goes on a sweet table for a baby shower? One anchor dessert (decorated cupcakes or a small cake), two filler sweets (sugar cookies, macarons, or brownies), a candy jar or two in the shower’s colors, and one interactive element like a s’mores kit or parfait cups. Keep it to 5–6 items in a two-color palette matching the shower theme.
How do you display desserts at different heights without buying expensive risers? Stack hardcover books under a tablecloth, use upside-down terracotta pots spray-painted white ($1 each), or wooden crates ($8 each). A 3-tier metal cake stand at $14 is the single best small investment. Three height levels minimum — it’s the visual difference between a bake sale and a styled party table.
Can you set up a dessert table the night before a party? Yes — all structural elements can be assembled the night before: risers, empty jars, linens, backdrops, labels, and signage. Cover loosely with a clean sheet. Do not add flowers, fresh desserts, or frosted items overnight. On party day, add flowers first, then fresh desserts in the final 30–45 minutes.
Frequently Asked Questions
How do you set up a dessert table step by step? Start with risers and empty vessels, then place your backdrop. Add non-perishable candy jars, labeled boards, and signage. Tuck in small flower bud vases. Add fresh desserts 30–45 minutes before guests arrive. Getting structure right before any food is on the table saves time and prevents rearranging around delicate items.
How many desserts do I need for a party of 30? Plan 3–4 dessert bites per person across 5–6 varieties — roughly 90–120 total pieces for 30 guests. Include one anchor dessert in larger quantity that can be cut if smaller items run short, two filler sweets at 25–30 pieces each, one color-pop item at around 20 pieces, and one interactive element.
What should I put on a dessert table? One anchor dessert (cupcakes or a sliceable cake), two filler sweets (brownies, cookies, or rice krispie treats), one color-pop item (macarons, cake pops, or dipped strawberries), and one interactive or nostalgic element (candy jars, s’mores kit, or mini parfait cups). Four to six items total for 20–30 guests looks curated without looking sparse.
How do I make a dessert table look professional on a budget? Three things create the most impact at the lowest cost: height variation using risers, a two-color palette applied to every element, and consistent labeling throughout. None of these cost more than $30 combined. After that, it’s placement — tallest item at center back, medium heights on the sides, low items at the front, florals tucked into gaps.
What is the difference between a dessert table and a candy buffet? A dessert table features baked goods, styled display elements, and a mix of sweet types — a complete visual and culinary installation. A candy buffet focuses on bulk candy in apothecary jars or glass vessels that guests scoop themselves. The two work well together: a candy buffet section on one end of a dessert table adds color, interactive appeal, and fills visual height gaps.
How far in advance can I set up a dessert table? Non-perishable elements — risers, linens, labels, signage, candy jars, backdrop, and florals — can go up 2–4 hours before the party. Fresh desserts should be added 30–45 minutes before guests arrive. Setting them out earlier in a warm room is the most common mistake and the main reason dessert tables look tired by the time the party peaks.
What is the best tablecloth for a dessert table? A neutral base — white, cream, or light linen — works for every occasion and makes colorful desserts pop. Add a textured runner on top for layered depth: burlap for rustic, lace for romantic, metallic for modern. The combination runs $8–$20 total and photographs better than a single-color tablecloth alone.
How do I display desserts at different heights? Use a 3-tier cake stand ($14), wooden crates ($8 each), or stacked hardcover books under a tablecloth as risers. Target at least three height levels: tall at the back center, medium on each side, low items at the front. The visual difference between a flat table and a tiered one is dramatic — and the cost difference can be zero.
Do I need a backdrop for a dessert table? Not required, but recommended if your party includes photos. A 12-pack of paper fans ($9) hung in a half-moon is the easiest high-impact option; a fabric drape ($18–$22) is the most versatile. For near-zero budget, ribbon streamers from a tension rod cost $3 and read as intentional in photos.
How much does it cost to set up a dessert table? A styled table for 20–25 guests typically runs $65–$90 for decor (risers, linens, backdrop, labels, florals) and $40–$65 for desserts sourced from a grocery bakery, warehouse club, and one or two homemade items. Full table — decor plus food — for 25 guests: $120–$150.
What desserts are easiest to display and hold up the longest? Cookies, brownies, rice krispie treats, and candy hold shape and texture the longest — safest for items placed out early. Cupcakes, cake pops, and macarons hold well for 1–2 hours. Anything with fresh cream, mousse, or cut fruit should go out last — these are your “add 30 minutes before guests arrive” items.
What is the best way to display a candy buffet at a party? Use 3–5 apothecary jars or large mason jars filled with color-matched bulk candy — Jordan almonds, M&Ms, rock candy sticks, or foil-wrapped chocolates. Vary jar heights and shapes for visual interest. Provide small scoops ($6 for a 6-pack) and clear bags or small boxes for guests to fill, and label each jar. For 25 guests, plan $12–$18 in bulk candy.
How do I prevent desserts from melting or drying out? Set out non-perishables early and keep fresh items refrigerated until 30–45 minutes before guests arrive. For outdoor parties in warm weather, reduce frosted items and favor cookies, brownies, candy, and individually wrapped sweets. Never display anything with fresh whipped cream or mousse outdoors in summer — it goes downhill fast.
Read More: 20 Best First Birthday Party Ideas for Boys and Girls
Disco Party Theme Ideas: How to Throw a Groovy Night
Best Wedding Decoration Ideas on a Budget (2026)