After hosting and attending more than 50 Thanksgiving and Friendsgiving gatherings over the past decade, I can tell you with complete confidence: the tables that stop people in the doorway are never the most expensive ones. They’re the ones that look considered, warm, and welcoming. The best DIY Thanksgiving Centerpiece Ideas aren’t about spending more money—they’re about creating something that feels intentional and festive.
The first Thanksgiving I ever hosted, I drove to three stores, bought real flowers, a wicker cornucopia, and an embarrassing amount of orange ribbon. By 4 p.m. — an hour before dinner — the flowers were drooping and the cornucopia looked like a school pageant prop. I’d spent $85 on something that looked worse than the dried wheat bundle my mom had been using for fifteen years. That experience taught me that great DIY Thanksgiving Centerpiece Ideas don’t have to be complicated or expensive.
My friend Emma — who hosts Friendsgiving for fourteen people every November in her backyard — has never made that mistake. Her table always looks like something out of a catalog. Last year I asked her how long it took. She shrugged: “Maybe forty-five minutes. Total.” Total cost: $38. That’s why her DIY Thanksgiving Centerpiece Ideas always stand out—they’re simple, thoughtful, and easy to recreate.
That’s the version of DIY I’m here to teach you. According to Pinterest Trends (2025), searches for “Thanksgiving centerpiece DIY” spike 312% starting in early September, peaking in the two weeks before Thanksgiving — meaning there are millions of hosts looking for DIY Thanksgiving Centerpiece Ideas exactly like the ones you’re searching for right now. And most of what they find on Pinterest sets them up to fail.
Here are the DIY Thanksgiving Centerpiece Ideas that actually work — what’s worth your time, what to skip, and the three rules that make homemade look store-bought every single time.
What Actually Makes a DIY Thanksgiving Centerpiece Look Store-Bought?
Let’s be honest about something first. Most DIY Thanksgiving centerpieces look homemade in the wrong way — not because the materials are cheap, but because nobody told the host the three rules.
The three rules:
1. Odd numbers only. Three pumpkins, five gourds, seven candles. Even numbers look accidental. Odd numbers look intentional. This is the single fastest upgrade you can make.
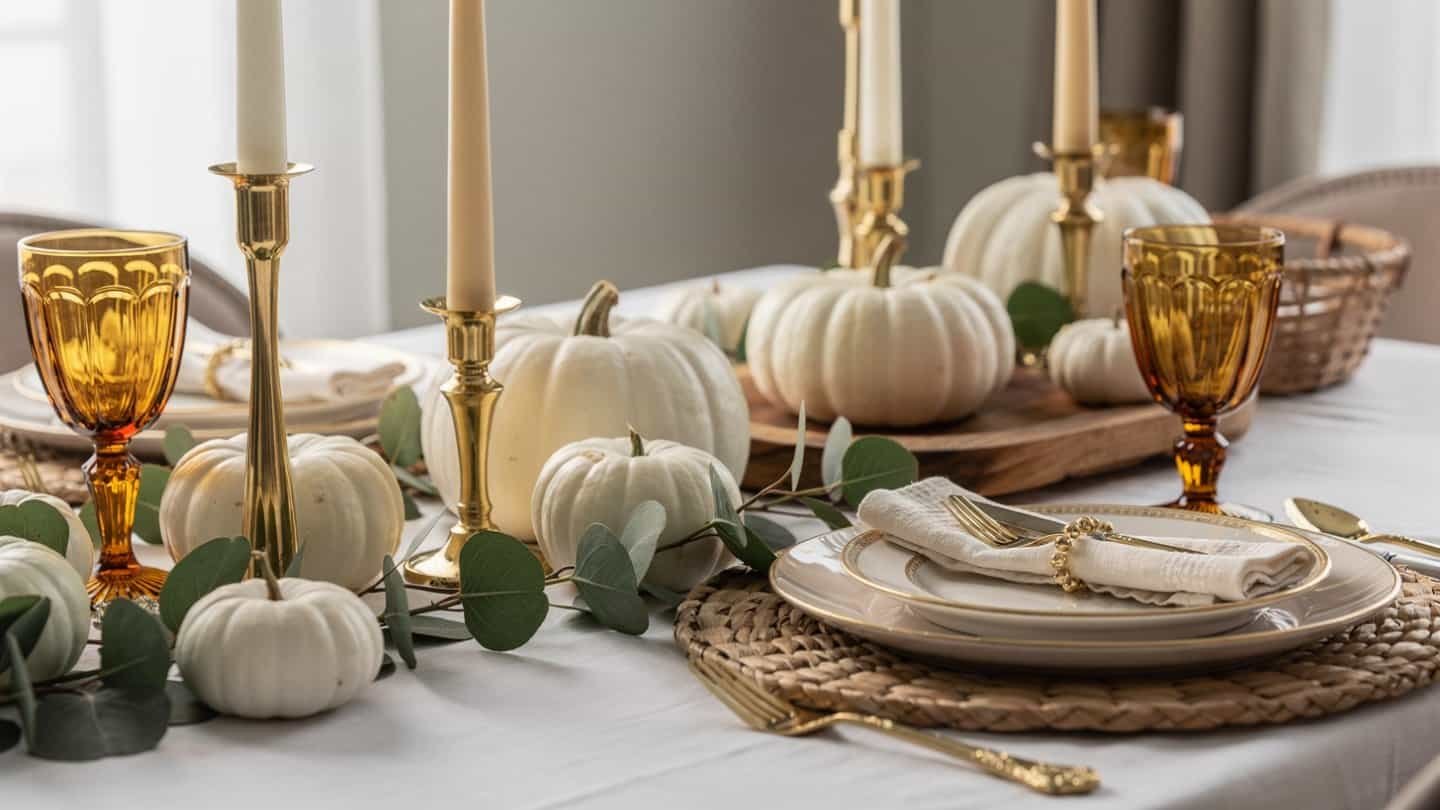
2. Two to three colors maximum. Not every shade of fall at once. Pick a palette — burgundy and cream, amber and gold, terracotta and sage — and hold it. The tables that look expensive are always restrained in color.
3. Layer your textures. Smooth beside rough. Matte beside shiny. Organic beside structural. This is what florists do and what most DIY tutorials skip entirely.
What a great fall centerpiece IS:
- Under 12 inches tall so guests can see each other across the table
- Built on a base (tray, wooden slice, crate, runner) so it looks anchored
- Layered with at least two different textures
- Done in two to three tones, not the full fall rainbow
What it ISN’T:
- A matched set bought and arranged straight from one store
- Overloaded with every seasonal element you own
- Tall enough to block eye contact between seated guests
- Built around real flowers (they will let you down — every time)
The trick is treating your centerpiece like a mood, not a checklist.
What Are the Best DIY Thanksgiving Centerpiece Ideas for Every Budget?
Whether you’re working with $20 from Dollar Tree or $45 from Michaels, there’s a version of every idea below that works. Here’s how they break down across three tiers before we get into the full tutorials.
| Budget ($15–$25) | Mid-Range ($26–$42) | Store-Bought Equivalent | |
|---|---|---|---|
| Best example | Copper-Dipped Acorn Scatter | Floral + Pumpkin Foam Arrangement | Williams-Sonoma pre-made |
| Time to make | 20–35 min | 45–60 min | 0 min |
| Materials from | Dollar Tree + outdoors | Michaels + Dollar Tree | Department store |
| Longevity | Full season (6+ weeks) | Full season (6+ weeks) | 1–2 weeks if real flowers |
| Visual impact | High | Very high | Very high |
| Estimated cost | $15–$25 | $26–$42 | $60–$120 |
| Best for | Beginners, small tables | Formal dinners, photo setups | Anyone short on time |
According to the National Retail Federation’s 2024 Thanksgiving survey, the average American spends approximately $74 on Thanksgiving hosting supplies, with table décor accounting for around 18% of that budget. At $26–$42 for a DIY centerpiece that looks like a $90 store purchase, you’re winning on every metric.
13 DIY Thanksgiving Centerpiece Ideas With Steps, Materials, and Costs
1. Stacked Pumpkin Tower
Best for: Dining tables, 6–10 guests, formal and casual settings | Difficulty: Easy | Budget: $22–$29 | Time: 30 minutes
Three faux pumpkins — small, medium, large — stacked vertically on a wooden slice base, wrapped in jute twine, and surrounded by dried orange slices and cinnamon sticks. It looks like a $65 Williams-Sonoma display. It costs $29 to make.
What you need:
- 3 faux pumpkins, graduating sizes ($12 for a set at Dollar Tree)
- 1 wooden slice base ($4 at Michaels)
- Jute twine ($3)
- Dried orange slices ($6, or DIY in oven at 200°F for 4 hours)
- Cinnamon sticks ($4)
- Low-temp hot glue gun ($6 at Dollar Tree if needed)
How to make it:
- Place the largest pumpkin on the wooden slice. Secure the base with a ring of hot glue.
- Stack the medium pumpkin on top, angled slightly for a natural look. Glue in place.
- Add the smallest pumpkin on top. Wrap the stack loosely with jute twine, knotted at the middle tier.
- Arrange dried orange slices and cinnamon sticks around the base.
Visual tip: If your faux pumpkins are too glossy, hit them with a light coat of matte spray paint ($4 Rust-Oleum) before stacking. Matte always reads more expensive than shiny.
💡 Pro Tip: Keep your palette in the warm neutral zone — cream, dusty orange, natural wood. Avoid bright Halloween orange; it reads fall harvest when muted.

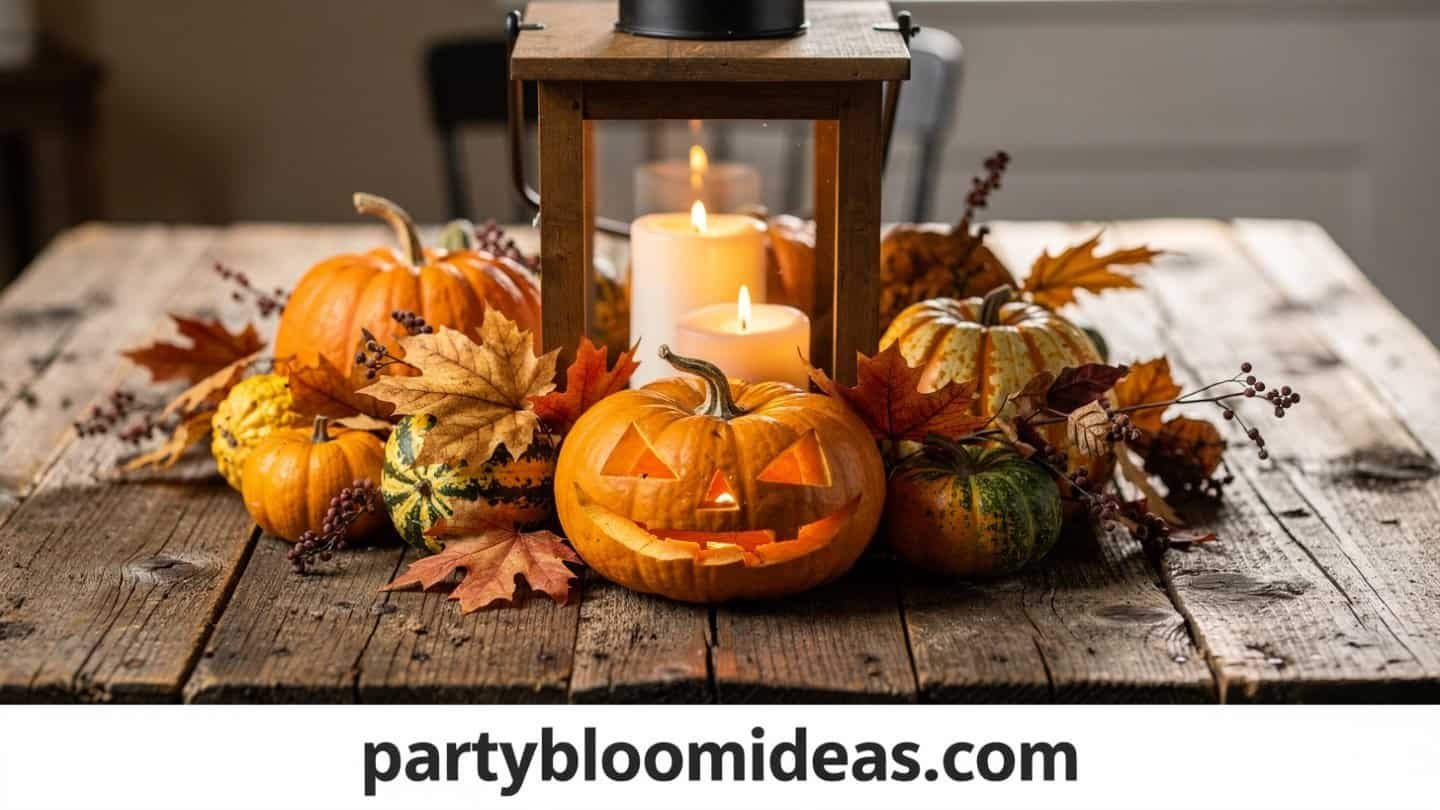
2. Harvest Lantern Centerpiece
Best for: Long rectangular tables, 8–14 guests, evening dinners | Difficulty: Easy | Budget: $26–$32 | Time: 20 minutes
A tall glass hurricane lantern filled with acorns, dried corn kernels, and a pillar candle, flanked by two mini pumpkins and eucalyptus sprigs. At dusk, when the candle catches, this one stops conversations mid-sentence. Emma used a version of this for last year’s Friendsgiving and three guests asked for the “link.”
What you need:
- Glass hurricane lantern ($14 at HomeGoods, or $6 dupe at Dollar Tree)
- Pillar candle, ivory or cream ($5–7)
- Bag of acorns ($4 Amazon, or foraged from outside — free)
- Dried corn cobs or kernels ($3 Dollar Tree)
- Eucalyptus sprigs ($8 fresh at Trader Joe’s, or $5 dried on Amazon)
- 2 mini pumpkins ($3–4 at the grocery store produce section)
How to make it:
- Pour acorns and a handful of dried corn into the bottom third of the lantern — about 2 to 3 inches deep.
- Set the pillar candle in the center, pressing down slightly so it sits stable.
- Tuck eucalyptus sprigs around the base of the candle inside the lantern.
- Set the lantern on the table. Place one mini pumpkin on each side, about 4 inches out.
Visual tip: Eucalyptus — even dried — adds a silver-gray tone that makes the warm amber pop against it. Don’t skip it. That contrast is what makes this look intentional.
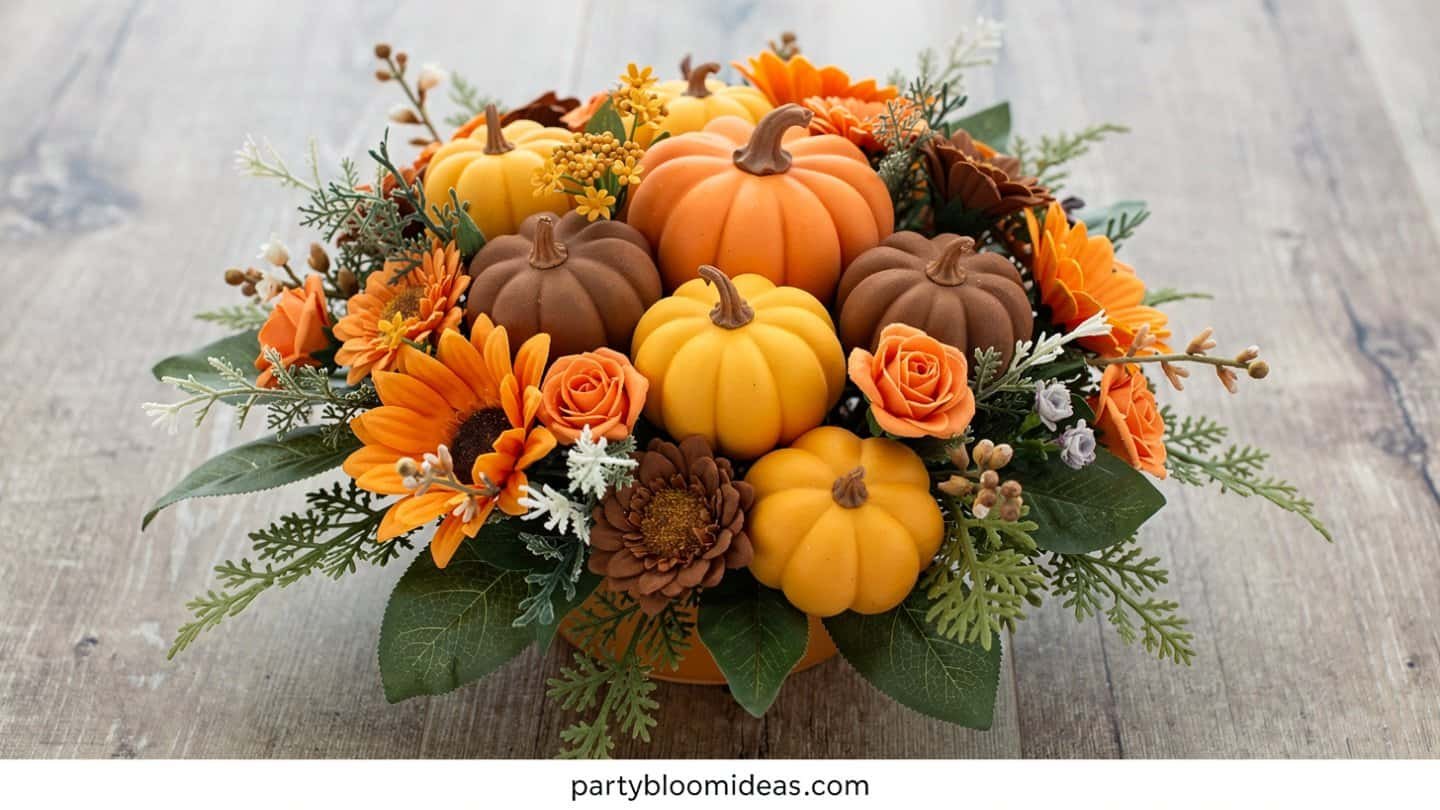
3. Floral + Pumpkin Foam Arrangement
Best for: Formal Thanksgiving tables, 8–12 guests, photo-worthy setups | Difficulty: Medium | Budget: $39–$42 | Time: 45–60 minutes
A large cream or white faux pumpkin with a floral foam insert, packed with faux fall stems in burgundy, burnt orange, and mustard yellow. This is the showstopper of the list. Guests will ask where you bought it. The answer — Michaels, $42, forty-five minutes — is deeply satisfying to deliver.
I made a version of this for a Friendsgiving I co-hosted three years ago. Two people photographed it before they even said hello.
What you need:
- Large faux pumpkin, cream or white ($14 at Michaels — use their 40% off coupon)
- Floral foam brick ($4 Hobby Lobby)
- 8–10 faux fall stems in varied heights ($15–18 for a variety pack, Amazon or Michaels)
- Greenery or ivy fill stems ($6 Michaels)
- Craft knife to hollow the top
How to make it:
- Use a craft knife to cut a 4-inch circle in the top of the pumpkin. Remove enough interior to fit the floral foam brick.
- Soak the foam brick in water for 3–5 minutes — even for faux stems, this adds weight and grip.
- Press the foam into the pumpkin opening.
- Insert stems starting with the tallest center stem. Work outward in a dome shape.
- Fill every gap with greenery so no foam is visible from any angle.
Visual tip: Use an odd number of “hero” stems — 3 or 5 large blooms — and fill the rest with foliage. That’s what florists charge $80 for. The ratio of statement stems to filler is the secret.
💡 Pro Tip: Michaels always has a 40% off one regular-priced item coupon. Apply it to the large pumpkin or the stem variety pack — that single coupon brings your total cost down by $5–6.
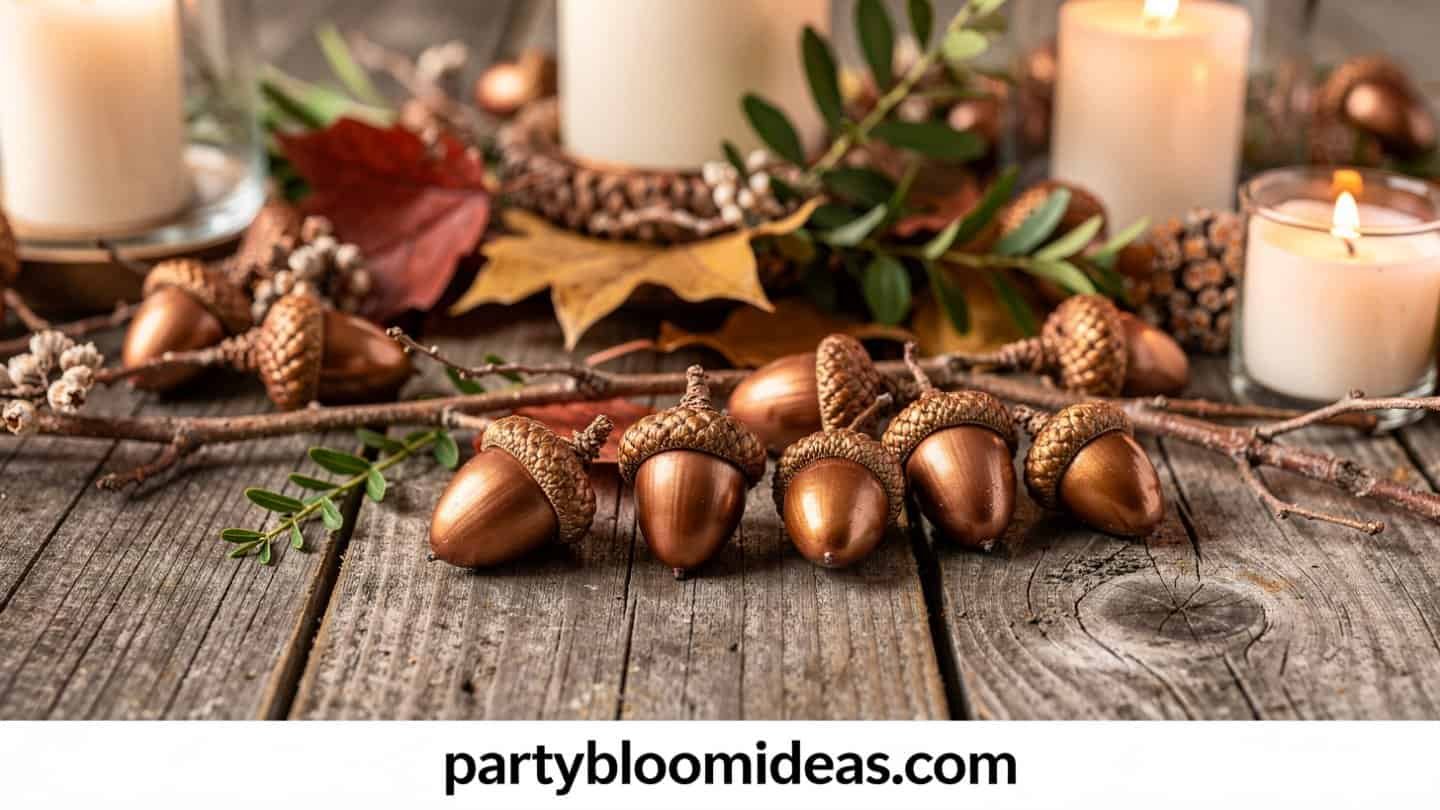
4. Copper-Dipped Acorn Tablescape
Best for: Long tables, 10–16 guests, modern-rustic aesthetic | Difficulty: Easy | Budget: $18–$22 | Time: 45 minutes (includes drying)
Acorns and pinecones with their tips dipped in copper spray paint, scattered down a kraft paper runner with tea light holders nestled between them. This is almost free if you have oak trees nearby. It’s also one of the most-pinned autumn table decor styles of 2025 — and it costs $18.
What you need:
- Natural acorns and pinecones (free foraged, or $4/bag on Amazon)
- Copper metallic spray paint ($5 Rust-Oleum at Walmart)
- Tea light holders ($4 for a set at IKEA or Dollar Tree)
- Faux fall leaves ($5 Dollar Tree)
- Kraft paper table runner ($4 Amazon)
How to make it:
- Lay acorns and pinecones on newspaper, tip-side up.
- Hold copper spray 8–10 inches away and give a light, sweeping coat across the tips only. One coat is enough.
- Let dry fully — about 30 minutes.
- Roll out the kraft runner down the table center.
- Scatter fall leaves as a base, then arrange copper-tipped pieces in clusters of odd numbers. Tuck tea lights between clusters.
Visual tip: Don’t coat the whole acorn — just the tip. That partial dip is what makes it look designed rather than spray-painted.
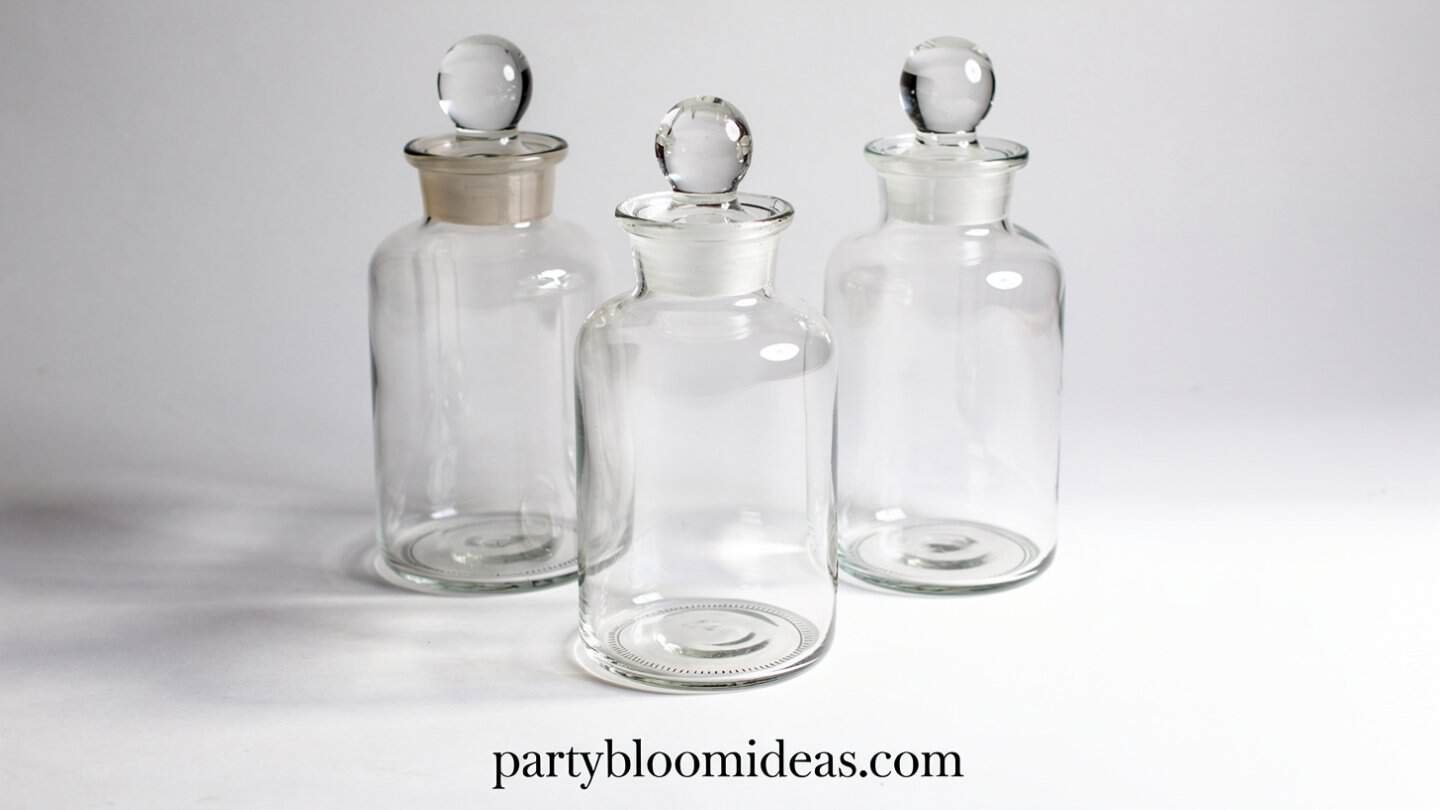
5. Apothecary Jar Trio
Best for: Small tables, 4–6 guests, first-time hosts | Difficulty: Easy | Budget: $20–$24 | Time: 15 minutes
Three glass jars in graduating heights — one filled with candy corn, one with mini pinecones, one with cinnamon stick bundles — tied at the neck with ribbon. Fifteen minutes. Zero tools. Always cohesive. This is the beginner centerpiece I recommend to literally everyone hosting their first Thanksgiving.
What you need:
- 3 glass jars in genuinely different heights ($9 for a set at Dollar Tree, or mason jars from Target)
- Candy corn ($4 — seasonal at most grocery stores through November)
- Mini pinecones ($4 Amazon or foraged)
- Cinnamon sticks ($4 McCormick bulk bag)
- Thin orange or burgundy ribbon ($3)
How to make it:
- Fill each jar with its designated filler, leaving 1 inch of space at the top.
- Arrange the three jars in a triangular cluster — vary the heights so no two are at the same level when viewed from the front.
- Tie a small ribbon bow around the neck of each jar.
Visual tip: Same-height jars arranged together look accidental. Different heights — short wide, medium cylinder, tall narrow — look considered. This one detail is worth more than any expensive material.
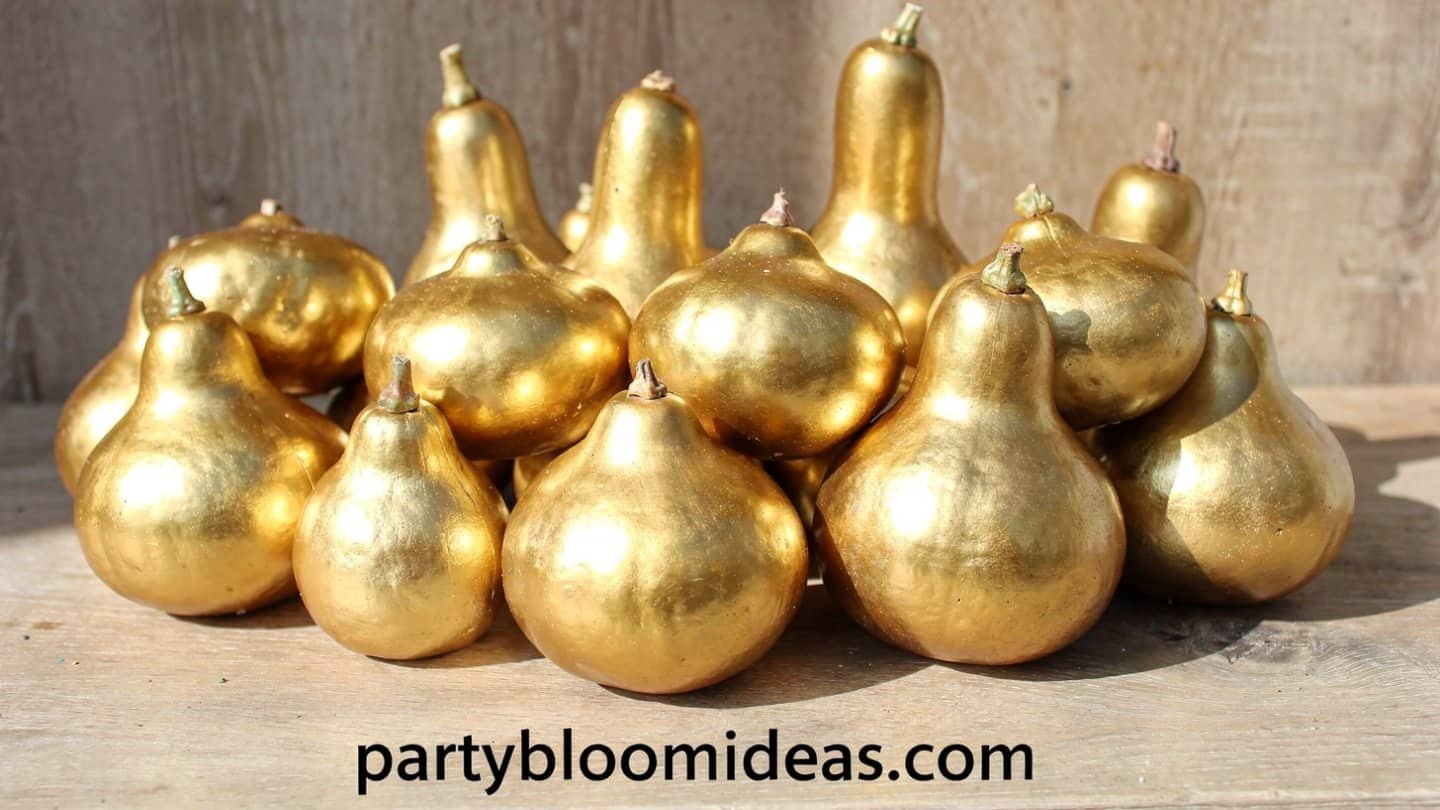
6. Gold-Dipped Gourd Cluster
Best for: Glam tables, 6–10 guests, hosts who love metallics | Difficulty: Easy | Budget: $21–$27 | Time: 1 hour including drying
Five to seven assorted gourds — the bumpy, irregular ones from the produce section — with their tips dipped in gold metallic paint, arranged on a round mirrored tray. The contrast between irregular organic shapes and clean metallic tips is the whole point. It photographs like a $75 centerpiece. It costs $27.
What you need:
- 5–7 assorted gourds ($8–10 at the grocery store produce section — usually $1–2 each)
- Gold metallic craft paint or spray paint ($5)
- Round mirrored tray ($8–12 at Dollar Tree or Amazon)
- Small paintbrush if using craft paint
How to make it:
- Wash and completely dry each gourd.
- Dip the stem end (top inch) in gold paint, or paint the base of each gourd — pick one direction and stay consistent across all of them.
- Let dry on wax paper, painted side up, for at least 1 hour.
- Arrange on the mirrored tray in a loose cluster, varying the orientation so they look naturally grouped.
Visual tip: The mirrored tray doubles the candlelight from the rest of your table. Position this centerpiece where it’ll catch that reflection — it transforms the whole display after dark.
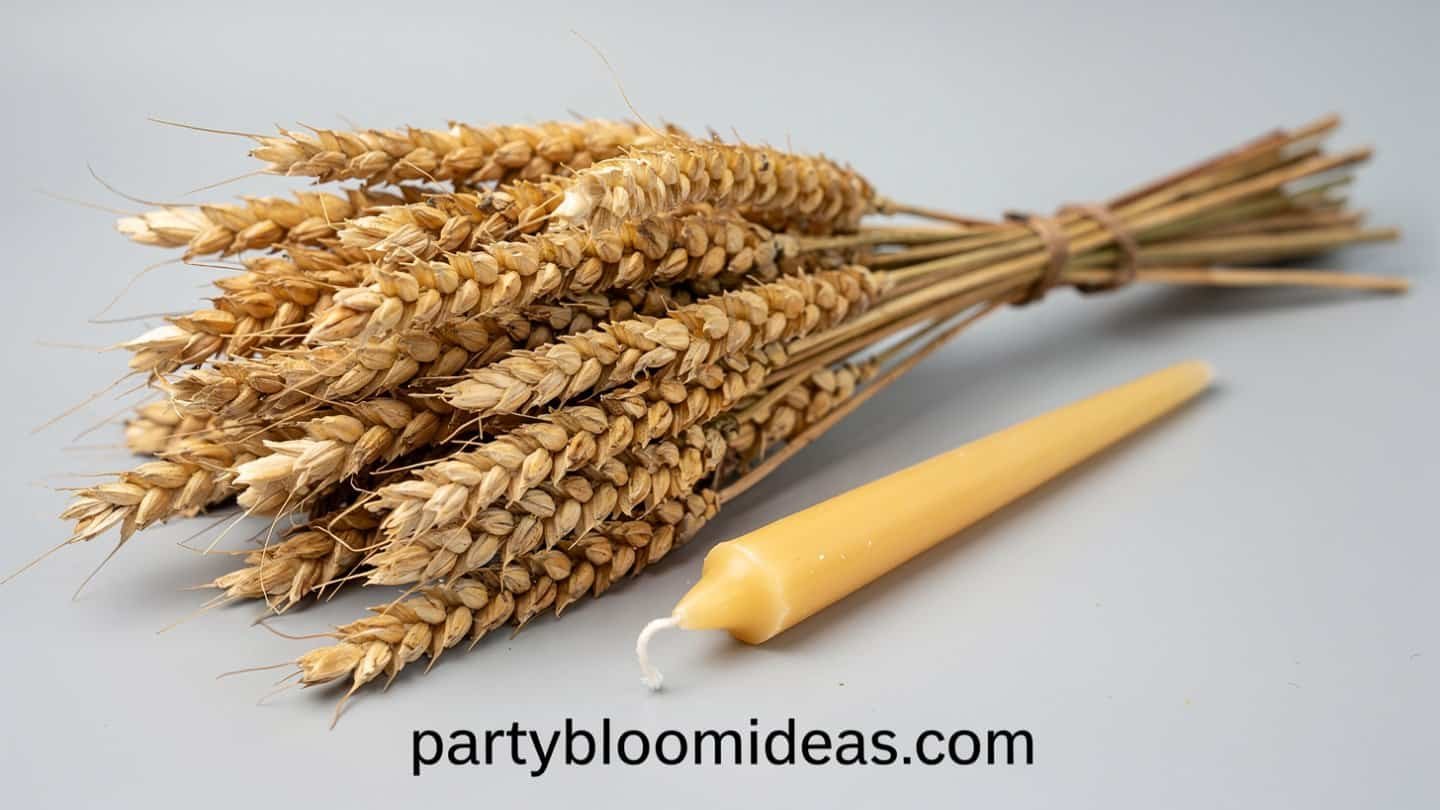
7. Dried Wheat + Taper Candle Bundle
Best for: Minimalist tables, 6–10 guests, adults-only dinners | Difficulty: Easy | Budget: $27–$31 | Time: 20 minutes
A bundle of dried wheat stalks laid horizontally across the table, or standing upright in a low vase, flanked by three to five ivory taper candles in varying heights. This is the most editorial look on this list. The most expensive-feeling. And arguably the least amount of effort. Done right, it looks like a catered tablescape. Done wrong — which usually means using too many tapers perfectly evenly spaced — it looks like a church altar. The trick is the stagger.
What you need:
- Dried wheat bundle ($10–14 at Hobby Lobby or Amazon)
- 5 ivory taper candles ($6)
- Taper candle holders, mismatched heights ($8 for a set — thrift stores are excellent for this)
- Jute twine ($3)
How to make it:
- Tie the wheat bundle loosely at the center with twine and fan both ends out.
- Lay horizontally on a kraft runner, or stand upright in a low galvanized bucket tied with twine.
- Flank with taper candles — don’t space them evenly. Alternate heights and cluster two together on one side, three on the other.
Visual tip: Mismatched taper holders — different metals, different heights — look infinitely more intentional than a matching set. Thrift stores have them for $0.50–$2 each.
💡 Pro Tip: If you’re worried about fire safety with dried wheat nearby, Luminara battery-operated tapers flicker convincingly and cost about $18 for a 4-pack. Worth it for peace of mind.
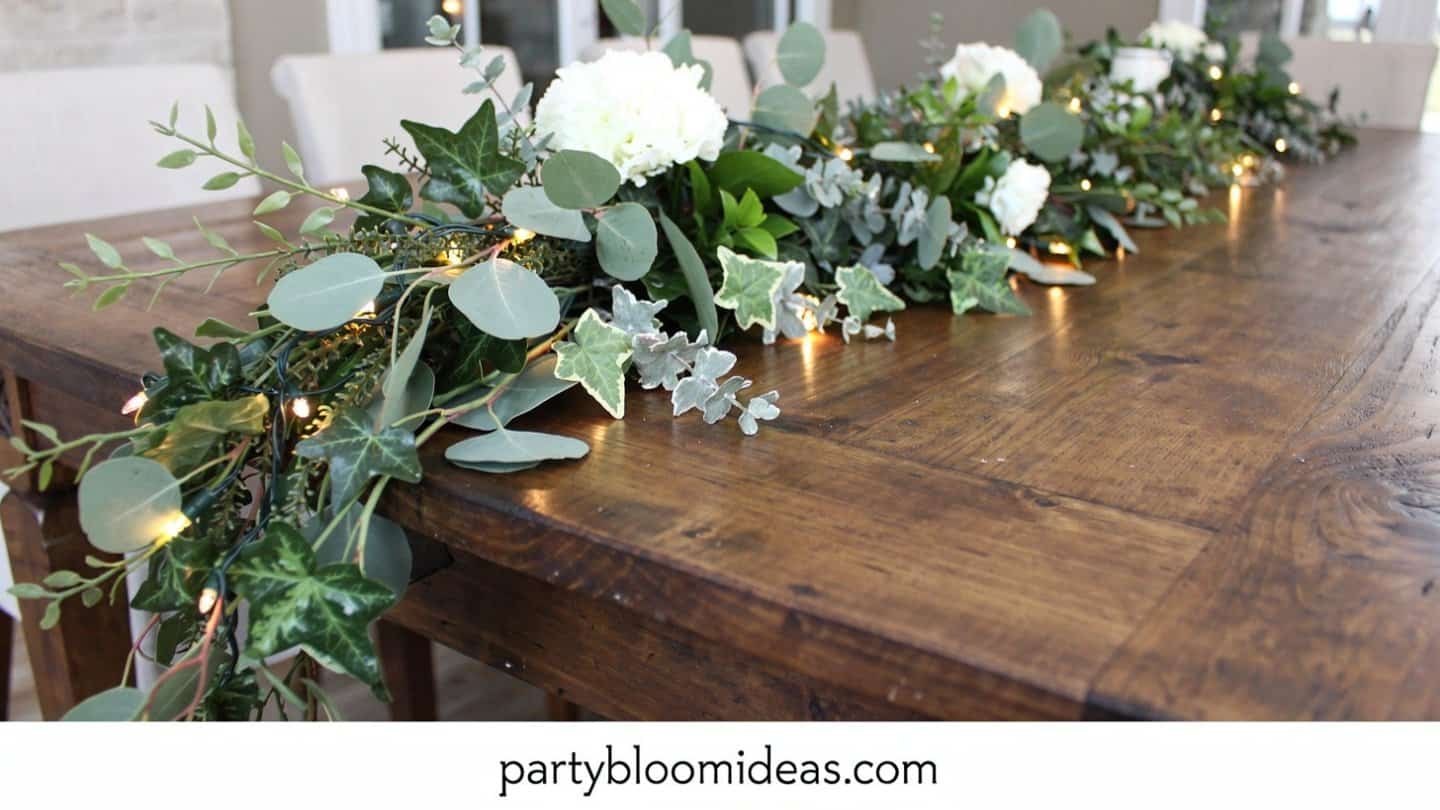
8. Cascading Garland Runner
Best for: Long tables, 10–20 guests, Friendsgiving large gatherings | Difficulty: Easy–Medium | Budget: $32–$38 | Time: 30–40 minutes
A six to twelve-foot faux fall garland running the full length of the table, with small pumpkin picks tucked in, loose greenery layered underneath, and taper candles nestled through the center. This isn’t a traditional centerpiece — it’s a full-table commitment. It looks like a catered event. Emma did a version of this for Friendsgiving two years ago and guests assumed she’d hired someone.
What you need:
- Faux fall garland, 6-foot ($12–16 on Amazon — buy two for tables over 8 feet)
- Small pumpkin picks ($6 Dollar Tree)
- Loose greenery or eucalyptus ($8)
- Taper candles and holders along center ($6–8)
How to make it:
- Lay loose greenery as a base layer down the center of the table — this gives the garland depth and something to sit on.
- Drape the fall garland on top, letting it cascade naturally rather than running in a tight, straight line.
- Tuck pumpkin picks into the garland every 12–16 inches, alternating sides.
- Nestle taper candles or tea lights at intervals through the garland.
Visual tip: Let the garland drape slightly off each end of the table. Pulled tight and straight, it looks cheap. Loose and flowing, it looks considered. The cascade is the entire aesthetic.
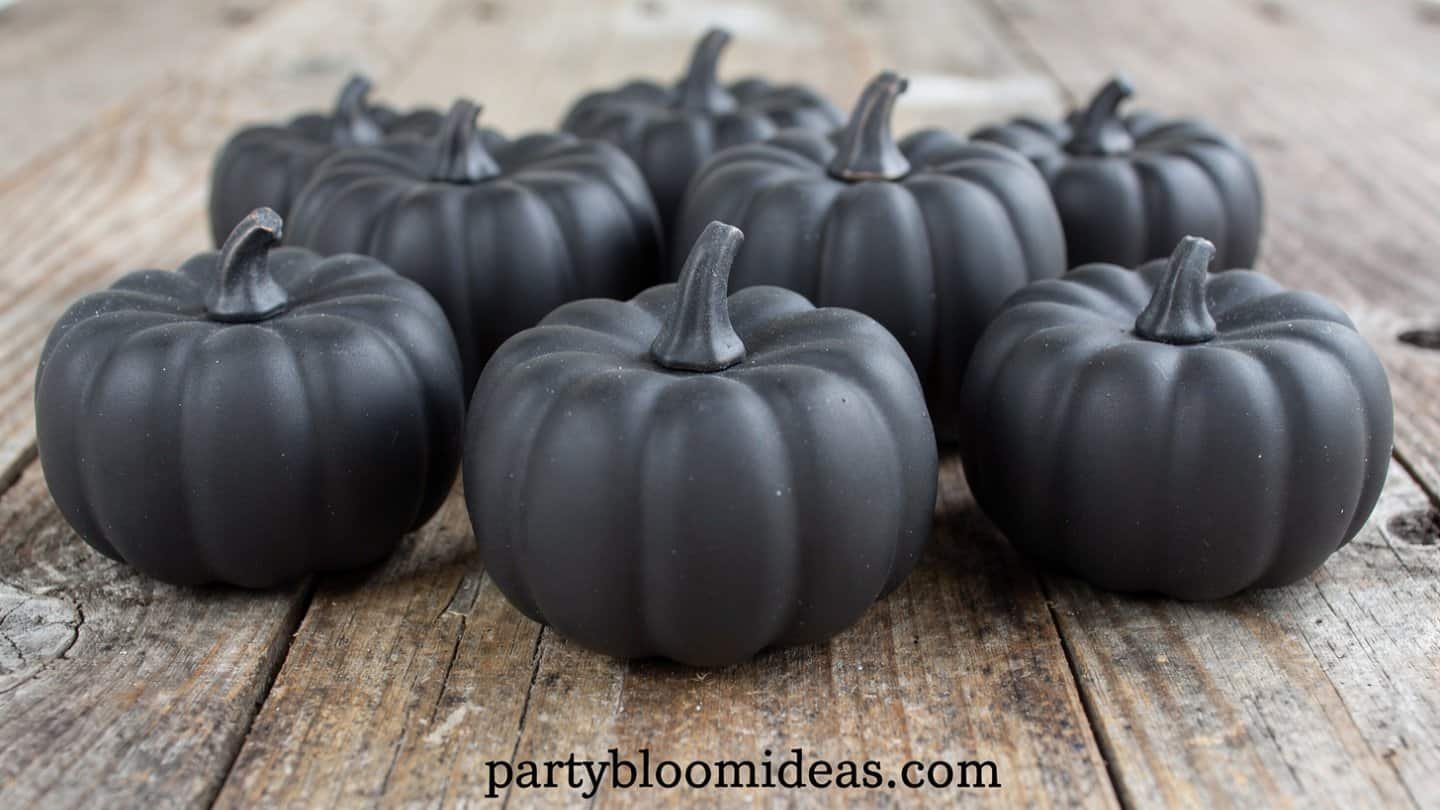
9. Chalkboard Pumpkin Place Card Cluster
Best for: Intimate dinners, 6–10 guests, detail-loving hosts | Difficulty: Medium | Budget: $22–$26 | Time: 1 hour including drying
Small black-painted pumpkins with each guest’s name written in chalk pen, arranged as a centerpiece cluster. They function as décor AND place cards — guests pick up their pumpkin and carry it to their seat. It’s the kind of personalized detail that gets photographed and talked about. At a bridal shower I attended two years ago, the host did this with mini gourds instead of pumpkins and I still think about that table.
What you need:
- Small faux or real pumpkins, one per guest ($8–10 at Dollar Tree — $1.25 each section)
- Chalkboard spray paint ($5 at Walmart or Amazon)
- Chalk pens or chalk markers ($5 for a 2-pack on Amazon)
- A few extra fall stems or leaves for filler ($4)
How to make it:
- Spray pumpkins with 2 light coats of chalkboard paint. Dry completely — 1 hour minimum.
- Once dry, rub the surface lightly with chalk and erase it. This “seasons” the surface so chalk pen writes more cleanly.
- Write each guest’s name in chalk pen. Allow 24 hours to fully set.
- Arrange all pumpkins in a loose cluster at the table center. Tuck greenery and fall leaves between them.
Visual tip: Loose, relaxed handwriting reads more personal than rigid lettering. If your handwriting stresses you out, simple wide block capitals work beautifully on matte black.
💡 Pro Tip: Write the names 24 hours in advance. Chalk pen doesn’t smear easily once fully set, but it does smear if it’s still wet when guests arrive.
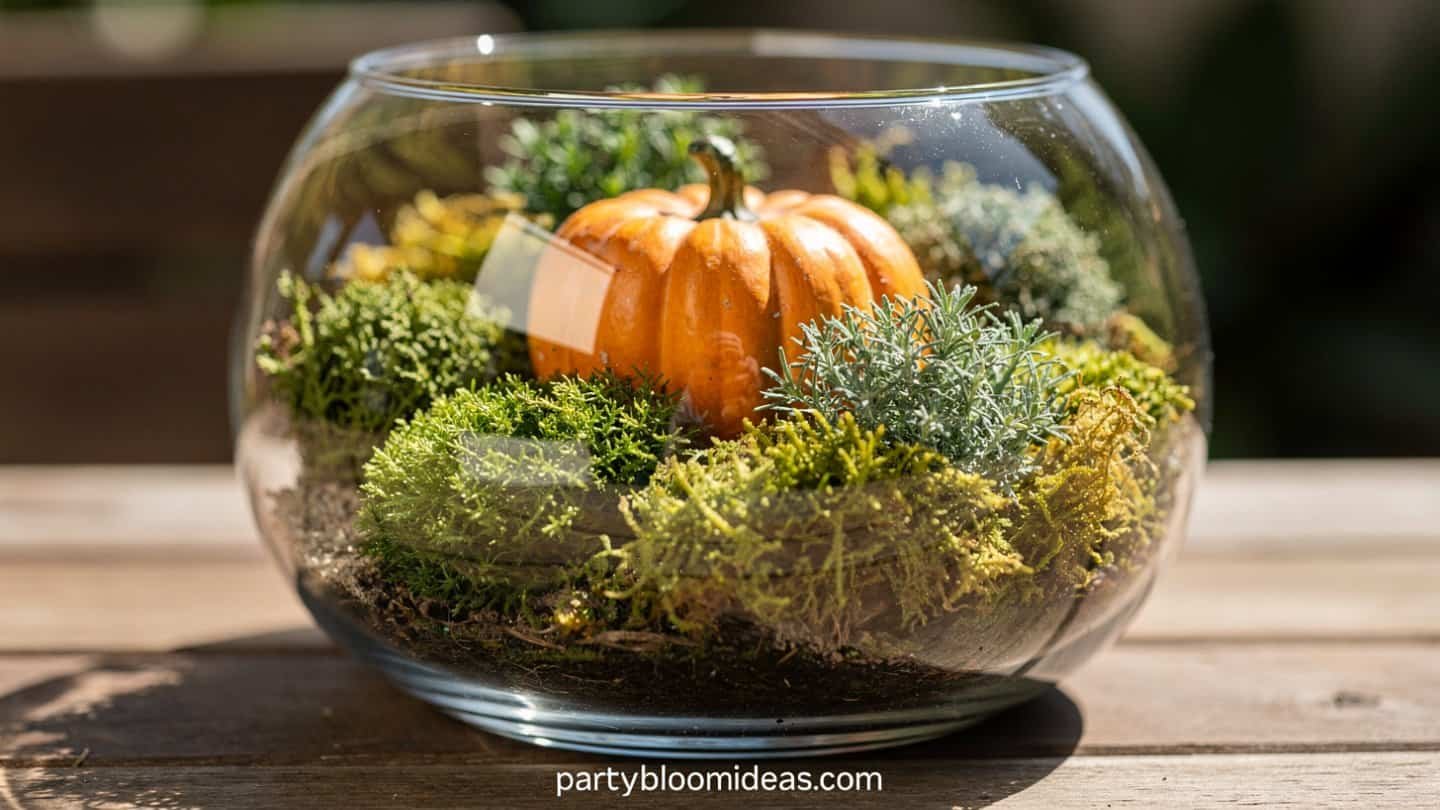
10. Preserved Moss + Pumpkin Terrarium
Best for: Coffee tables, modern hosts, 4–8 guests | Difficulty: Easy–Medium | Budget: $24–$34 | Time: 30 minutes
A wide, low glass bowl filled with a base of preserved green or brown moss, small real gourds nestled into it, acorns tucked around the edges, and — for the extra-fancy version — a glass cloche over the top. It looks botanical. Curated. Like something from a high-end garden shop. It costs $28.
What you need:
- Wide, low glass bowl or cloche ($10–18 depending on size — Amazon or HomeGoods)
- Preserved sheet moss ($6 at Hobby Lobby or Amazon)
- 2–3 small real pumpkins or gourds ($4–6 at the grocery store)
- Handful of acorns ($4 Amazon, or foraged)
- Small twigs or branches (free)
How to make it:
- Line the bottom of the bowl with a generous layer of preserved moss.
- Nestle the pumpkins and gourds into the moss — press them in slightly so they look settled, not perched on top.
- Tuck acorns and small twigs around the base of each pumpkin to fill the space.
- If using a cloche, set it over the entire arrangement.
Visual tip: Use gourds and pumpkins that are genuinely different from each other — bumpy beside smooth, round beside elongated. The variety reads like a natural environment. Uniform shapes read like a store shelf.
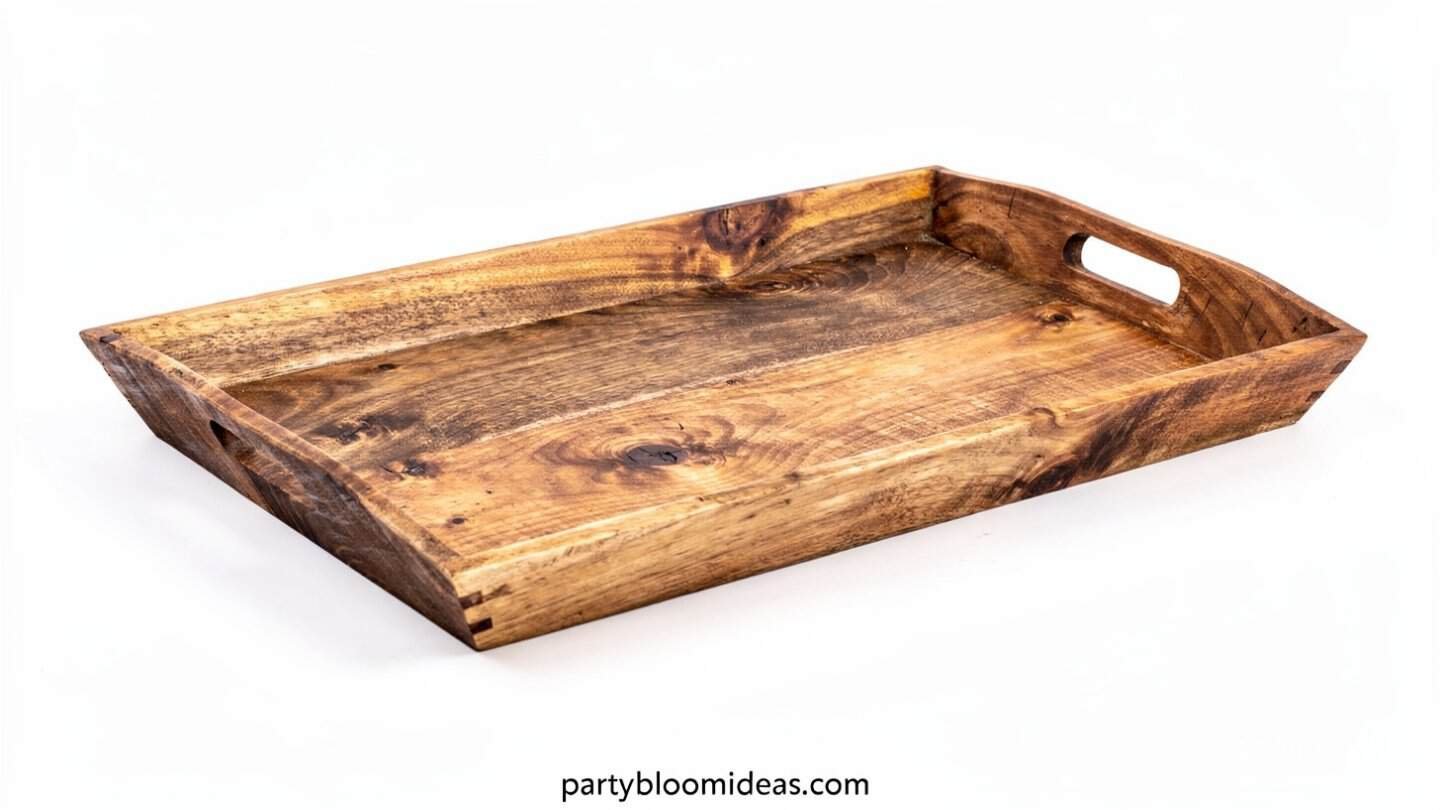
11. Wooden Box Harvest Tray
Best for: Kitchen islands, console tables, secondary tablescaping | Difficulty: Easy | Budget: $28–$34 | Time: 20 minutes
A low rectangular wooden crate styled with mini pumpkins, gourds, a small candle, loose greenery, and a seasonal sign. The complete Thanksgiving vignette in one contained footprint. It’s familiar, yes — but it works every time because you’re styling it like a shelf display, not just piling things in a box.
What you need:
- Wooden crate or tray ($8–14 at Michaels or Dollar Tree)
- Mini pumpkin and gourd assortment ($8 Dollar Tree)
- Greenery picks ($5)
- 1–2 tea lights or small jar candle ($3–5)
- Small seasonal sign — “Gather,” “Give Thanks” ($4 Dollar Tree)
How to make it:
- Prop the sign at the back of the crate as a “back wall.”
- Place the largest pumpkin at center-front.
- Tuck smaller gourds around it, varying heights by placing some on a small stack of paper inside the crate.
- Fill gaps with greenery picks. Nestle tea lights in the front corners.
Visual tip: Every arrangement needs a “back wall” — something vertical at the rear. Without it, everything looks flat and splays outward. The sign, a small book, or a piece of birch bark all work.
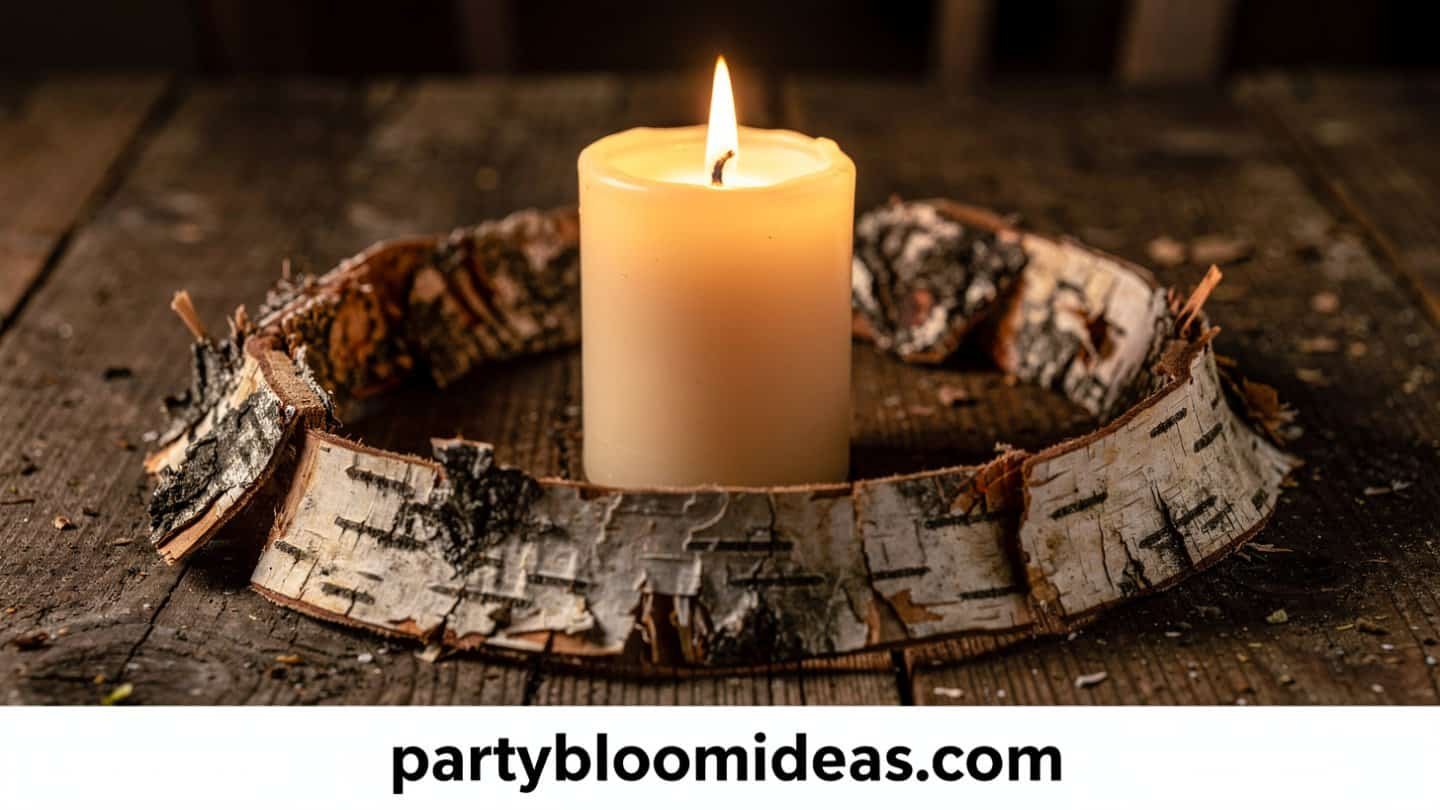
12. Birch Bark + Pillar Candle Ring
Best for: Intimate tables, 4–8 guests, nature-loving hosts | Difficulty: Medium | Budget: $19–$23 | Time: 45 minutes
Small strips of birch bark arranged in a ring around a fat pillar candle, with fall foliage tucked into the gaps. It looks handmade in exactly the right way — organic, warm, specific. The first time I made this for a small dinner party, two people asked if I’d bought it at a craft fair. That’s the reaction you want.
What you need:
- Birch bark slices or strips ($6–8 on Amazon)
- Pillar candle, ivory or cream ($6)
- Low-temp hot glue gun
- Faux fall leaves and small stems ($4–6 Dollar Tree)
How to make it:
- Set the pillar candle on a small plate or wooden slice as a base.
- Apply a thin strip of hot glue to each piece of bark and press around the candle’s circumference, wrapping all the way around.
- Let dry for 10 minutes.
- Tuck fall leaves and small stems into the gaps between bark pieces and around the base.
Visual tip: Don’t glue the bark flush and even. Let pieces overlap slightly, vary their heights, let some tip outward. Deliberate imperfection is the whole aesthetic here.
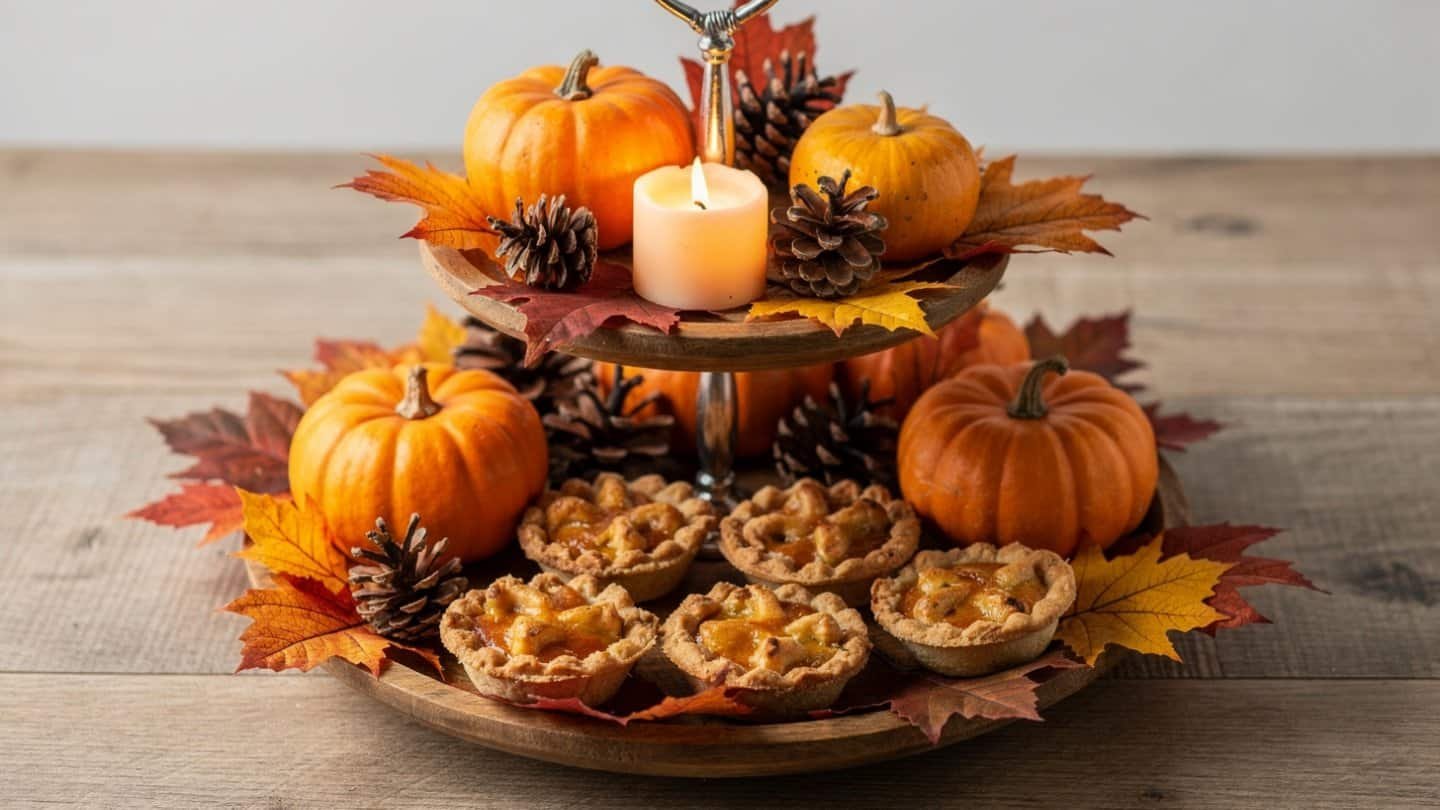
13. Tiered Tray Thanksgiving Vignette
Best for: Kitchen islands, side tables, hosts who already own a tiered tray | Difficulty: Easy | Budget: $29–$39 | Time: 20 minutes
If you own a tiered tray — and many of you do — this is your lowest-effort, highest-impact option. A complete micro Thanksgiving scene across two tiers. Familiar? Yes. Does it consistently work? Also yes. The key is treating each tier like a separate styled shelf, not just placing things on it.
What you need:
- Tiered tray ($12–22 if you need one — TJ Maxx and Amazon both carry good options)
- Mini pumpkins ($5)
- Seasonal signage ($4 Dollar Tree)
- Pinecones ($3)
- Small candle in a jar ($5)
- Filler greenery or faux fall leaves ($4)
How to make it:
- Bottom tier: lay leaves as a base, stand the sign at the back, group pinecones at the front.
- Top tier: place the candle at center, flank with 2–3 mini pumpkins, tuck greenery in the gaps.
Visual tip: The top tier should always hold your most interesting element — it’s at eye level when guests are standing. Put your best piece there, not your largest.
How Do You Make a DIY Thanksgiving Centerpiece Ideas Look Expensive Without Spending a Lot?
This question comes up every year, and the answer is less about materials and more about method. According to a 2024 Etsy Trend Report, handmade and DIY fall décor outperformed mass-produced alternatives in saves and purchases, with harvest-themed centerpieces up 41% year-over-year. People can feel the difference between something assembled and something made.
Here’s what actually separates a $28 DIY centerpiece from one that looks like it cost $90:
Use a defined base. A tray, wooden slice, crate, or runner anchors everything. No arrangement should look like it’s floating on the table. A base is what transforms “items placed on a table” into a “centerpiece.”
Layer in three depths. Base layer (greenery, moss, runner), mid layer (main elements — pumpkins, lantern, gourds), accent layer (small details — acorns, cinnamon sticks, ribbon). Three layers with a defined base = professional-looking result.
Finish the back. Most people style the front of a centerpiece and ignore the back. Walk around yours before guests arrive. If the back looks unfinished, add a stem or two.
Matte over shiny. If any faux element looks too plastic, a coat of matte spray paint ($4) fixes it instantly. Matte materials always read more expensive than glossy ones.
Common Mistakes That Make DIY Thanksgiving Centerpiece Ideas Look Homemade (in the Bad Way)
The biggest mistake most hosts make is believing more materials equals more impact. It doesn’t. Here’s what actually undermines a good Thanksgiving table:
Using real flowers. They peak at setup. By the time you’re eating, they’re starting to go. By dessert, they’re drooping. Dried botanicals and faux stems photograph just as well and last the entire season. I switched to dried and faux after my first hosting disaster and I’ve never gone back.
The cornucopia. I’ll just say it directly: it’s a dated piece that almost nobody under 60 has styled successfully in recent memory. It’s bulky, the shape is hard to work with, and it reads like a prop rather than a décor choice. Skip it completely.
Buying everything from one store in one collection. Matched sets look like a display, not a table. Mix your sources — Dollar Tree for filler, Michaels for one statement piece, real gourds from the grocery store, acorns from your yard. That layered sourcing is what gives it the “collected over time” look.
Over-matching your colors. Real harvest tables that look elevated use two to three tones, not the entire fall spectrum. Every shade of orange, yellow, red, brown, and green simultaneously reads chaotic. Pick a palette — burgundy and cream, amber and gold — and hold it.
Going too tall. Anything over 12 inches centered on a dining table is a social barrier. Your guests came to see each other, not your centerpiece. If you love height, go long-and-low with a garland runner instead.
🎉 Quick Summary
✅ Best for: Thanksgiving dining tables, Friendsgiving long tables, kitchen islands, console tables, apartment hosting 💰 Budget range: $15–$42 DIY (vs. $60–$120 store-bought equivalent) ⏱ Setup time: 15 minutes – 1 hour depending on the idea 🌟 Top pick: Floral + Pumpkin Foam Arrangement — highest wow factor, most photo-worthy, still under $45 📌 Don’t skip: The odd-number rule. Three pumpkins, five gourds, seven candles. Odd numbers are what separate intentional from accidental.
People Also Ask
What is the easiest DIY Thanksgiving Centerpiece Ideas for beginners? The Apothecary Jar Trio is the easiest starting point — no tools, no glue, no craft skills required. Fill three glass jars of different heights with candy corn, pinecones, and cinnamon sticks, tie a ribbon around each, and you’re done in 15 minutes for about $22. The Copper-Dipped Acorn Scatter is a close second at $18 and 45 minutes.
How do you make a DIY Thanksgiving Centerpiece Ideas look store-bought on a budget? Three rules: odd numbers (3, 5, or 7 elements — never even), two to three colors maximum, and layered textures (smooth beside rough, matte beside shiny). A $20 centerpiece built around these principles will outperform a $60 matched set every time. The materials aren’t the difference — the method is.
How far in advance can I make a DIY Thanksgiving Centerpiece Ideas ? Most of these can be made 1–2 weeks ahead with no issues, especially with faux or dried materials. Real gourds and uncarved pumpkins typically last 3–6 weeks indoors. Avoid real flowers entirely for anything made more than one day ahead — they will not hold up through the meal.
How tall should a DIY Thanksgiving Centerpiece Ideas be? For a dining table where guests sit across from each other, keep your centerpiece under 12 inches. If you want something dramatic, go long and low — a garland runner or scattered tablescape — rather than tall. The goal is conversation, not obstruction.
Can I use Dollar Tree supplies for a Thanksgiving centerpiece that looks good? Yes — Dollar Tree is one of the best sources in this category. Their faux pumpkin packs, glass lanterns, wooden trays, mini gourds, chalk pens, and seasonal signage are all genuinely workable. The upgrade moves: spray everything matte, add one real or dried element (eucalyptus, wheat, foraged acorns), and always style in odd numbers.
Frequently Asked Questions
How do I make a DIY Thanksgiving Centerpiece Ideas that doesn’t wilt? Use dried botanicals, preserved greenery, or faux stems instead of fresh flowers. Dried wheat, preserved eucalyptus, faux fall stems, and real gourds (which last 3–6 weeks indoors uncarved) are all excellent choices. Fresh flowers are the single most common mistake hosts make — they look their best the moment you set up and decline through the entire meal.
What do you put in the middle of a DIY Thanksgiving Centerpiece Ideas ? Anything that is under 12 inches tall, built in odd numbers, and layered with at least two different textures. Popular options include pumpkin arrangements, harvest lanterns, candle clusters with fall foliage, and cascading garland runners. The key is low enough for conversation, interesting enough to anchor the table visually.
What is the difference between a fall centerpiece and a DIY Thanksgiving Centerpiece Ideas ? Mostly timing and tone. A fall centerpiece works broadly from September through November — warm tones, organic textures, harvest foliage. A Thanksgiving centerpiece typically skews deeper and warmer — burgundy and cream, amber and gold — and is specifically designed for a dining table with guests around it. The functional requirements (height, footprint, candlelight) matter more at Thanksgiving than in general fall décor.
Can I use real fruit and vegetables in a DIY Thanksgiving Centerpiece Ideas ? Yes, and it can look incredible. Real pears, pomegranates, and apples in warm tones work beautifully alongside gourds. Keep them dry and uncut — whole fruit at room temperature lasts 7–10 days easily. Avoid anything that bruises or softens quickly, and never cut anything you’re using decoratively.
How do I keep real pumpkins from rotting on my table? Keep them completely dry and off surfaces that hold moisture. If placing on wood, put a piece of felt or a thin tray underneath. Never stack real pumpkins directly on each other — the weight speeds up softening. A thin coat of petroleum jelly on the outer surface slows moisture loss. Uncarved real pumpkins last 3–6 weeks indoors in dry conditions.
What are non-floral DIY Thanksgiving Centerpiece Ideas ? Almost everything in this guide qualifies. The copper-dipped acorn scatter, dried wheat bundle, harvest lantern, gold-dipped gourd cluster, chalkboard pumpkin cluster, apothecary jar trio, and moss terrarium are all completely flower-free. The best Thanksgiving centerpieces are overwhelmingly non-floral — the season’s natural textures are the entire aesthetic.
Can I make a DIY Thanksgiving Centerpiece Ideas the night before? For nearly everything in this guide, yes — and making it the night before is actually ideal. It removes Thanksgiving morning pressure, gives glue and paint extra time to fully cure, and lets you troubleshoot anything that doesn’t look right without rushing. The only exceptions are arrangements using fresh flowers, which should be done as close to serving time as possible.
How do I use candles in a DIY Thanksgiving Centerpiece Ideas safely? Never leave burning candles unattended. Use holders with a non-tip base wide enough to catch drips. Keep open flames away from dried botanicals — dried wheat, fall leaves, and garlands are flammable. If you’re using a garland runner with candles, keep at least 4–6 inches of clearance. For a worry-free version, Luminara flameless taper and pillar candles are convincingly realistic.
What DIY Thanksgiving Centerpiece Ideas colors work best in 2026? The strongest Thanksgiving palettes for 2026 lean into deep, sophisticated tones rather than bright orange: burgundy and cream, deep amber and brushed gold, dusty sage green with terracotta, and charcoal with copper accents. The “bright orange everywhere” approach has dated. Two to three restrained tones always read more intentional than the full fall rainbow.
How do you make a harvest arrangement look layered and professional? The professional method is three distinct layers. Base layer: greenery, moss, or a kraft runner as a foundation. Mid layer: your main elements — pumpkins, lantern, gourd cluster. Accent layer: small detail fills — acorns, cinnamon sticks, individual leaves, ribbon. Three defined layers with a solid base = the look florists charge $80 for.
What DIY Thanksgiving Centerpiece Ideas works best for a small apartment table? The Apothecary Jar Trio, Birch Bark Candle Ring, or a single large Floral Pumpkin Arrangement. For very small tables (4-person or under), one strong focal piece beats a sprawling arrangement every time. The Chalkboard Pumpkin Cluster also works well — the pumpkins are small, and guests take them to their seats, clearing the entire center of the table for the meal.
Is it cheaper to DIY or buy a DIY Thanksgiving Centerpiece Ideas ? At the budget tier ($15–25), DIY often costs about the same as a comparable low-end store purchase — but looks significantly better. At the mid-range tier ($26–42), DIY consistently outperforms store-bought options in the $60–90 range. The real value of DIY isn’t just cost savings — it’s that you can tailor the palette, scale, and materials exactly to your table, which store-bought arrangements can’t do.
How many centerpieces do I need for a long DIY Thanksgiving Centerpiece Ideas ? For tables under 8 feet: one strong centerpiece. For tables 8–12 feet: either a full cascading garland runner (the easiest solution — it reads as one cohesive element) or two complementary arrangements placed at equal distances from each end. Two separate centerpieces at the same height can compete with each other visually; the runner avoids that problem entirely.
What’s the most pinned DIY Thanksgiving Centerpiece Ideasstyle for 2026? According to Pinterest Trends (2025), the most-saved Thanksgiving DIY centerpiece styles heading into the 2026 season are: pumpkin floral arrangements, gold and copper metallic accents on natural materials, and garland runner tablescapes. The shift is away from bright harvest colors and toward deeper, more sophisticated palettes — burgundy, cream, amber, and brushed metallics.
The Thanksgiving table doesn’t need to be elaborate to feel special. Emma’s Friendsgiving table — the one fourteen people crowded around last November until nearly midnight — cost her $38 and forty-five minutes the Saturday before. What it had wasn’t a big budget. It had texture, warmth, candlelight, and the sense that someone made it feel good on purpose.
That’s really all a centerpiece needs to do. Not impress. Not perform. Just tell your guests: someone thought about you.
You don’t need a designer’s eye or a craft store budget to pull that off. You need odd numbers, two to three colors, one candle, and the confidence to stop adding things before it becomes too much. The trick is always restraint. Start with one idea from this list. Make it the weekend before. And when your guests walk in and ask where you bought it — enjoy that moment.
Read More : 14 Mother’s Day Party Ideas (2026) Sunday, May 10, 2026
DIY Photo Booth Ideas for Any Party (Easy and Fun)
Color Palette Ideas for Every Party Theme (With Photos)