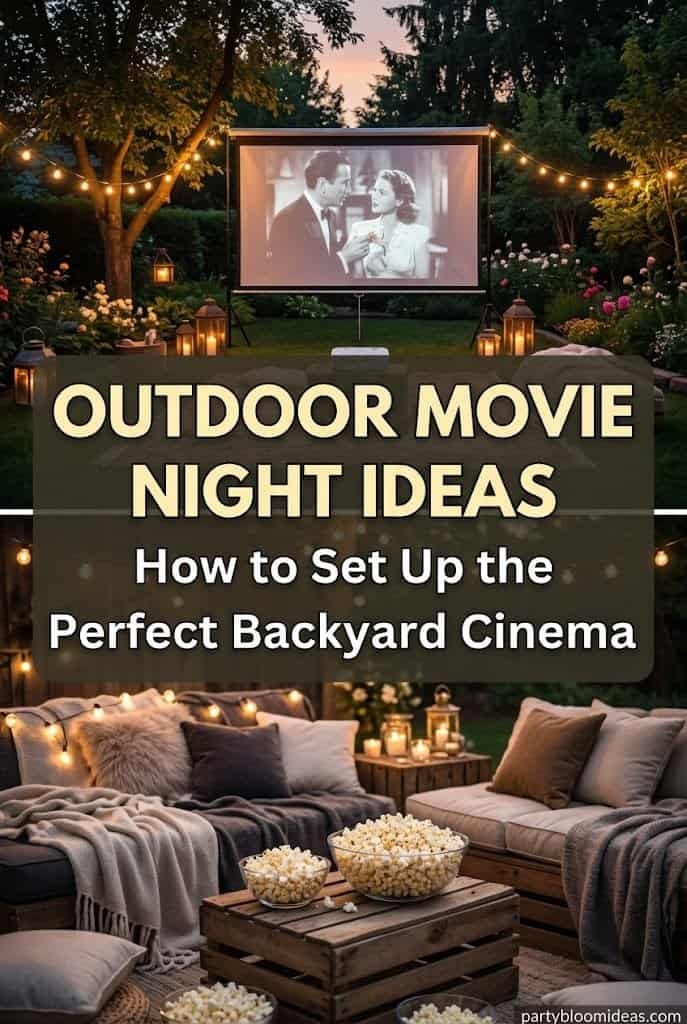
Outdoor Movie Night Ideas are something I only truly understood after my first backyard movie night went completely wrong.
The first backyard movie night I ever hosted was a disaster. I hung a white bedsheet on the fence using clothespins. Borrowed a projector from a friend. Set up three lawn chairs and opened a bag of popcorn from the pantry.
By minute 20, the bedsheet had come loose and was flapping in the breeze. The projector was overheating. The audio from my laptop speakers was so quiet we could barely hear the dialogue. And everyone was eaten alive by mosquitoes because I forgot the bug spray.
My friend Dave leaned over at minute 45 and said, “You know what would be awesome? If we could actually hear this.” And he was right.
That was five years ago. Since then, I’ve hosted probably fifteen backyard movie nights — birthdays, summer parties, just-because Fridays with the neighbors — and I’ve finally figured out what actually works. This article is the complete playbook.
The Four Things That Make or Break a Backyard Movie Night
Before we get into ideas, understand the four pillars. Get these right and the night works. Mess any of them up and it falls apart.
1. A screen that doesn’t move in the wind.
2. A projector that’s actually bright enough.
3. Sound you can hear over outdoor noise.
4. Seating that people can relax in for 2 hours.
If you spend any money, spend it on these four things. Everything else is decor.
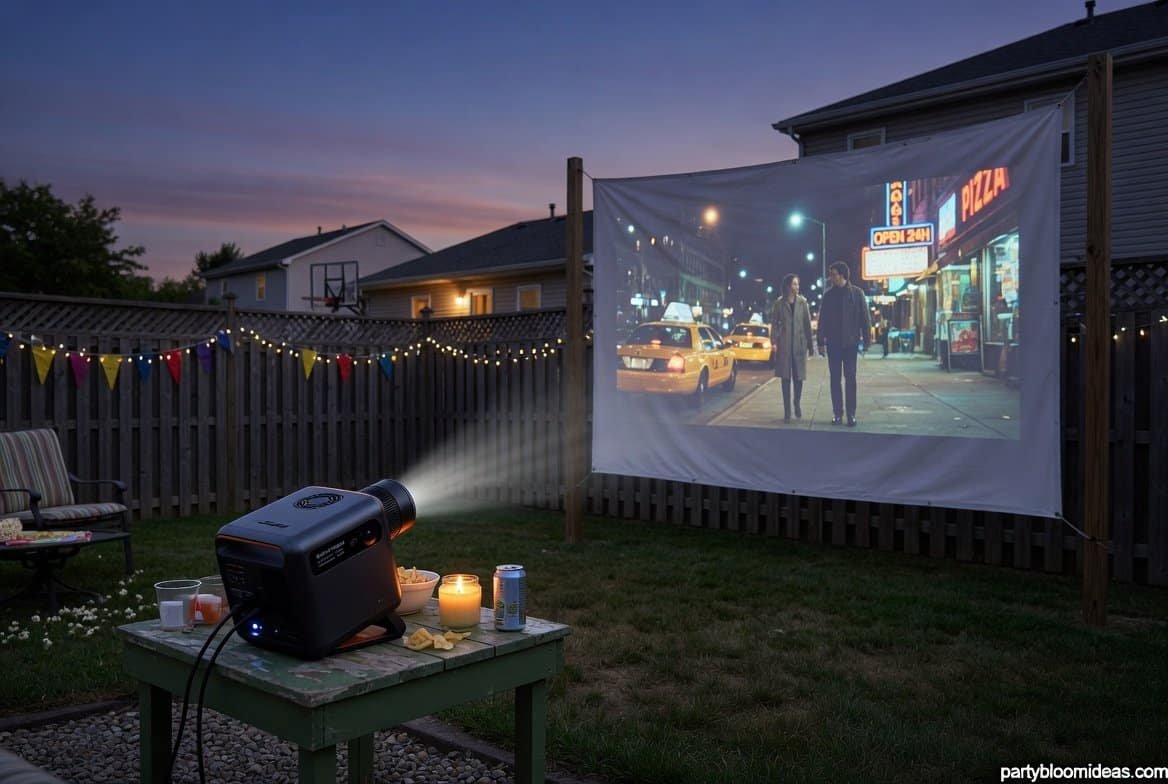
1. The Projector Setup (The Most Important Decision)
Your projector choice determines the whole experience. Here is the honest breakdown after testing several:
Budget option ($80 to $120): Mini projectors like the TOPVISION or YABER V2 on Amazon. These work fine for small gatherings under 10 people and when it’s truly dark (after 9 p.m.). Brightness is limited, so during dusk, the image will wash out. Good starting point if you’re not sure you’ll use it often.
Mid-range ($200 to $400): Something like the Anker Nebula Capsule, XGIMI MoGo, or BenQ TK700STi. Much brighter, decent built-in speakers, portable, and they handle ambient light better. This is where most casual hosts should land.
Premium ($500 to $1,200): Full outdoor projectors with 2,000+ lumens. These work even in some light, produce theater-quality images, and have excellent sound. Worth it if you’re hosting regularly or have a big screen.
Critical spec to understand: Lumens. This is brightness. For outdoor use:
- Under 1,000 lumens = only works in pitch black
- 1,500 to 2,500 lumens = works at dusk, good for most backyards
- 3,000+ lumens = works even with some ambient light
Do not buy a projector under 1,500 lumens for outdoor use unless you will only watch after 10 p.m.
2. The Screen Options
You have three legitimate screen options, each with tradeoffs.
Option A: Dedicated Inflatable Screen ($80 to $200)
Amazon has inflatable movie screens that come with a small fan. Inflate in 2 minutes, use, deflate, store. Sizes range from 9 feet to 20 feet wide.
These are the easiest setup by far. No rigging, no clothespins, no sagging. They stand on their own, the fan keeps them inflated during the movie, and they stay tight in light wind.
Downsides: They take up a lot of storage space even deflated, and they’re only a screen — no other use.
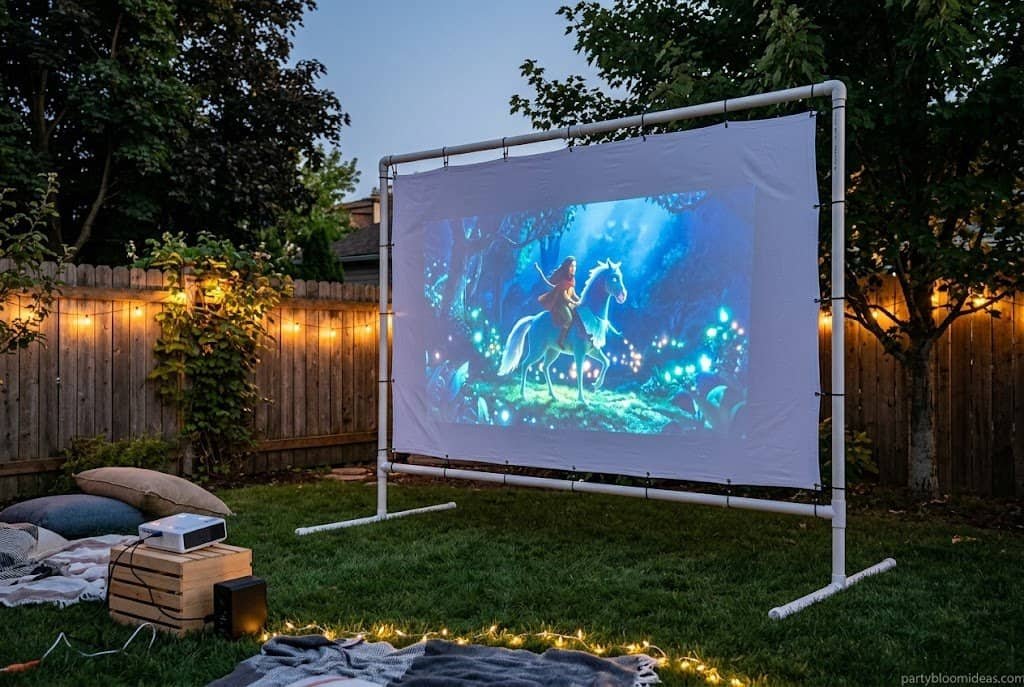
Option B: DIY PVC Pipe Frame with Screen Fabric ($40 to $70)
Build a rectangular frame with PVC pipes. Stretch white blackout cloth or a proper projector screen fabric across it. Prop it up with stakes or weighted feet.
This is what I actually use. The setup is sturdy, looks surprisingly professional, and the whole thing breaks down into a tube of PVC pipes that fits in the garage.
Full tutorial: build a 10×6 foot frame using 1-inch PVC pipes and corner connectors from Home Depot. Attach white blackout cloth with grommets and bungee cords. Stakes go through the bottom corner connectors.
Option C: The Wall or Garage Door
If you have a flat, light-colored outdoor wall or a white garage door, use it directly. No screen needed.
This is actually my favorite setup for small gatherings. Projects straight onto the wall, zero rigging, and the image quality on a smooth white wall is excellent.
Downsides: your wall has to be truly smooth and very light colored. Brick or textured surfaces will show texture through the image.
Option D: Skip it — use a white bedsheet
The lowest-budget version. A clean, white king-size flat sheet, pulled taut between two poles or over a clothesline, with the corners weighted or staked.
It works. It looks fine. Just know the tradeoffs: sheets move in the wind, wrinkles show in the image, and setup takes longer. For a one-time party, fine. For regular use, upgrade.
3. Sound: The Most Overlooked Element
Most people spend $200 on a projector and forget to think about sound. Then everyone complains they can’t hear the movie.
Why projector built-in speakers fail outdoors:
They’re designed for indoor spaces where sound reflects off walls. Outside, the sound just disappears into the air. Add wind, distant cars, insects, or a breeze and you are cooked.
What actually works:
Bluetooth speaker ($50 to $150) — Connect your projector or laptop to a good Bluetooth speaker. JBL Charge 5, Anker Soundcore Motion+, or UE Boom 3 all work well and cost $100 to $170.
Soundbar ($100 to $250) — If you’re getting serious, a dedicated soundbar makes a huge difference. Position it under or near the screen.
Wired speakers via 3.5mm cable — If your projector has a headphone jack and you have any old computer speakers, plug them in. Free upgrade.
The volume test: play a 30-second clip of movie dialogue before guests arrive and stand at the far edge of your seating area. If you can hear every word clearly, you’re set. If you’re straining, turn it up or upgrade the speaker.
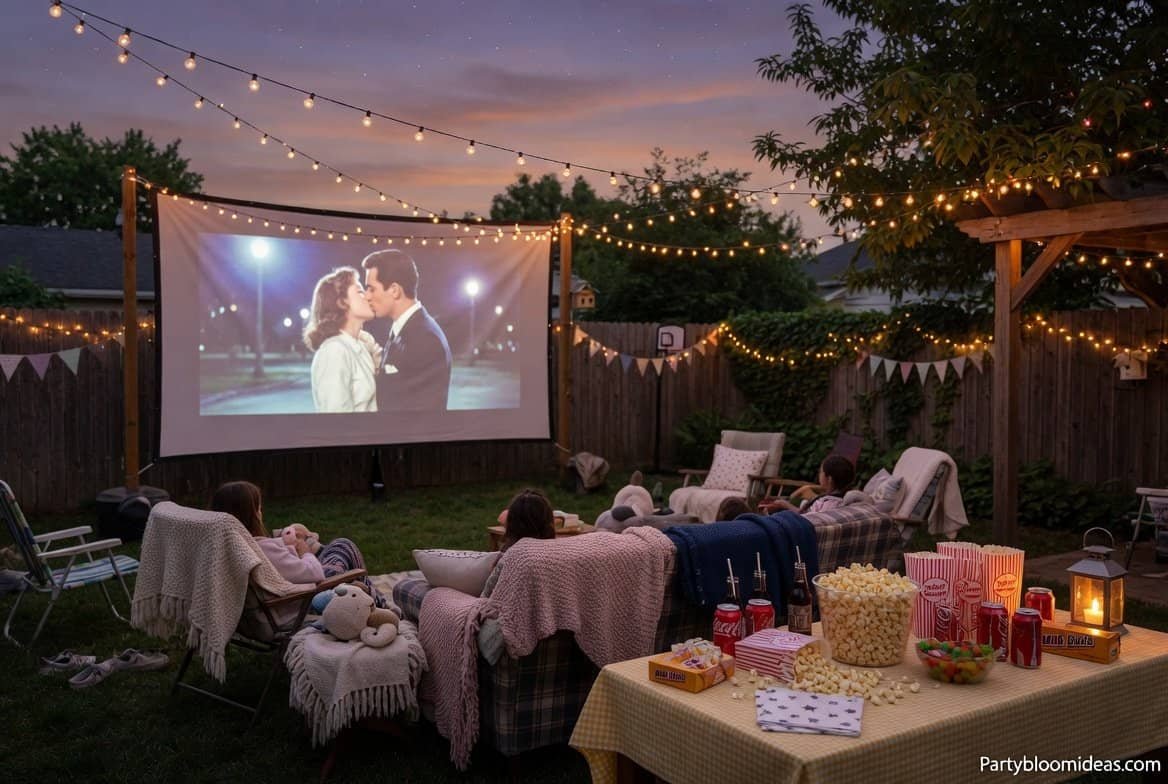
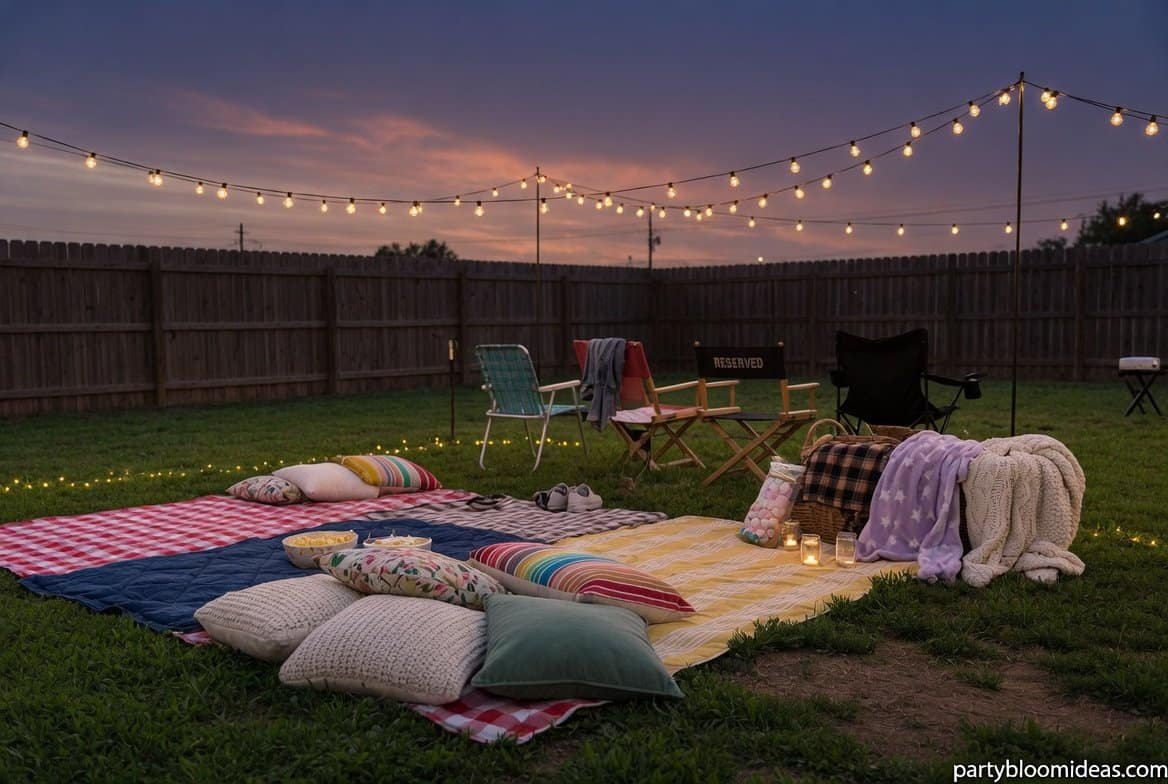
4. Seating That Actually Works
A movie is 90 to 120 minutes. Your seating needs to let people relax for that long.
The best outdoor movie seating combinations:
Ground-level: Picnic blankets + throw pillows on the grass. Casual, inclusive, great for kids. Stack pillows as needed so necks don’t strain looking up at the screen.
Chair row: Camp chairs, folding chairs, Adirondack chairs. Easier for adults and people with back issues. Bring them in from around the yard.
Mixed zones: A blanket zone up front for kids, chairs in the back for adults. This mirrors real outdoor movie theater setups and works great for mixed-age groups.
Beanbag chairs: Big outdoor beanbag chairs (about $80 each) are the most comfortable option but take up storage space.
Absolute minimum per person: 1 chair or 4 square feet of blanket space. Have 2 to 3 extra pillows for anyone who wants to lean back.
Critical reminder: have throw blankets available. Once the sun fully sets, even summer evenings get cool. Always have 4 to 6 extra throws folded in a basket.
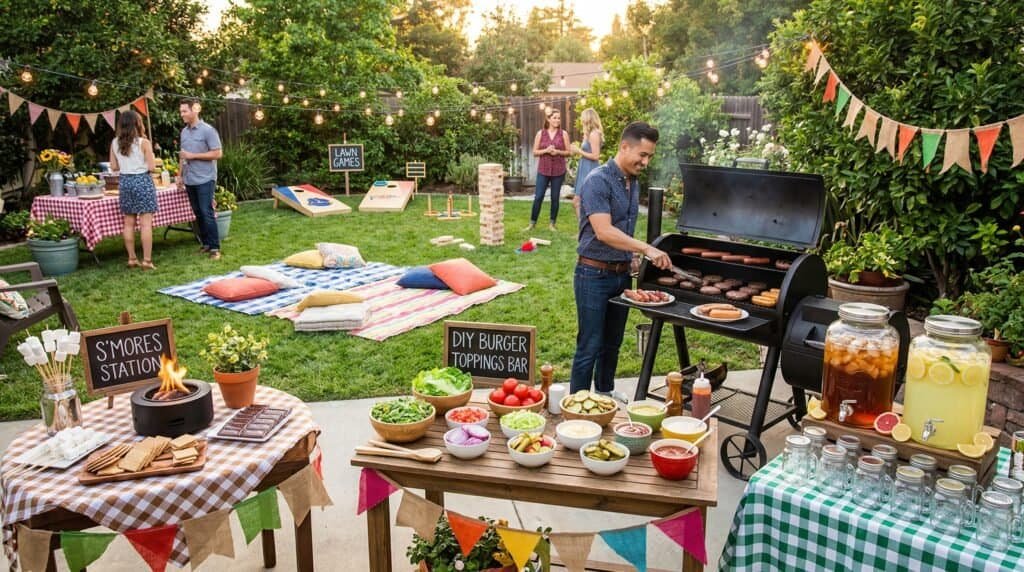
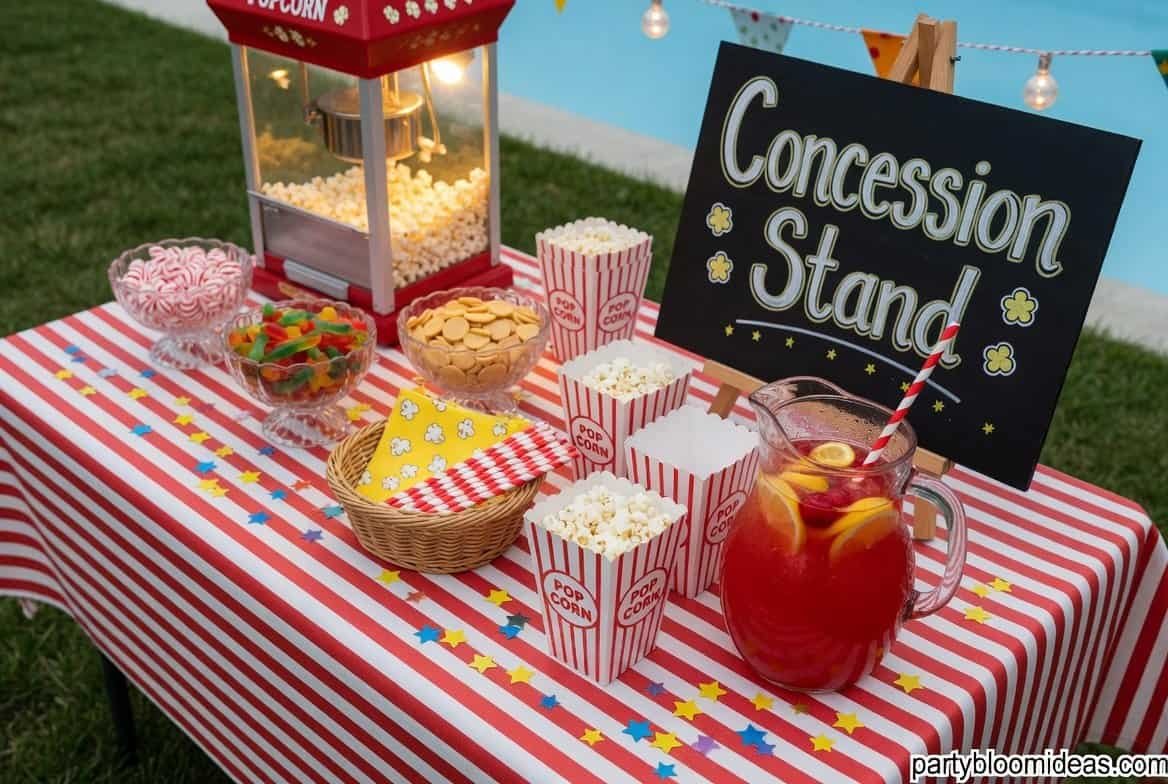
5. The Snack Station Setup
Movie theater snacks are half the reason people love movies. Replicate the concession stand.
The essentials:
- Popcorn (make it fresh, not microwave — a large batch in a big pot with butter and salt)
- Candy — Twizzlers, M&Ms, Reese’s Pieces, Raisinets, Junior Mints
- Concession-style cardboard boxes (Amazon sells them in bulk, $15 for 50 boxes) so people can fill them themselves
- A “soda fountain” — pitchers of Coke, Sprite, and water with ice and paper cups
Upgrade ideas:
- A hot dog station with toppings for a summer night
- Nachos with cheese sauce and jalapeños
- Ice cream bar with toppings for dessert
- Theater-style “candy shop” with small bowls of different candies and paper bags for scooping
Set up a table off to the side so people can grab snacks without walking through the viewing area. Mid-movie snack runs are a thing. Don’t block the screen.
6. Lighting Strategy (More Important Than You Think)
You need to balance two things: the movie area needs to be DARK so the image projects clearly, but guests need light to walk around, find snacks, and not trip.
The solution: zone your lighting.
- Viewing area: Completely dark. No lights pointing at the screen.
- Snack area: Dim warm lighting. String lights or a battery-powered lantern.
- Pathway to bathroom/kitchen: Solar path lights or dim lanterns lining the walkway.
- Side conversation area (for people who want to chat): A small circle with a lantern, set away from the main viewing area.
String lights hung around the perimeter of the yard (but not over the screen area) create the “movie theater” ambiance without washing out the projection.
Battery-powered LED candles in jars on tables give soft light without any flame risk near fabric or grass.

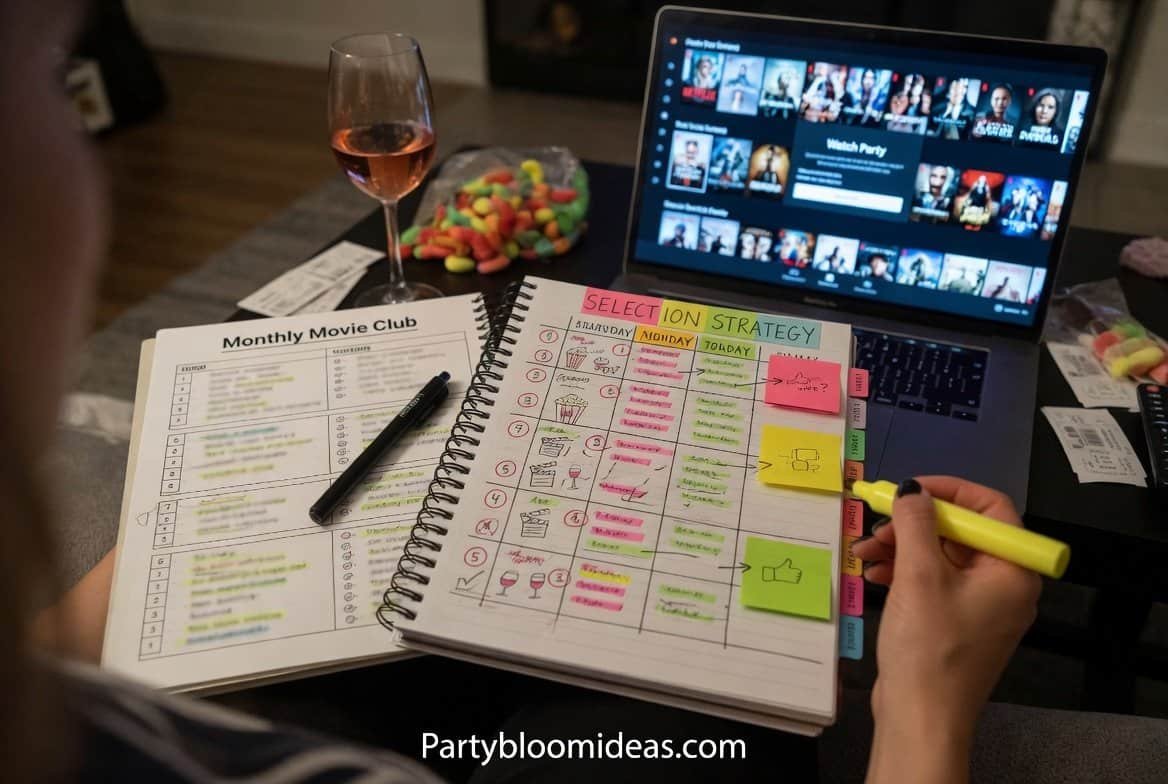
7. Movie Selection Strategy
What to watch matters almost as much as how you’re watching it. Different groups, different movies.
For kids’ movie nights (ages 4-10):
- Moana, Encanto, Frozen, Toy Story, Finding Nemo
- The Incredibles, Ratatouille, Zootopia
- Classic animated Disney films
- Start before 8:30 p.m. — kids can’t stay up past 10 for the ending
For tween/teen groups (ages 11-16):
- The Sandlot, A Goofy Movie, Princess Diaries
- Harry Potter films
- Modern hits like Enola Holmes, Wonder
- Keep it PG or PG-13 unless you’ve cleared it with all parents
For adult groups:
- Nostalgic favorites (Ferris Bueller, Grease, The Princess Bride, Back to the Future)
- Action classics (Top Gun, Indiana Jones, Die Hard)
- Summer vibes (Dirty Dancing, Mamma Mia, The Sandlot)
- Comedies (Airplane!, The Blues Brothers, Caddyshack)
For mixed-age family groups:
- Pixar films (Up, Toy Story, The Incredibles — these work for all ages)
- Classic family films (E.T., The Princess Bride, Hook)
- Live-action Disney (The Mighty Ducks, Remember the Titans for older kids)
Pro tip: Avoid long movies (over 2 hours) outdoors. By hour 2, people are fidgety, tired, and cold. Sweet spot is 90 to 110 minutes.
Copyright note: If you’re hosting a private family or friends gathering, showing a movie on a streaming service you pay for is fine. If you’re charging admission or hosting a public event, you technically need a public performance license. For a backyard party with friends, you’re in the clear.
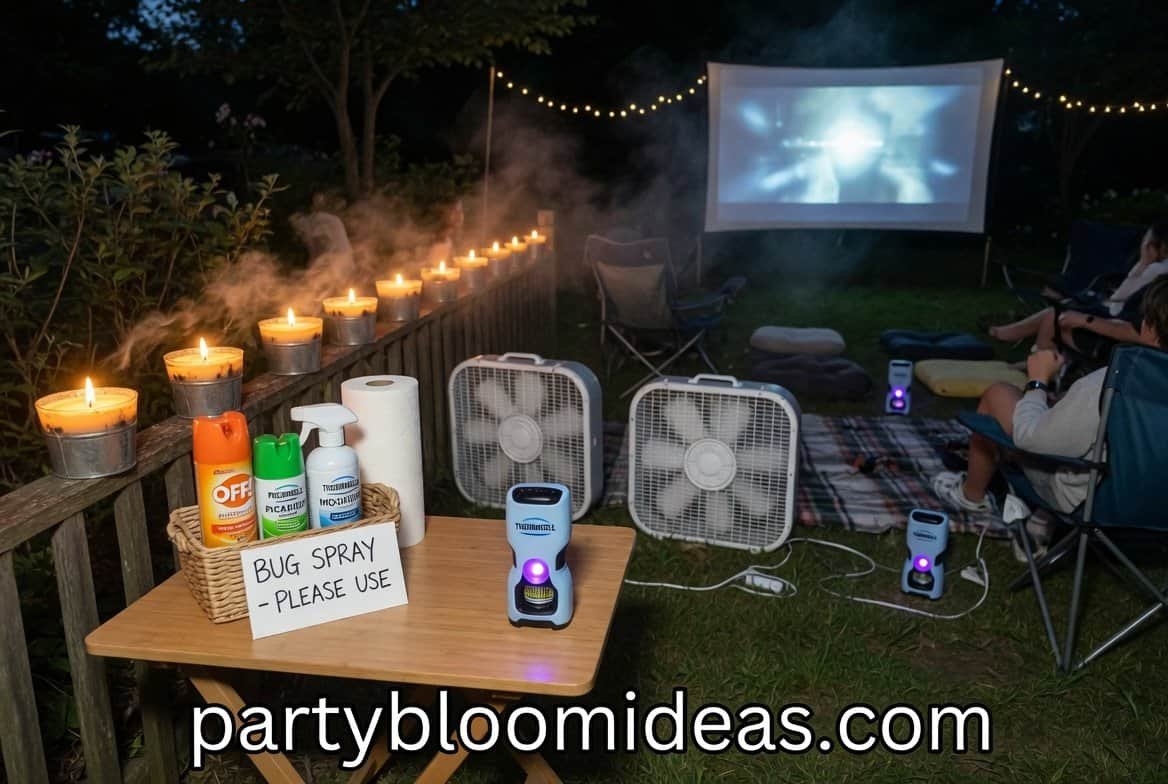
8. The Bug-Free Zone (Non-Negotiable)
Nothing ruins an outdoor movie faster than mosquitoes. This is the detail that separates amateurs from hosts who know what they’re doing.
Layered bug defense:
- Citronella candles around the perimeter (not in the viewing area — smoke blows toward faces)
- Thermacell Mosquito Repellers — these portable devices create a 15-foot mosquito-free zone. About $30 each, $5 for refills. I have three placed around my seating area.
- Bug spray station at the entry to the viewing area. A small basket with a few cans of OFF! or Picaridin spray for guests to use.
- Fans pointed at the seating area — mosquitoes can’t fly in wind over 5 mph. Two box fans running quietly behind the seats keep bugs away and help with summer heat.
Spend $50 total on bug defense. It makes or breaks the night.
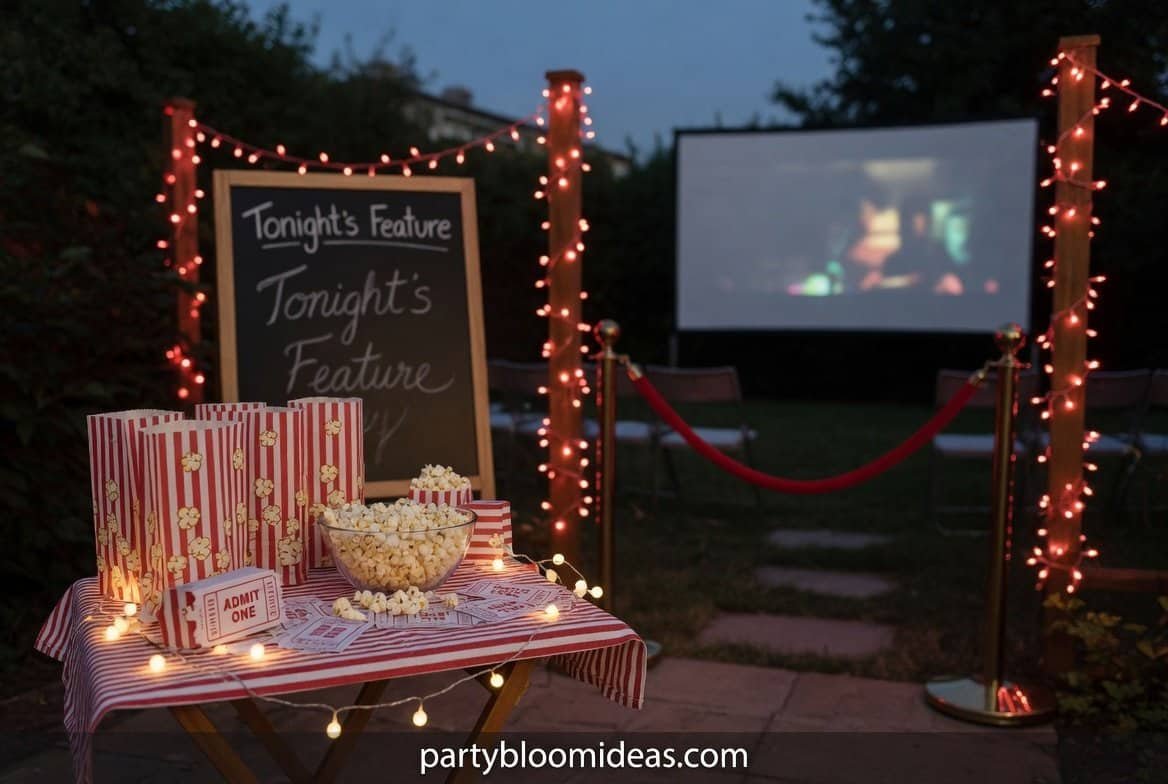
9. The Decor That Sets the Mood
You don’t need to go overboard, but a few intentional touches turn a backyard into a cinema.
Quick decor wins:
- “Tonight’s Feature” chalkboard sign at the entrance with the movie title
- Red velvet rope or red string lights delineating the “theater entrance”
- Popcorn-themed decorations — popcorn striped paper bags, red and white colors
- Tickets — print fake movie tickets with the date, movie title, and “Admit One” (kids love this)
- A marquee-style sign if you’re fancy — Etsy sells printable movie marquee signs
Keep lighting dim so decor is visible but doesn’t wash out the screen. Battery-operated fairy lights wrapped around decorations add a magical touch without too much brightness.
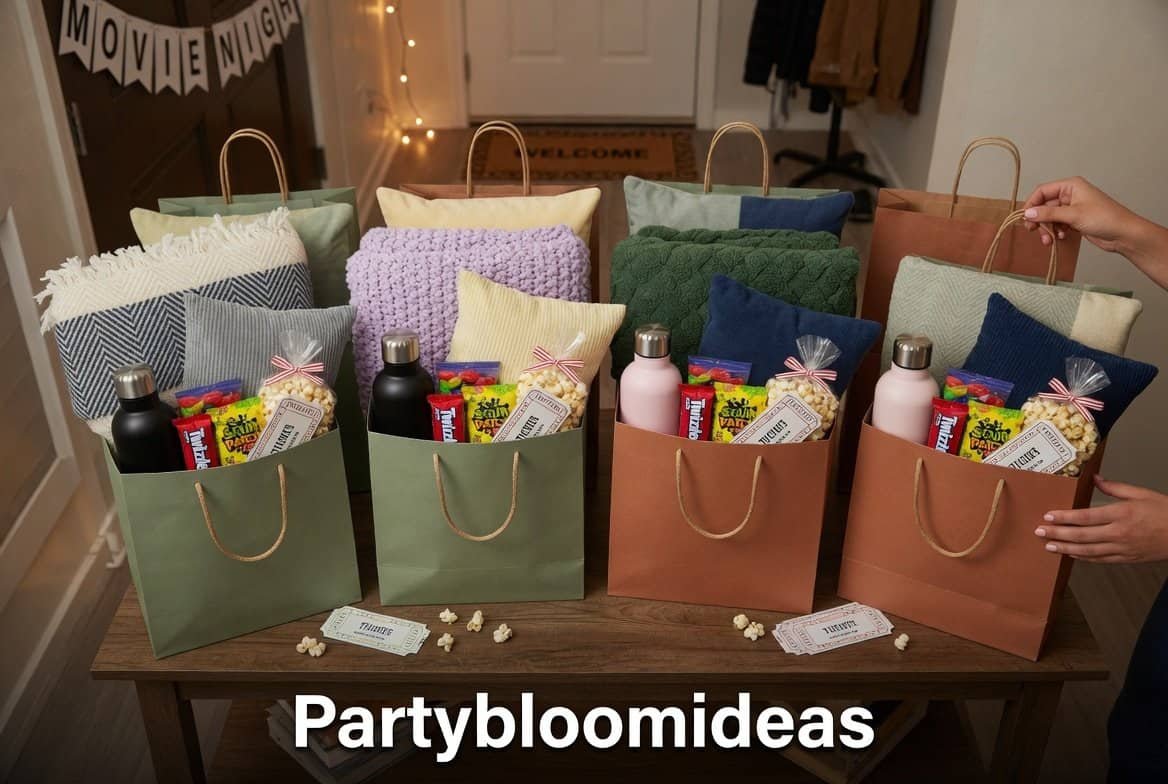
10. The Comfort Upgrade: Cozy Kit for Each Guest
If you’re hosting a special movie night, this takes it to the next level:
For each guest or family, assemble a small “cozy kit”:
- 1 throw blanket
- 1 pillow
- 1 water bottle
- A small bag of snacks (popcorn, candy)
- A printed “ticket”
Guests arrive and are handed their kit at the entrance. It makes the whole thing feel like going to an actual movie theater but way more comfortable.
Cost per kit: about $8 to $12 if you’re buying things new. Much less if you pull throws and pillows from around your house.
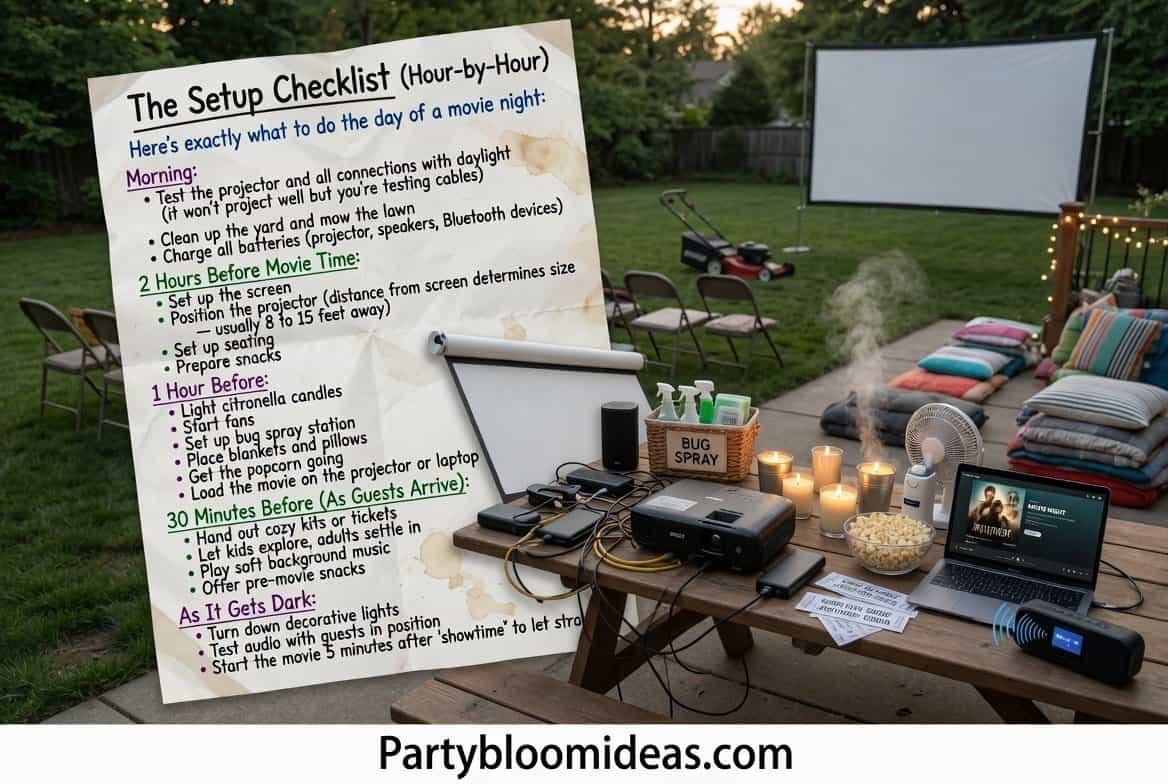
11. The Setup Checklist (Hour-by-Hour)
Here’s exactly what to do the day of a movie night:
Morning:
- Test the projector and all connections with daylight (it won’t project well but you’re testing cables)
- Clean up the yard and mow the lawn
- Charge all batteries (projector, speakers, Bluetooth devices)
2 Hours Before Movie Time:
- Set up the screen
- Position the projector (distance from screen determines size — usually 8 to 15 feet away)
- Set up seating
- Prepare snacks
1 Hour Before:
- Light citronella candles
- Start fans
- Set up bug spray station
- Place blankets and pillows
- Get the popcorn going
- Load the movie on the projector or laptop
30 Minutes Before (As Guests Arrive):
- Hand out cozy kits or tickets
- Let kids explore, adults settle in
- Play soft background music
- Offer pre-movie snacks
As It Gets Dark:
- Turn down decorative lights
- Test audio with guests in position
- Start the movie 5 minutes after “showtime” to let stragglers get settled
Budget Breakdown
For a first-time backyard movie setup:
| Item | Budget Option | Mid-Range |
|---|---|---|
| Projector | $100 | $300 |
| Screen | $40 (DIY) | $150 (inflatable) |
| Sound | $50 (basic speaker) | $150 (good Bluetooth) |
| Seating | Free (use what you have) | $200 (camp chairs + cushions) |
| Snacks/decor | $40 | $75 |
| Bug defense | $20 | $60 |
| Total | $250 | $935 |
Honest recommendation: start with the budget setup for your first movie night. Test it out. If you love it, upgrade the projector and sound the next year. The budget version works for casual family movie nights; the mid-range is better if you want to host regular summer gatherings.
Frequently Asked Questions
What size projector do I need for a backyard movie night?
For a 10-foot screen and small group (under 15 people), a projector with 1,500 to 2,500 lumens works well. For larger setups (20+ people or bigger screens), look for 3,000+ lumens. Budget projectors around $100 work for pitch-dark viewing but struggle in any ambient light.
How dark does it need to be to watch an outdoor movie?
Completely dark for best quality. That means waiting until 30 to 60 minutes after sunset in summer. In August, that’s around 9 p.m. In June (longer days), it’s closer to 9:30 or 10 p.m. Plan your movie start time accordingly.
Can I project onto a white wall or garage door instead of a screen?
Yes, and it often looks great. The wall needs to be smooth (no heavy brick or stucco texture) and truly white or very light. A white garage door is perfect. Check the wall with your projector during a trial run before committing.
What do I do if it rains?
Have a backup plan. A garage with the door open can work as an indoor-outdoor viewing spot. Or move inside and show the movie on a big TV. Check the weather 48 hours before your event and reschedule if heavy rain is forecast.
How do I hook up my laptop to my outdoor projector?
Most projectors accept HDMI, so a laptop with HDMI (or USB-C to HDMI adapter) plugs in directly. Audio goes through the projector’s built-in speakers or via a 3.5mm cable to an external speaker. If your projector supports Bluetooth, you can stream audio wirelessly to a portable speaker.
What’s the best time to start an outdoor movie?
Start 30 to 45 minutes after sunset. This gives guests time to arrive, settle in, get snacks, and let the sky fully darken. Most summer outdoor movies start between 8:30 and 9:30 p.m. For kids-friendly events, earlier is better — even if the image is a bit washed out at first.
Are outdoor movie nights family-friendly for young kids?
Absolutely, with a few adjustments. Choose movies under 90 minutes. Start before 8:30 p.m. so the movie ends before bedtime. Have plenty of blankets and pillows for kids to get comfortable. And have an escape plan — snacks and a mid-movie break if kids get restless.
Related Articles
- 30 Best Summer Party Ideas for the Ultimate Backyard Bash
- 15 Best BBQ Party Ideas for a Summer Cookout Everyone Loves
- 15 Pool Party Ideas That Make a Splash
- Best Summer Party Decorations for Your Backyard
Read More : Best Summer Party Decorations for Your Backyard