🎃 Quick Answer
The best DIY Halloween decorations look expensive but cost a few dollars: floating cheesecloth ghosts, apothecary potion bottles from empty wine bottles, glam spray-painted skulls, and glowing eye luminaries in the bushes. The two rules that make cheap materials read as intentional are matte spray paint only (never gloss) and evaluating every display at night with flickering LED candlelight. Most ideas here run $5–$30 and one afternoon.
A great DIY Halloween setup can look like it cost a few hundred dollars and actually cost under $40 and one Saturday afternoon. Picture stacked books with cracked spines spray-painted matte black on the mantle, a row of dark bottles labeled Belladonna Extract and Eye of Toad with candles flickering between them, and cheesecloth draped from a pergola in soft, billowing waves. The apothecary bottles? Empty wine bottles, food coloring, and free printed labels.
That’s DIY Halloween decorating done right. Here are the best cheap DIY Halloween decorations worth making — what actually works, what’s overrated, and how to pull it off without breaking the bank or your weekend.
What DIY Halloween Decorations Actually Mean (And What They Don’t)
“DIY Halloween decorations” covers everything from a kid’s toilet paper mummy to a full gothic manor transformation. This is the middle ground — ideas that look genuinely impressive, that guests photograph, that don’t scream “I grabbed this from a bin at the dollar store,” even when that’s exactly where part of it came from.
What it IS:
- Specific projects with materials lists, real USD costs, and honest time estimates
- Ideas that use Dollar Tree, Target, Amazon, and things you already own
- Decorations that create a mood — not just a checklist of Halloween symbols
- Projects beginners can finish in one sitting
What it ISN’T:
- Buying a $150 animatronic prop and calling it DIY
- Hot-gluing orange craft pom-poms onto everything and calling it a theme
- A project that requires a Cricut machine, six hours, and a craft degree
The trick is picking three or four ideas that work together — same color palette, same mood — instead of doing fifteen different things that fight each other visually.
Why DIY Is Winning Halloween in 2026
Halloween decoration spending has climbed steadily in recent years and now rivals candy spending, with discount stores becoming one of the top shopping destinations for decor. Total Halloween spending sits in the multi-billion-dollar range, so there’s a lot of money on the table — and a real opportunity to undercut store-bought prices with DIY that looks just as good, or better.
The math is simple: what a specialty store sells for $15 per tombstone, pool noodles deliver for $1.25. What an online shop charges $40 for in an apothecary bottle set, empty wine bottles and food coloring replicate for $8. Done right, nobody knows the difference.
What Are the Best Cheap DIY Halloween Decorations for 2026?
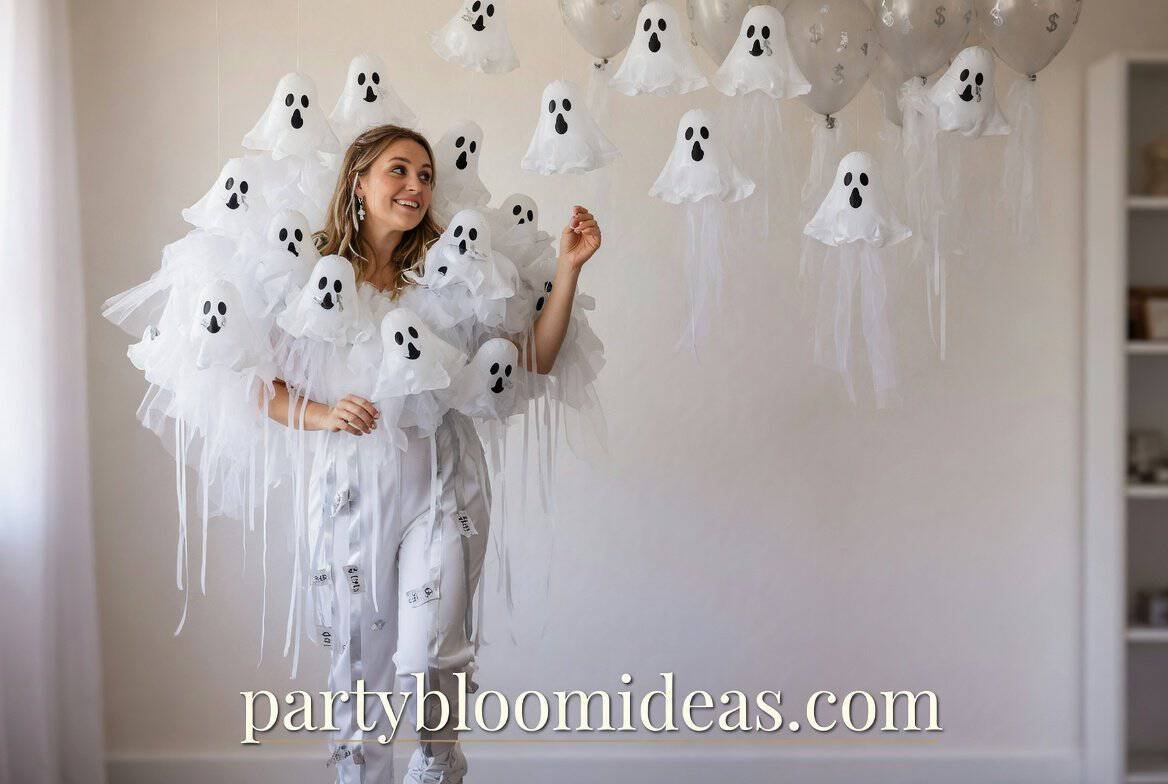
1. Floating Ghost Cluster
Best for: Front porch, outdoor trees, beginners | Budget: $15–$20 for 8–10 ghosts
This is the one that looks like you spent $80 at a specialty shop — for about $15 and forty-five minutes. Take round white paper lanterns ($1.25 each), drape white cheesecloth over them letting excess hang loosely below, cut two oval eyes from black felt and hot-glue them on. Thread fishing line through the top, drop a battery LED tea light inside, and hang at staggered heights from porch beams, tree branches, or a shepherd’s hook.
At dusk, with flickering tea lights inside, these are genuinely unsettling. The key is quantity: three ghosts looks cute, eight ghosts looks haunted. The soft glow pulsing behind the cheesecloth and the way they shift in the breeze keeps guests on the porch longer than they planned.
Color palette: Pure white, black felt accents, warm amber glow. Materials: Paper lanterns ($1.25 each), white cheesecloth ($3–4/yard), black felt scraps, battery flickering LED tea lights ($3–5/pack), fishing line ($2).
💡 Pro Tip: Use battery flickering LED tea lights, not real candles. The flickering battery version looks identical and won’t risk a fire on cheesecloth.
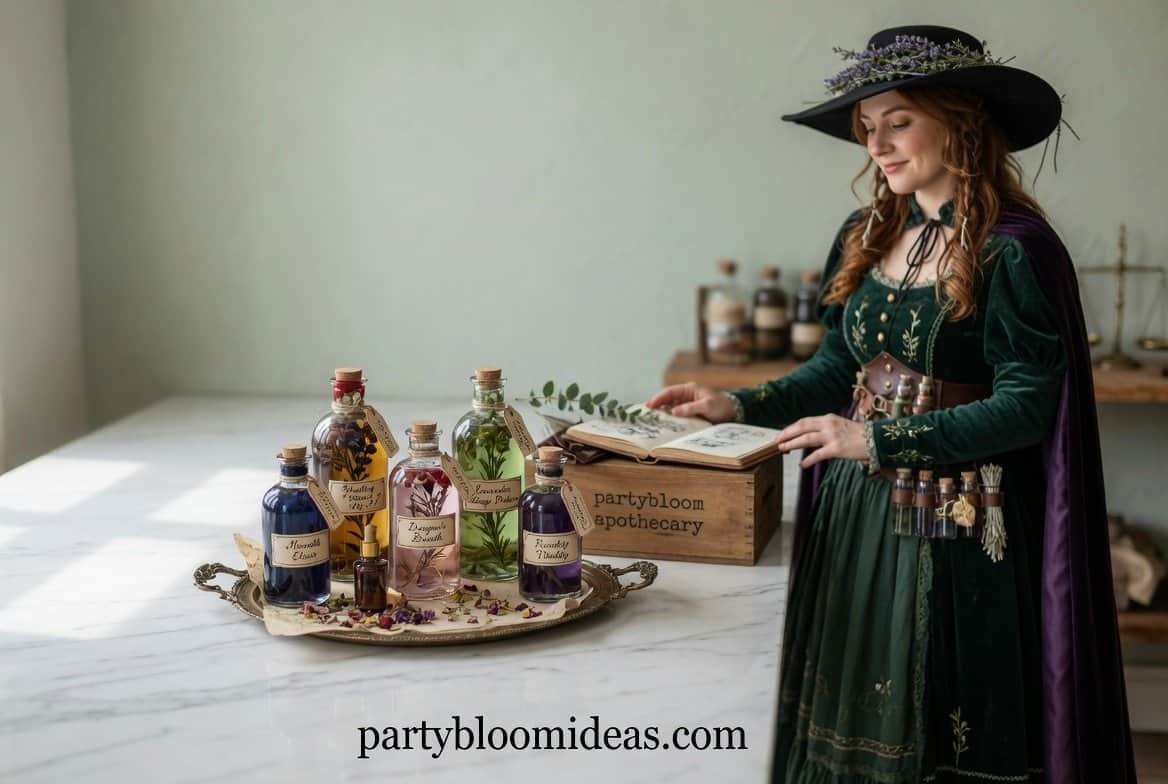
2. Apothecary Potion Bottle Display
Best for: Mantle, dining table, indoor shelf | Budget: $8–$12 for 10–15 bottles
The base ingredient is free: empty bottles. Start collecting wine, olive oil, hot sauce, and fancy soda bottles in September, rinse them, remove labels, and you have the skeleton of a display that looks like it belongs in an actual apothecary shop.
Fill each bottle with water and two to three drops of food coloring — deep purple, black, forest green, and dark amber. Print free apothecary labels from Pinterest or Canva, distress the edges by tearing or burning slightly, and glue them on. Spray two or three bottles entirely matte black for contrast, and add adhesive craft gems to a few stoppers. Cluster the collection on a tray or directly on your mantle with black taper candles between them — the flicker of candlelight through colored glass photographs beautifully every time.
Color palette: Deep purple, forest green, amber, matte black, gold accent details. Materials: Empty glass bottles (free), food coloring ($2–$3), free printable labels, matte black spray paint ($4–$6), craft gems ($1.25).
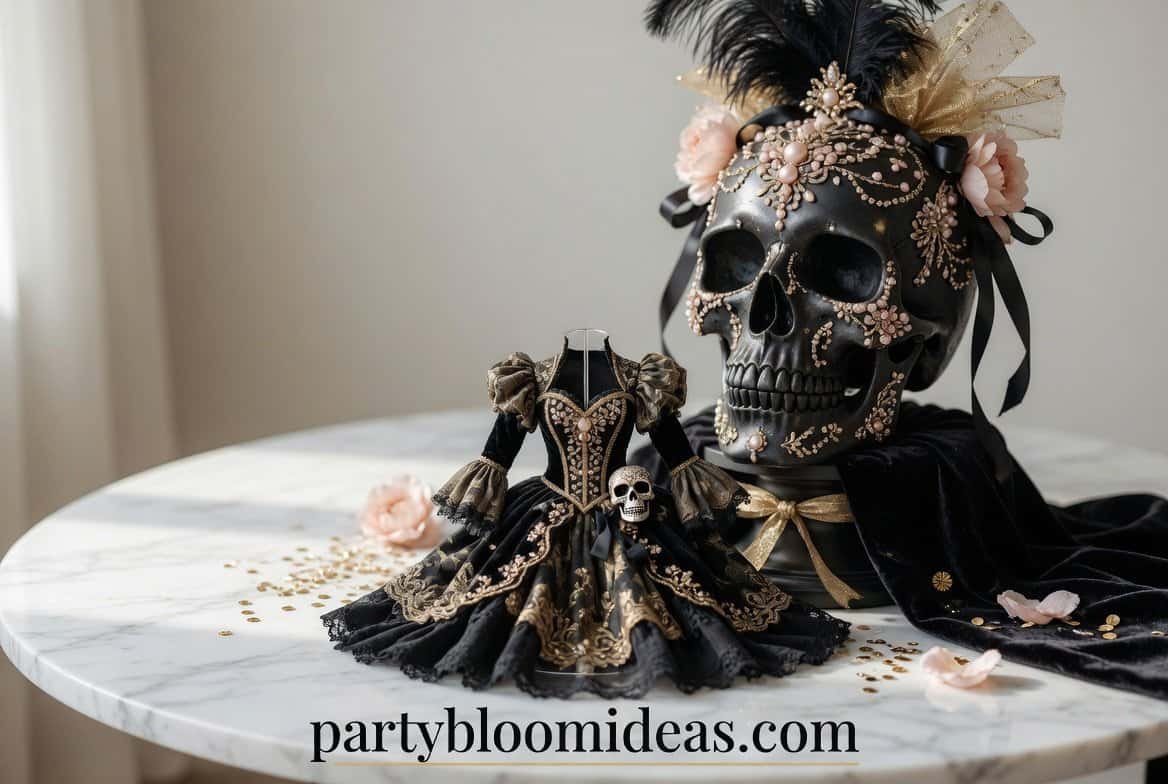
3. Glam Skull Centerpiece
Best for: Dining table, adult parties, sophisticated aesthetic | Budget: $12–$18 for a 3–5 skull arrangement
Done right, this looks like a $60 home-store purchase. Done wrong, it looks like a craft project — the difference is matte spray paint and deliberate gem placement. Buy three to five plastic skulls ($1.25 each), spray them outside with matte white or metallic gold (never gloss), and let them dry fully, at least two hours. Apply adhesive rhinestones in a radial pattern outward from the eye sockets, not scattered randomly. Arrange on a mirrored charger or dark tray with faux black roses and pillar candles at varying heights.
The whole project takes about ninety minutes including drying time and costs under $18 for a five-skull centerpiece that reads as genuinely impressive.
Color palette: Matte white or metallic gold skulls, black roses, warm candlelight, silver gem accents. Materials: Plastic skulls ($1.25 each), matte gold or white spray paint ($4–$6), adhesive rhinestones ($1.25–$3), charger plate or dark tray, faux black roses ($1.25), pillar candles ($3–$5).
💡 Pro Tip: The single most important rule in dollar-store DIY: matte spray paint only. Gloss reads as cheap; matte reads as intentional and chosen. One $5 can of matte paint is the reason these centerpieces fool guests.
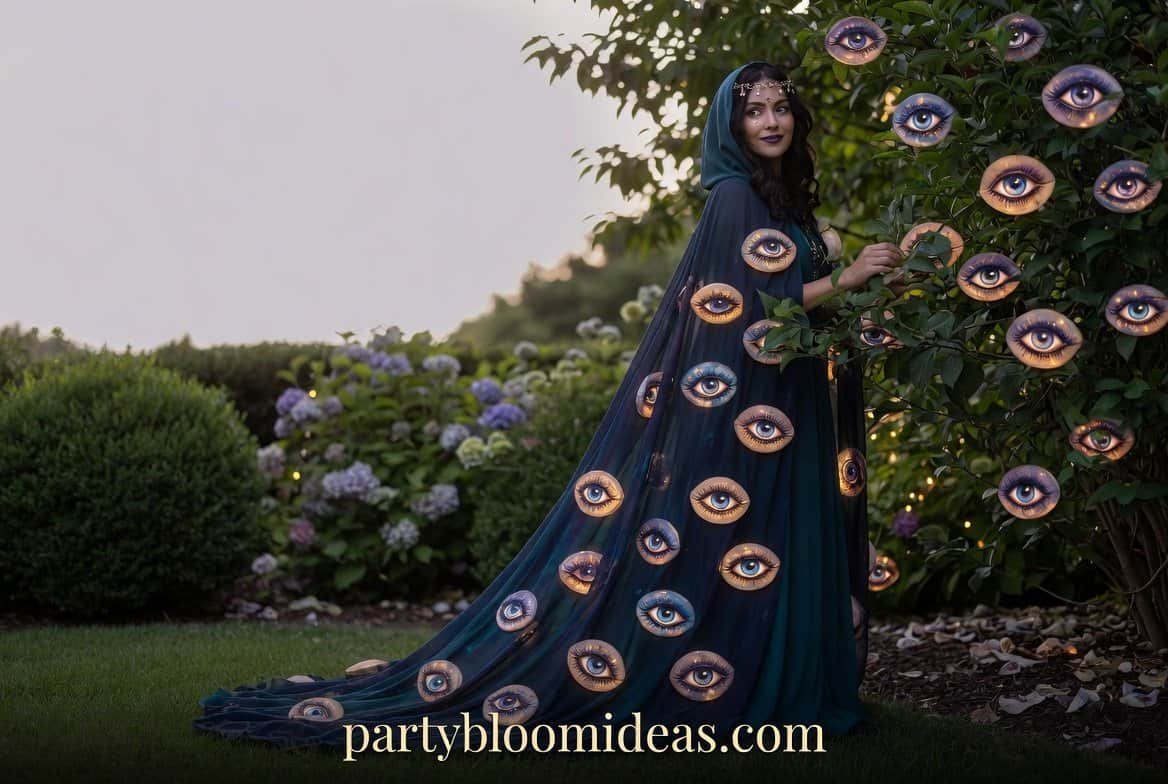
4. Glowing Eye Luminaries in the Bushes
Best for: Garden walkways, outdoor shrubs, night-time effect | Budget: $8–$12 for 8–10 jars
For pure effect-to-effort ratio, this is the best idea on the list. Collect glass jars or bottles, cut pairs of oval “eyes” from yellow or green glow tape or reflective contact paper and stick them to the outside, and drop a battery flickering tea light inside. Place them deep in garden bushes, under hedges, or along the dark edge of your walkway.
When guests arrive at night, they’re greeted by a dozen pairs of glowing eyes peering from the shrubbery — the kind of effect that makes grown adults stop mid-step. That’s $10 and twenty-five minutes of work.
Materials: Glass jars or bottles (free), yellow or green glow tape or reflective contact paper ($3–$5), battery flickering LED tea lights ($3–$5/pack).
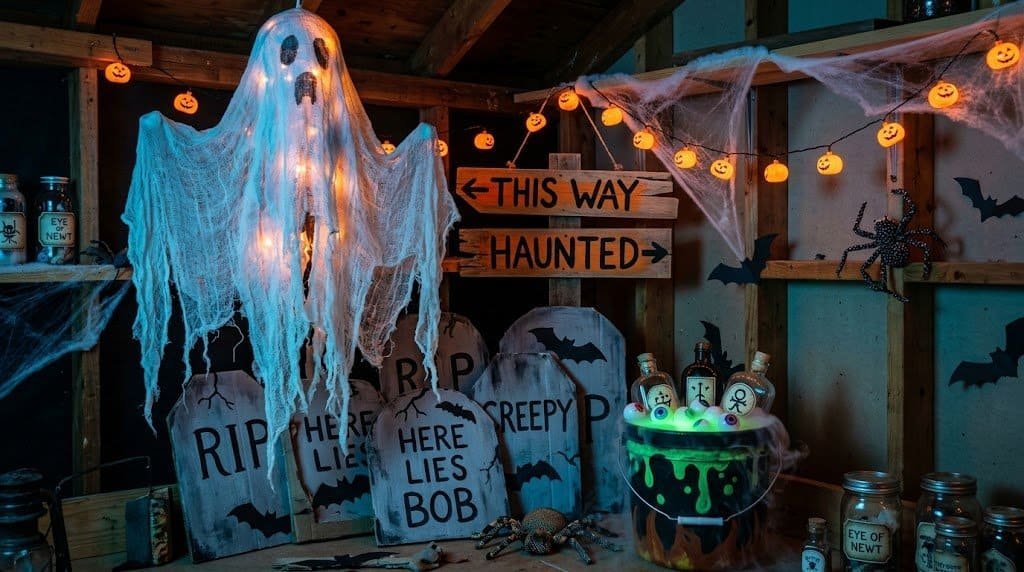
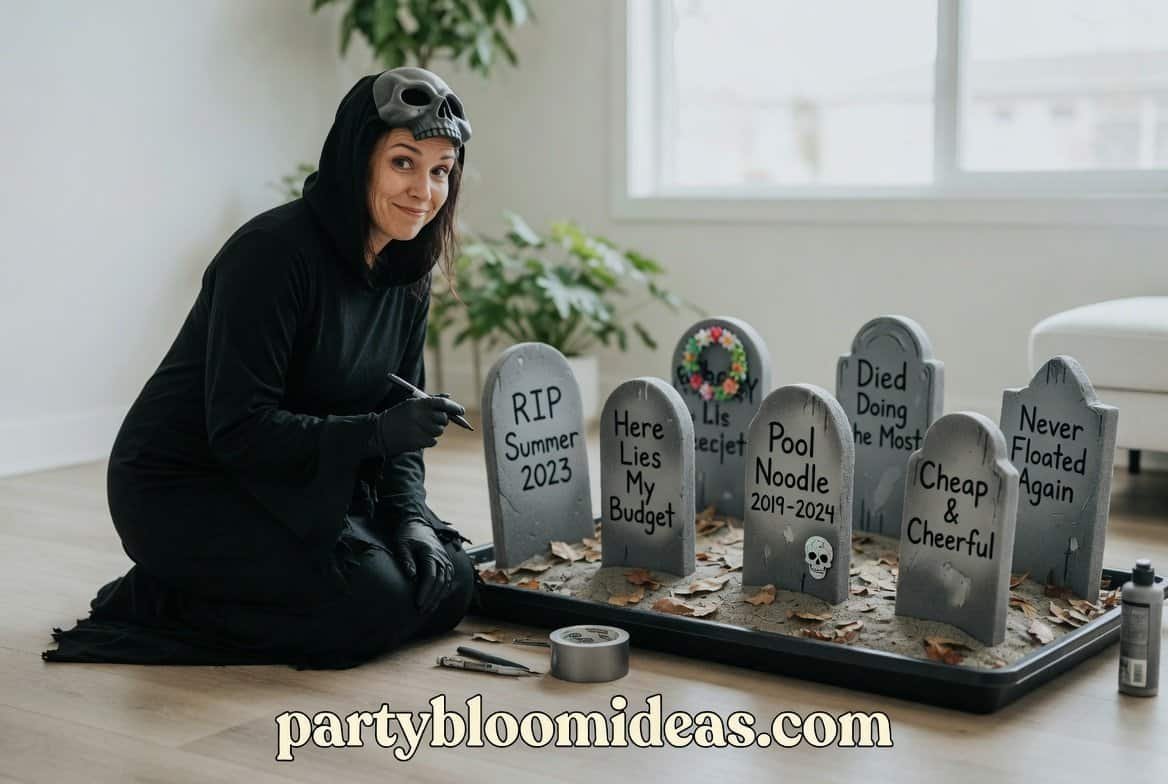
5. Pool Noodle Graveyard — The Cheap Tombstone Method
Best for: Front yard, walkway, neighborhood visibility | Budget: $15–$20 for 6–8 tombstones
Spending $10–$15 per foam tombstone at a specialty store is a waste of money — pool noodles cost $1.25 each and create the same effect. Buy six to eight, cut each one to a flat face or use upright with a flat top cut at a slight angle for the classic rounded shape, and spray them gray. Once dry, use black craft paint for epitaphs: Here Lies My Motivation, RIP Good Sleep, Beloved Party Guest — Gone Too Soon. Stake them into the lawn with wooden garden dowels, and add a solar ground light at the base of each for dramatic upward shadowing at night.
The result is indistinguishable from store-bought foam tombstones costing four times as much.
Materials: Pool noodles ($1.25 each), gray spray paint ($4–$6), black craft paint ($2–$3), wooden garden stakes ($2–$3).
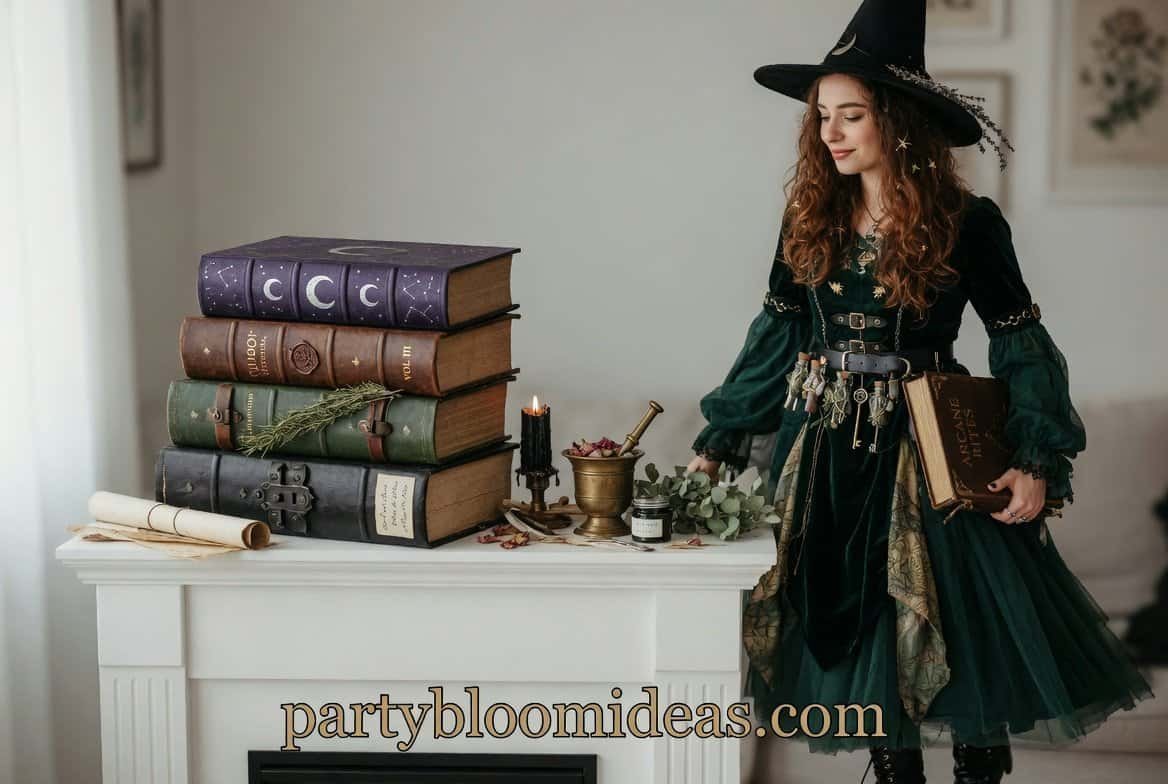
6. Spell Book Mantle Stack
Best for: Indoor mantle, bookshelf display, gothic/witchy aesthetic | Budget: $10–$20 for full display
Grab eight to ten large hardcover books from a thrift store for $1–$2 each — titles don’t matter, they’re getting painted. Spray them outside in matte black or dark forest green. Once dry, use gold acrylic paint and a small brush to write fake titles on the spines: Potions Vol. III, The Forbidden Rites, Compendium of Dark Arts. Stack them in a slightly precarious tower on your mantle, add pillar candles at different heights, and drape a bit of cheesecloth loosely over one corner.
This is the decoration that looks like it’s been there for thirty years — collected, not assembled. It takes the longest to set up (about two hours with drying time) but generates the most comments, and nobody guesses the books came from a thrift store.
Color palette: Matte black, dark green, gold lettering, warm candlelight, soft gray cheesecloth. Materials: Thrift-store hardcover books ($1–$2 each), matte black or dark green spray paint ($4–$6), gold acrylic paint ($2), pillar candles ($3–$5), cheesecloth scraps.
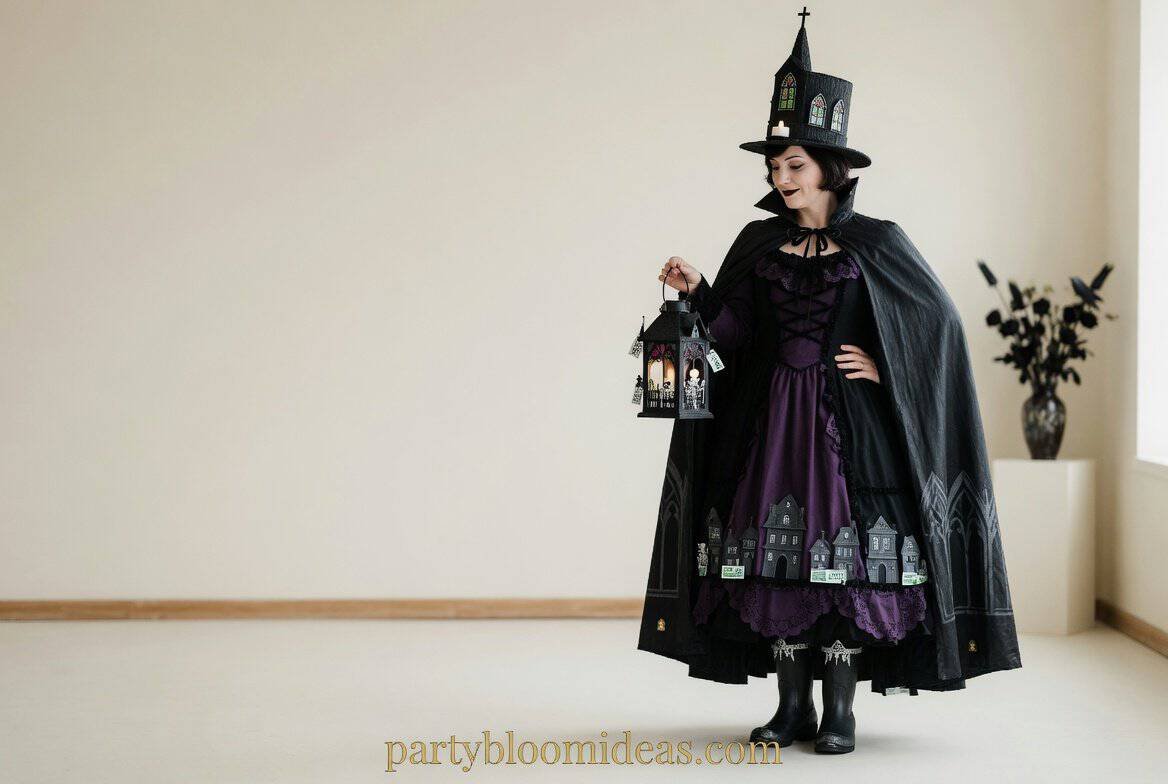
7. Gothic Village
Best for: Indoor mantle display, adult gatherings | Budget: $20–$30 for full village
This is the highest-effort project on the list, with the highest payoff. Dollar stores sell ceramic Christmas houses and small figurines every fall — the kind meant for little holiday village displays. Buy ten to twelve, take them outside, and spray paint every single piece in matte black. Arrange them on a mantle or table with faux green moss at the base, miniature LED string lights weaving through the buildings, and a few skull accents tucked between structures.
The effect is a Victorian ghost town that looks like a $200 collector’s Halloween village. Nobody believes the source until they see the receipts.
Materials: Ceramic village pieces ($1.25–$2 each), matte black spray paint ($4–$6), mini LED string lights ($3–$5), faux moss ($2–$3), skull accents ($1.25 each).
💡 Pro Tip: Add depth by building levels — stack a few pieces on small books or boxes underneath the moss before arranging the houses on top. The height variation is what makes it look like a real townscape.
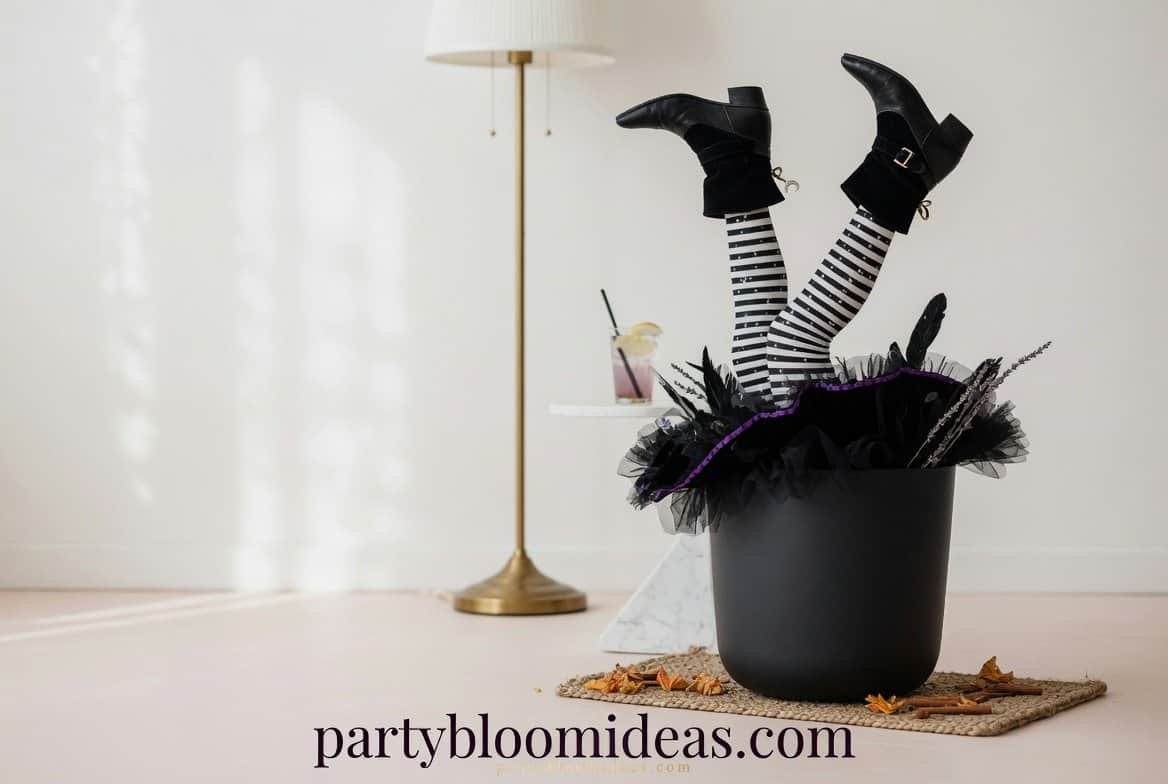
8. Witch Legs in the Planter
Best for: Front porch/yard, high neighborhood visibility | Budget: $8–$15
If you want restrained, understated decor, skip this one. If you want every neighbor who walks by to stop and take a photo, this is it. Take a large porch planter, insert two wooden dowels deeply into the soil, slide pool noodles over them as “legs,” then pull striped stockings over the pool noodles. Add witch shoes or thrift-store boots at the bottom, and position everything sticking straight up — as if a witch crash-landed headfirst. Place a witch hat nearby at a jaunty angle.
It doesn’t fit a restrained aesthetic at all — but it delights every single person who sees it. Sometimes delight is the point.
Materials: Striped stockings ($1.25), pool noodles ($1.25 each), witch boots/shoes ($1.25–$3), wooden dowels, witch hat ($1.25).
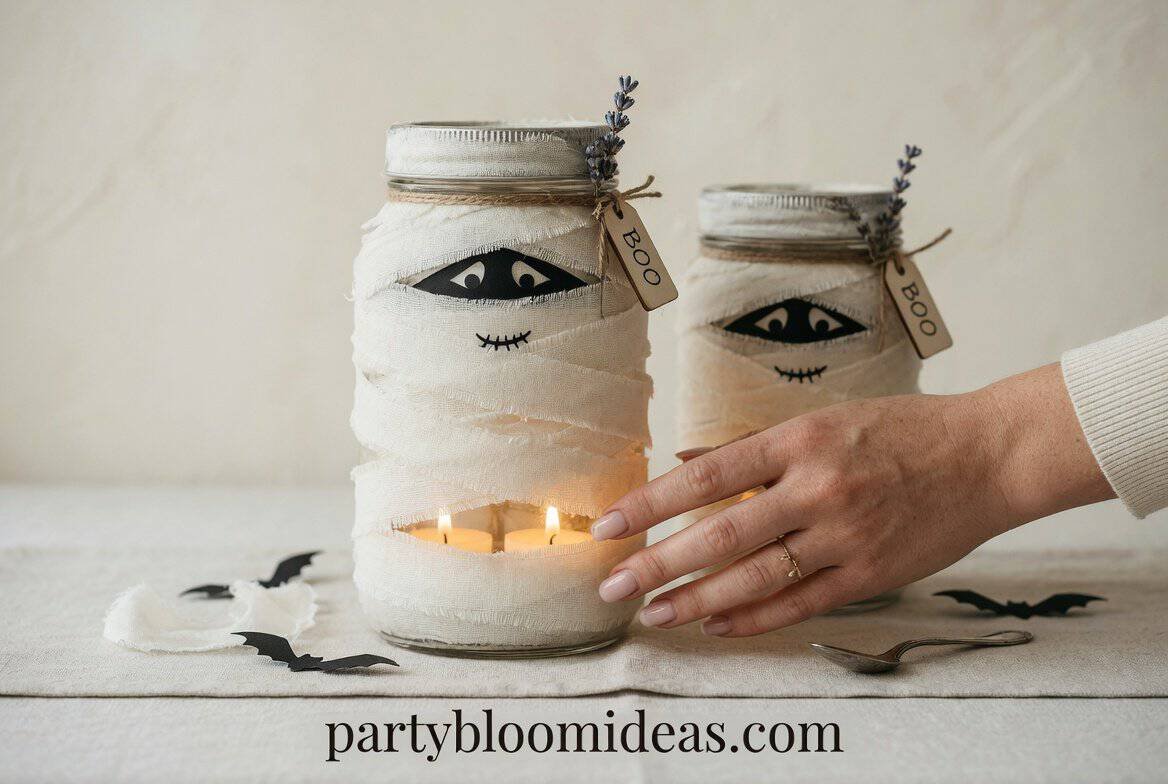
9. Mason Jar Mummy Candle Holders
Best for: Indoor tables, kids’ parties, family craft project | Budget: $10–$15 for 6–8 jars
Old pasta sauce jars work perfectly. Wrap each one in white medical gauze or cheesecloth, overlapping in messy layers, hot-glue two googly eyes peeking out between the wraps, and drop a battery flickering tea light inside. A row of eight on a table creates a warm, slightly spooky glow — the gauze softens the candlelight and the googly eyes catch reflections. Kids can make these start to finish (with adult supervision on the hot glue). Thirty minutes, $12–$15 for the whole set.
Materials: Old glass jars (free), white medical gauze or cheesecloth ($3–$4), googly eyes ($1.25), battery flickering LED tea lights ($3–$5/pack), hot glue gun.
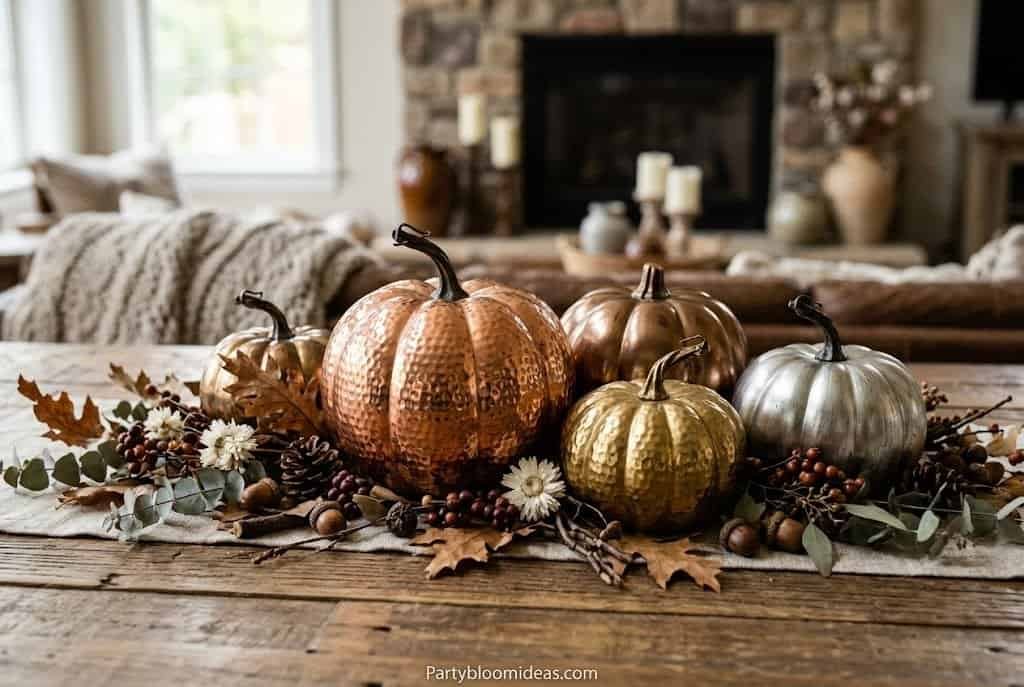
10. Metallic Pumpkin Arrangement
Best for: Porch, mantle, dining table, adults | Budget: $15–$20 for 5-piece arrangement
Faux pumpkins — the foam or plastic ones — spray-painted metallic gold or bronze, arranged on charger plates with black satin ribbon tied at the stems and a bit of moss at the base. This arrangement photographs beautifully, lasts the entire fall season without rotting, and consistently draws “where did you get those?” from guests. The metallic finish is everything — it reads as intentional and modern rather than seasonal and disposable. Group them in odd numbers (three or five) with different sizes, and let the charger plate unify the arrangement.
Materials: Faux pumpkins ($1.25 each), metallic gold or bronze spray paint ($5–$7), charger plates ($1.50 each), black ribbon ($2–$3), faux moss ($2).
Budget vs. Store-Bought: How DIY Halloween Decorations Stack Up
| Decoration | DIY + Dollar-Store Cost | Store-Bought Equivalent | Visual Difference |
|---|---|---|---|
| 8–10 floating ghosts | $15–$20 | $60–$80 (specialty Halloween shop) | None — identical at dusk |
| Apothecary bottle display (12 bottles) | $8–$12 | $40–$60 (online shops) | Indistinguishable |
| Glam skull centerpiece (5 skulls) | $12–$18 | $75–$150 (home/decor stores) | Identical with matte paint |
| Graveyard (6–8 tombstones) | $15–$20 | $60–$120 (specialty store) | Same foam material |
| Gothic village display | $20–$30 | $150–$200 (collector’s sets) | Near-identical |
| Witch legs planter | $8–$15 | $30–$50 (party stores) | Same or better |
The DIY column wins on price by 70–85% consistently. On atmosphere it’s a tie, or the DIY version wins — because you’ve personalized it.
What Are the Most Common DIY Halloween Decoration Mistakes?
The mistake most hosts make is doing too many things. Seventeen different DIY ideas scattered around the house with no consistent color or mood reads as busy, not haunted. Pick one hero display — your mantle or your front porch — and make it exceptional, then add two or three smaller accents that match it. Other common mistakes:
- Using gloss spray paint. Gloss reads plasticky and cheap; matte reads intentional and collected. This one rule changes everything.
- Judging your setup in daylight. Your ghosts look okay in afternoon sun; at 8 PM with a solar floodlight and flickering tea lights, they’re extraordinary. Always evaluate in the dark.
- Buying animated props. Those $50–$150 screaming/light-up props tend to break by November 1st — the money is better spent on three more DIY displays.
- Over-orange-ing. Atmosphere that feels collected skips orange almost entirely. Black, white, deep green, gold, and burgundy create mood; orange and purple from a party-supply store creates a party-supply store.
- Spreading decorations too thin. One gorgeous concentrated display beats twenty average things spread across every surface.
🎉 Quick Summary
✅ Best for: Front porch displays, mantle styling, Halloween parties, yard haunts, family DIY nights
💰 Budget range: $5–$30 per idea ($50–$100 for a full home setup)
⏱ Setup time: 20 minutes (mummy jars) to 3 hours (gothic village)
🌟 Top pick: Glowing eye luminaries in the bushes — $10, 25 minutes, maximum guest reaction
📌 Don’t skip: The matte spray paint rule. It’s the single transformation that makes every dollar-store item look intentional.
People Also Ask
How do you make Halloween decorations look expensive on a cheap budget? Three rules: matte spray paint only (never gloss), group items in odd numbers on a tray or charger plate, and evaluate your display at night with flickering LED candlelight. Lighting transforms cheap materials into atmospheric decorations — any plastic skull looks intentional in the dark with the right light source.
What is the cheapest Halloween decoration you can make at home? Milk jug ghost lanterns cost essentially nothing — empty plastic milk jugs, a Sharpie, and $3–$5 in battery tea lights. Glowing eye bush luminaries are second, at $8–$12 using jars you already own. A black paper bat wall cascade runs $3–$8 in cardstock.
What dollar-store items are best for Halloween DIY decorations? Top performers: plastic skulls (transform with matte spray paint and rhinestones), paper lanterns (ghost clusters), cheesecloth (draping, mummy jars), faux pumpkins (metallic makeover), ceramic village pieces (gothic village when painted black), pool noodles (tombstones and witch legs), and battery LED tea lights (essential for every project).
How early should you put up DIY Halloween decorations? Early October is the sweet spot for outdoor setups — it gives the neighborhood 3–4 weeks to enjoy the display. For a party-specific setup, three to five days before gives you time to troubleshoot and photograph. For the gothic village or spell book stack (multiple hours with drying time), plan a weekend 7–10 days out.
What are the best outdoor DIY Halloween decorations on a $20 budget? The pool noodle tombstone graveyard ($15–$20 for 6–8 stones), the floating ghost cluster ($15–$20 for 8–10 ghosts), a giant black trash bag spider web ($5–$8), and the glowing eye luminaries ($8–$12) all land under $20 with serious outdoor visual impact.
Frequently Asked Questions
What are the easiest DIY Halloween decorations for absolute beginners? Mummy jar candle holders, milk jug ghost lanterns, and glowing eye bush luminaries. All three require zero advanced skills — just jars, gauze, tape, and battery tea lights — each taking under thirty minutes and under $12. Start with the eye luminaries: the payoff is highest and the process is simplest.
How do I make apothecary potion bottles for Halloween? Collect empty wine, olive oil, or soda bottles through September, rinse and remove labels. Fill with water plus two to three drops of food coloring — deep purple, forest green, and amber look most authentic. Print free apothecary labels, tear the edges for a weathered effect, and Mod Podge them on. Spray one or two bottles matte black for variation, then cluster on a tray with dark candles.
What household items can I turn into Halloween decorations? Empty glass bottles (potion display), old hardcover books (spell book stack), pasta sauce jars (mummy holders), plastic milk jugs (ghost lanterns), pool noodles (tombstones or witch legs), cheesecloth or gauze (ghosts, draping, wrapping), old pillar candles, thrift-store frames (shadow box), and dried branches in a dark vase. The best Halloween setups use almost zero specifically-purchased Halloween items.
How do I make cheesecloth ghosts for Halloween? Buy white cheesecloth by the yard ($3–$4/yard), cut into large squares, and drape over a balloon, a paper lantern, or a ball of crumpled newspaper. The lantern option is best — it holds the shape and houses a battery tea light inside. Add black felt eyes and hang with fishing line at staggered heights. Twelve inches to six feet of height variation makes it look professionally done.
What outdoor DIY Halloween decorations hold up in wind and rain? Pool noodle tombstones (weighted by the ground stake), witch legs in a heavy planter (the planter anchors everything), and the trash bag spider web (flexible enough to move with wind). The floating ghost cluster handles light wind beautifully — the movement adds to the effect. Avoid anything paper-based outdoors; it won’t survive rain.
How do I make glam skulls from dollar-store supplies? Buy plastic skulls ($1.25 each), take them outside, and apply two coats of matte white or metallic gold spray paint, letting them dry fully between coats. Apply adhesive rhinestones starting from the eye-socket edges and radiating outward in a deliberate pattern. Arrange on a dark tray or mirrored charger with faux black roses and pillar candles. Total cost per skull: $3–$4; perceived value closer to $25.
Are animated Halloween props worth buying? Generally no. The $50–$150 screaming/light-up animated props tend not to survive to a second Halloween season — the motor usually goes first. For $50, you could build a full gothic village, three ghost clusters, and a tombstone graveyard that will look better, last longer, and create more atmosphere.
How do I create a cohesive Halloween decoration theme on a budget? Pick one aesthetic — witchy/gothic, elegant macabre, or family-spooky — and commit to a two- to three-color palette. Witchy/gothic: black, gold, forest green. Elegant macabre: matte white, antique gold, deep burgundy. Family-spooky: orange, black, white. Then select three to four ideas that fit that palette rather than doing everything at once. Three cohesive ideas look deliberately styled; twelve unrelated ones look like you couldn’t decide.
What’s the best DIY Halloween decoration for a small apartment? The apothecary bottle display (contained to one surface, no installation), mason jar mummy candle holders (small footprint, big impact), and a bat wall cascade (removable command strips, no wall damage). All three work beautifully in small spaces and don’t require outdoor access.
How do I hang outdoor Halloween decorations without damaging my home? Outdoor command strips and hooks for lightweight items — bats, small garlands, ghost clusters under five pounds. Shepherd’s hooks planted in the lawn for hanging ghost clusters and lanterns. Fishing line strung between trees or from existing porch hardware disappears completely at night. A full porch can be decorated every year using zero nails.
Can dollar-store Christmas village pieces really look like a Halloween display? Yes — one of the best hacks on this list. The ceramic houses, trees, and figurines sold for fall/holiday displays are structurally similar to collector Halloween village pieces that sell for $15–$25 each. Spray paint everything matte black, add mini LED lights and faux moss, and the transformation is complete. Nobody identifies the source.
What spooky crafts are good for adults who want a sophisticated Halloween look? The apothecary bottle display, the spell book mantle stack, the glam skull centerpiece, and the gothic village all read as deliberate rather than costumed. They skip the traditional orange-and-purple scheme entirely, leaning into blacks, deep greens, golds, and whites for a more sophisticated, less “party supply store” atmosphere.
The whole strategy is simple: look at your space, pick your three best display surfaces (mantle, porch, entry table), and choose one cohesive idea per surface. Three surfaces, three cohesive displays — that reads as deliberate, and it’s all it takes. Start with the glowing eye luminaries, then build from there.
Read More: 15 Baby Shower Ideas
30 Halloween Party Ideas for Adults