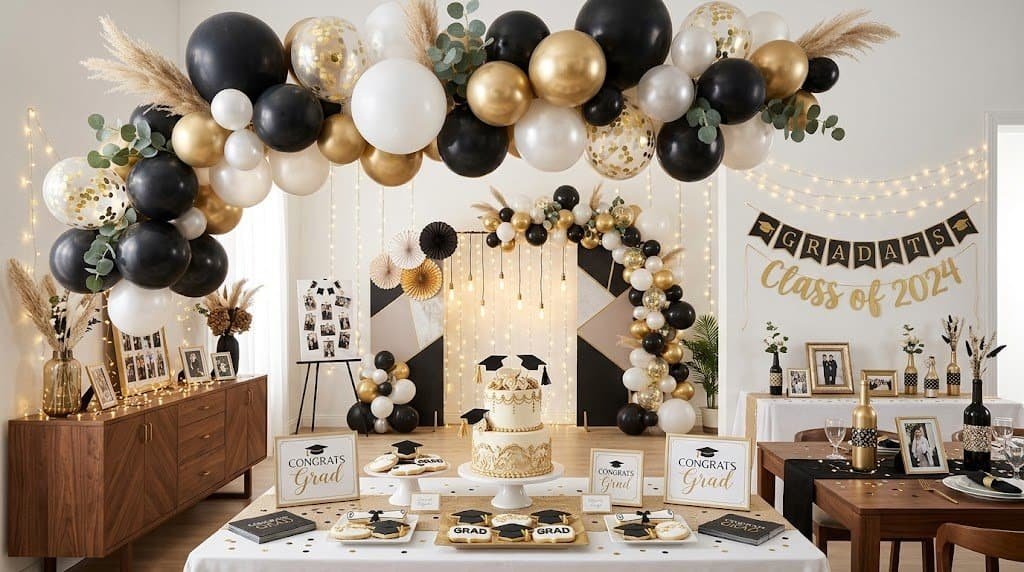
DIY Graduation Party Decorations That Look Professional
1. Start with a Color Palette and Stick to It
The single biggest difference between a party that looks professionally designed and one that looks thrown together is color consistency. Professional event designers do not just pick pretty decorations — they pick a cohesive color story and repeat it everywhere. This is the first rule I learned the hard way.
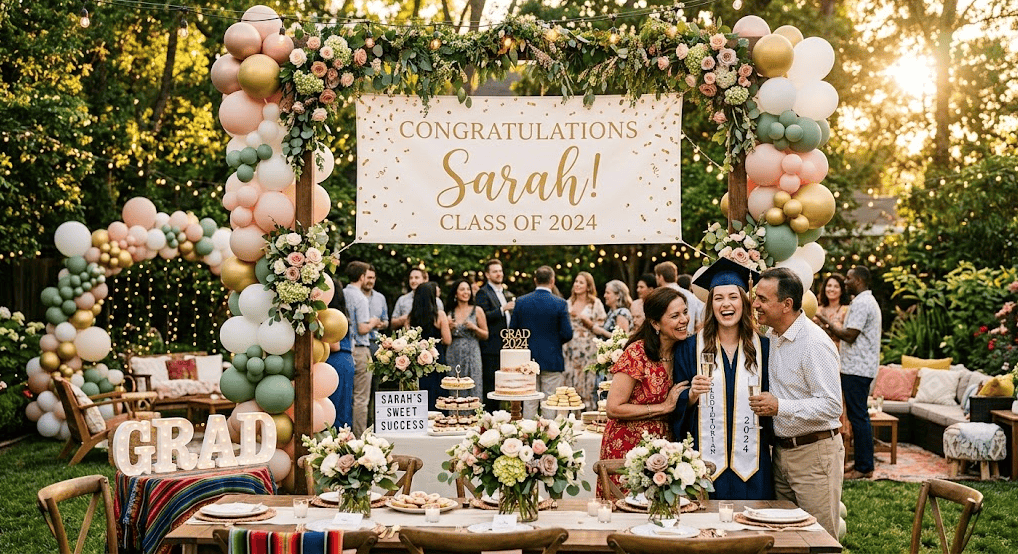
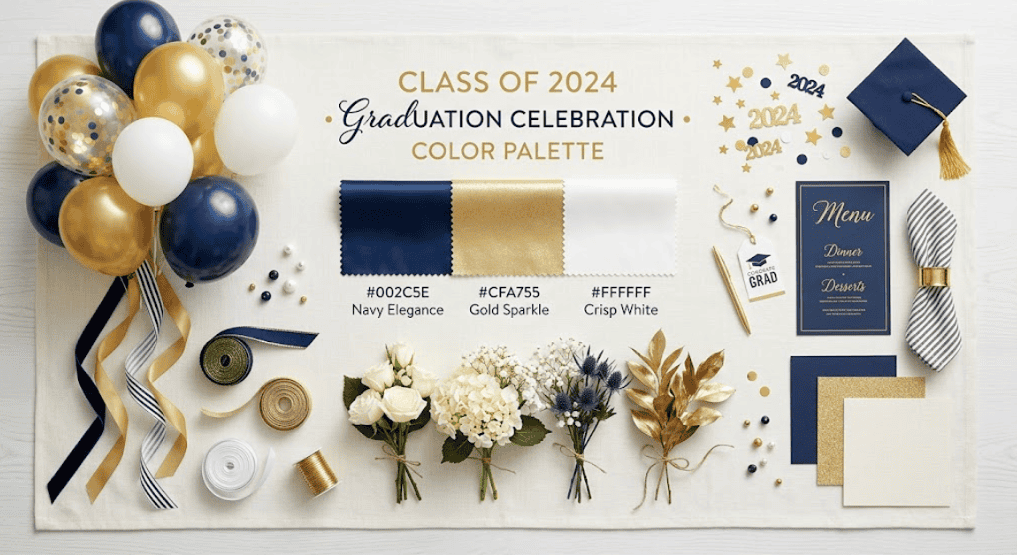
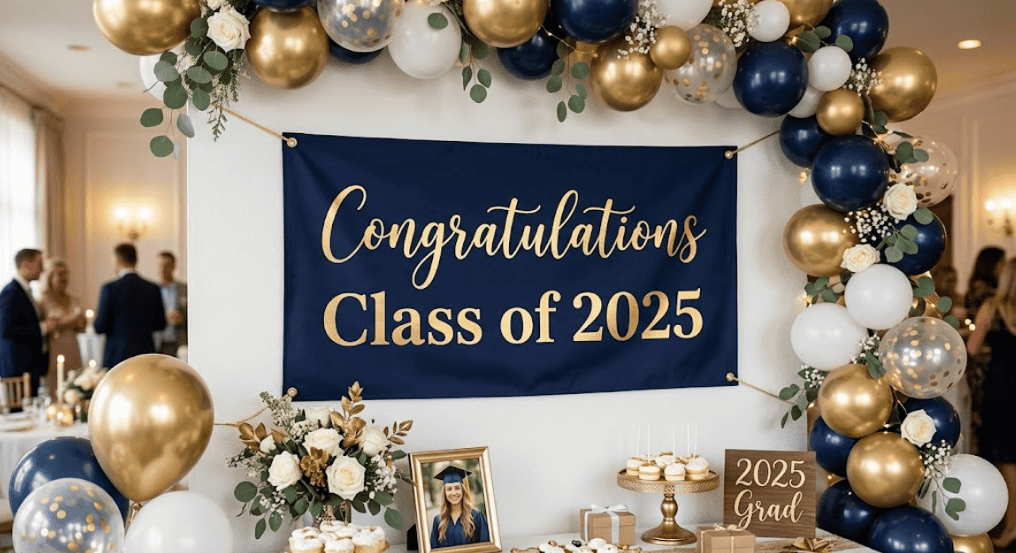
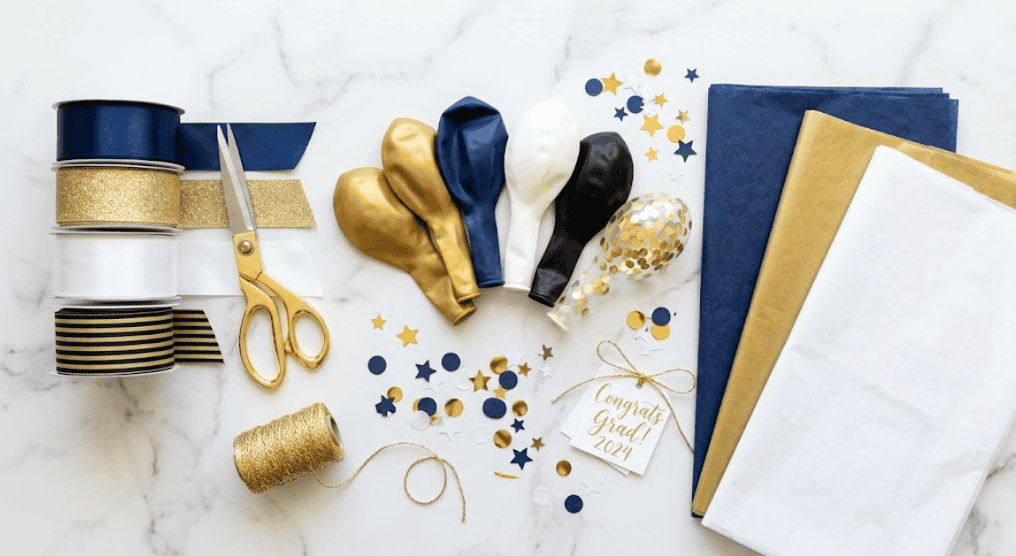
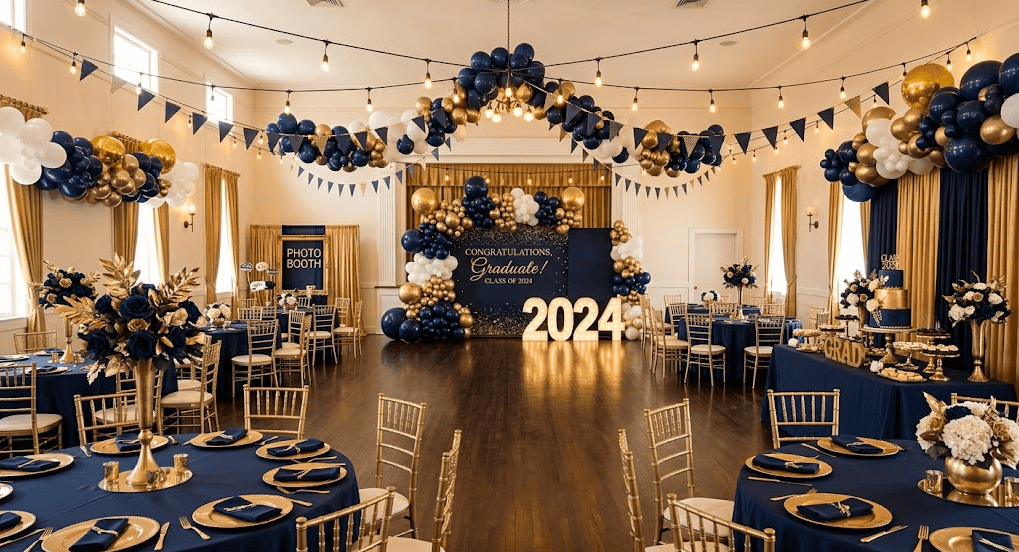
Before you buy a single balloon or roll of ribbon, decide on two to three colors maximum. For Sara’s party, we went with navy blue, gold, and white. Those three colors appeared on everything — the balloons, the tablecloths, the floral arrangements, the banner, the dessert table, even the napkins. The result looked intentional and curated rather than random and chaotic.
When choosing your palette, consider your graduate’s school colors — that personal touch always resonates with guests. If the school colors clash badly (think neon orange and forest green), you can soften them with a neutral like white, cream, or gold. Metallics like gold and silver are universally flattering and instantly elevate any color scheme to something that feels expensive.
Pro tip from a real 15-year SEO content creator and party enthusiast: shop your color palette across dollar stores, craft stores, and even grocery stores. You will be shocked how much more affordable decorations become when you are shopping with a specific color in mind rather than grabbing whatever looks cute.
2. The DIY Balloon Garland: Your Biggest Visual Impact for the Least Money
If you take only one idea from this entire article, let it be this: a DIY balloon garland or balloon arch is the most powerful visual decoration you can create, and it costs a fraction of what florists or event companies charge. Professional balloon arches can run anywhere from $150 to $400 depending on your area. A DIY version? You can pull it off for $20 to $40.
Here is what you need: a balloon decorating strip (this is a long plastic strip with holes punched in it — you can find it on Amazon for under $5), balloons in your color palette in two to three sizes, a hand pump (inflating by mouth will leave you dizzy), and command hooks to hang everything.
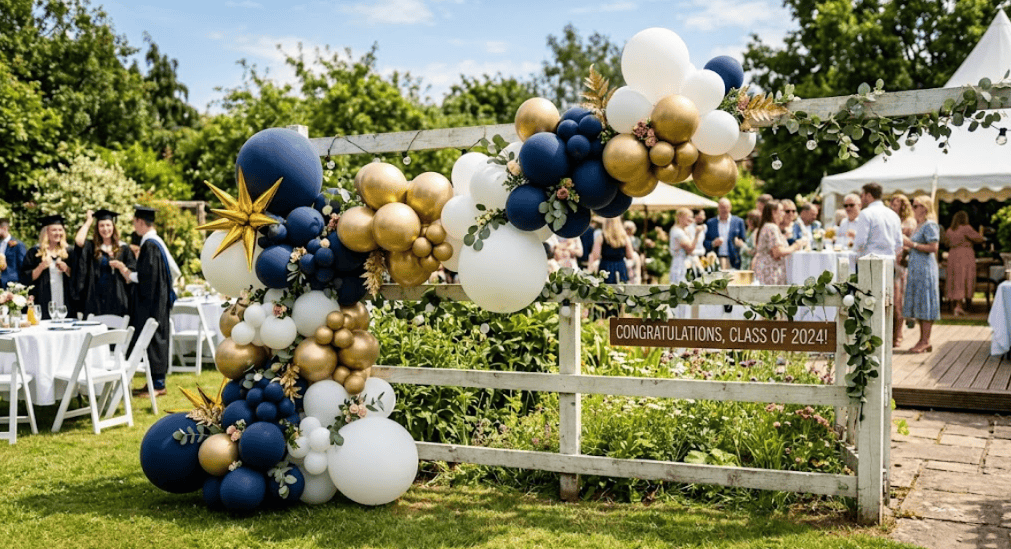
The secret to making your garland look professional is using varied balloon sizes. When I made Sara’s garland, I used 5-inch, 11-inch, and 16-inch balloons. The varied sizes create that organic, cloud-like texture that looks like something out of a high-end event magazine. Push the balloon knots through the holes in the decorating strip, alternating colors as you go. Once the strip is full, tuck in smaller balloons in the gaps with a little tape or low-heat glue.
For extra polish, add a few balloons in a complementary metallic shade — gold or rose gold foil balloons scattered throughout the garland instantly make the whole thing look more expensive. When Sara’s garland went up on the fence, three different guests pulled out their phones to photograph it before the party even officially started. That is the kind of reaction you are going for.
3. Create a Graduation Photo Backdrop That Looks Like a Studio Setup
Every graduation party needs a dedicated photo spot. Guests expect it, graduates love it, and it becomes the source of memories that people share for years. The problem? Professional backdrops and photo booth setups can cost a fortune to rent. The solution? Build your own, and make it even more personal.
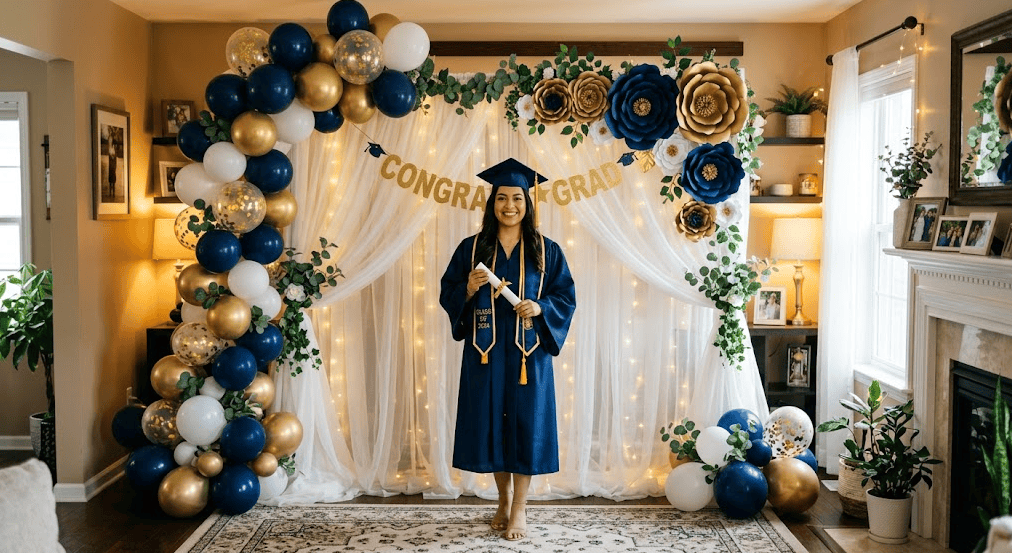
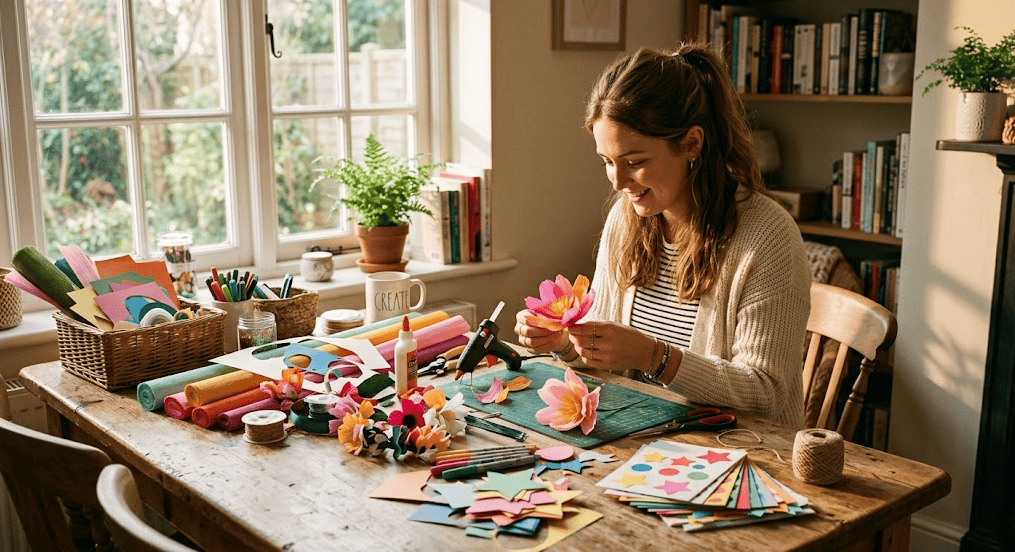
The easiest professional-looking backdrop I have ever created uses a tension rod or a simple wooden dowel hung between two chairs or curtain hooks, draped with fabric. For Sara’s party, I used a yard of sheer white fabric as the base layer and then attached balloon clusters, artificial greenery, and a mix of paper flowers. It took me about two hours, cost around $30, and looked like a setup from a styled shoot.
Paper flowers are your best friend here. Large paper flowers in your palette colors are dramatic, beautiful, and surprisingly easy to make. There are dozens of free templates on Pinterest — simply cut petal shapes from cardstock, score and fold each petal slightly, then layer them together and fluff. A 12-inch paper flower takes about 20 to 25 minutes. Make five to seven of them and arrange them on your backdrop, and the result is breathtaking.
One detail that makes DIY backdrops look particularly professional: add depth and dimension. Layer items at different distances from the base — some things pinned flat to the fabric, some hanging slightly forward, some attached to floral wire that lets them float out in front of everything else. That layered look is exactly what professional event designers use to make their setups look full and lush.
4. Personalized Graduation Banners That Do Not Look Homemade
There is a version of a DIY graduation banner that looks like it was made by a five-year-old with construction paper and markers. And then there is the version that looks like you ordered it from a custom print shop. The difference comes down to two things: font choices and material quality.
If you are printing your own banner at home, use a clean, modern font — never Comic Sans or the default handwriting fonts. I recommend Canva for designing banners because it is free, has beautiful templates, and exports in high resolution. For Sara’s “Congratulations Sara, Class of 2024” banner, I designed it in Canva using a bold serif font for the name and a thinner font for the rest of the text. I printed it across multiple sheets of cardstock at home, trimmed the edges, and connected the panels with gold ribbon.
If you want to skip the printing entirely, consider using letter boards, chalkboard paint panels, or even a length of kraft paper with brush calligraphy — brush calligraphy looks incredibly professional and you can learn the basics in an afternoon. There are countless free YouTube tutorials specifically for party banner lettering.
One trick that always elevates a banner: add gold foil letter stickers from your local craft store between the printed or painted elements. A small “✦” or “★” between words or panels adds that professional flourish that makes people look twice. At Sara’s party, I added small gold star stickers between each word on the banner, and it looked like something from an Etsy custom shop — but cost less than $4 extra.
5. Centerpieces That Cost Under $15 Each but Look Like They Cost $60
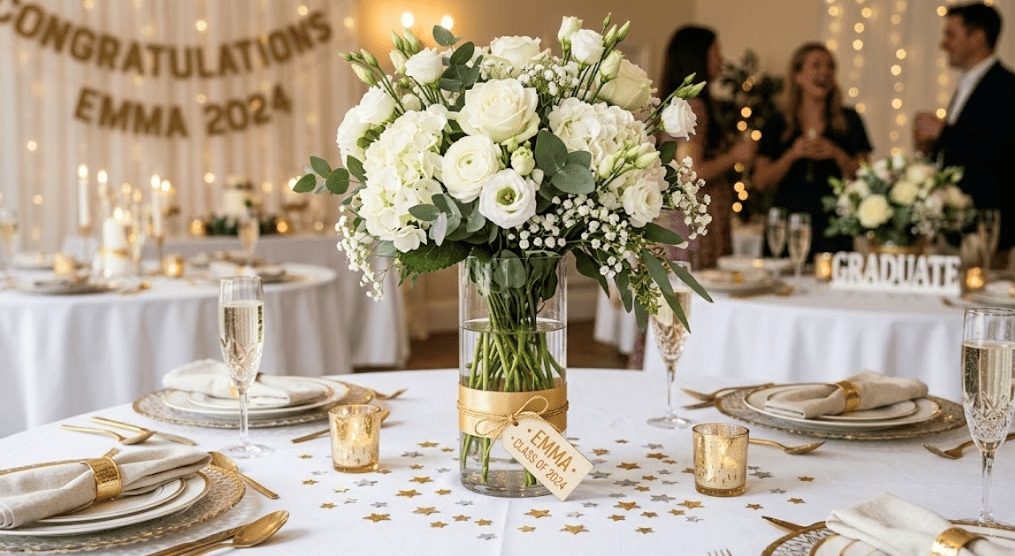
Centerpieces are where most people overspend without realizing it. A florist-made centerpiece for a single table can easily cost $50 to $80. But here is what event designers know that most people do not: height and texture do most of the heavy lifting in a centerpiece. Once you understand that, you can create stunning centerpieces from the dollar store.
My go-to formula for a DIY graduation centerpiece uses three elements: a tall element for height, a medium element for fullness, and a small element for detail. For Sara’s tables, I used tall glass vases (from the dollar store) filled with golden grass and a single white balloon tied at the top for height. Around the base of the vase, I arranged small white carnations in a shorter vase (also dollar store). For the detail layer, I scattered gold star confetti and small “Class of 2024” cardstock tags around the base.
The total cost per table? About $12. The reaction from guests? Multiple people asked if I had ordered them from a florist. The trick is the glass — clear glass vases always look more elegant than opaque containers, and they let light pass through, which makes the whole centerpiece glow.
If you want a non-floral option, consider using graduation cap toppers (small cardstock graduation caps are super easy to make), stacked books with a small plant on top, or a framed photo of the graduate surrounded by small battery-operated candles. All of these look intentional and polished without requiring any floral arranging skills whatsoever.
6. Tassel Garlands: The DIY Decoration That Goes Everywhere
Tassel garlands are one of the most versatile and satisfying DIY decorations you can make. They take about 30 minutes per garland, cost less than $5 to make, and can be used across the dessert table, as a backdrop accent, along the serving table, or even hanging from tree branches for an outdoor party. And the best part: they look genuinely chic when done correctly.
To make a tassel garland, you need tissue paper in your palette colors, scissors, and twine or string. Cut the tissue paper into strips about 12 inches long and 1.5 inches wide — a stack of eight to ten layers at a time makes this go faster. Fold each stack in half, loop it over your twine, and pull the ends through the loop to secure it. Keep the tassels close together on the twine so the garland looks full and lush rather than sparse.
The professional trick with tissue paper tassels is to fan and separate each individual layer once the tassel is on the twine. Each tassel should have a full, almost three-dimensional shape rather than hanging flat. That fluffing step is what separates a garland that looks homemade from one that looks like it came from a paper goods studio.
For Sara’s party, I made three garlands: one in navy and gold alternating, one in all white, and one in gold metallic tissue paper. The metallic one in particular caught the light beautifully and added that luxurious shimmer that tied the whole party look together. Guests were actually touching them because they looked so unusual and pretty.

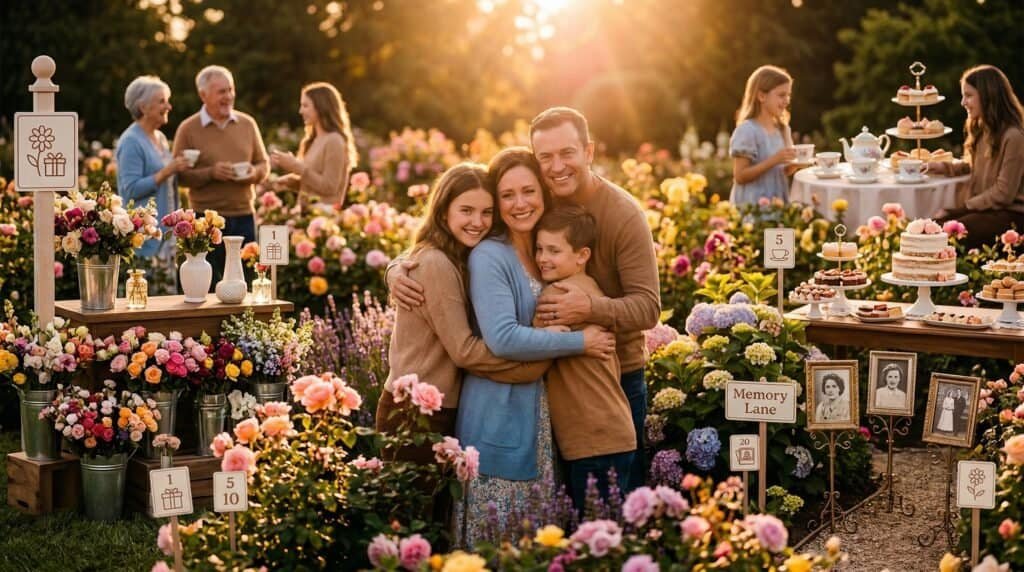
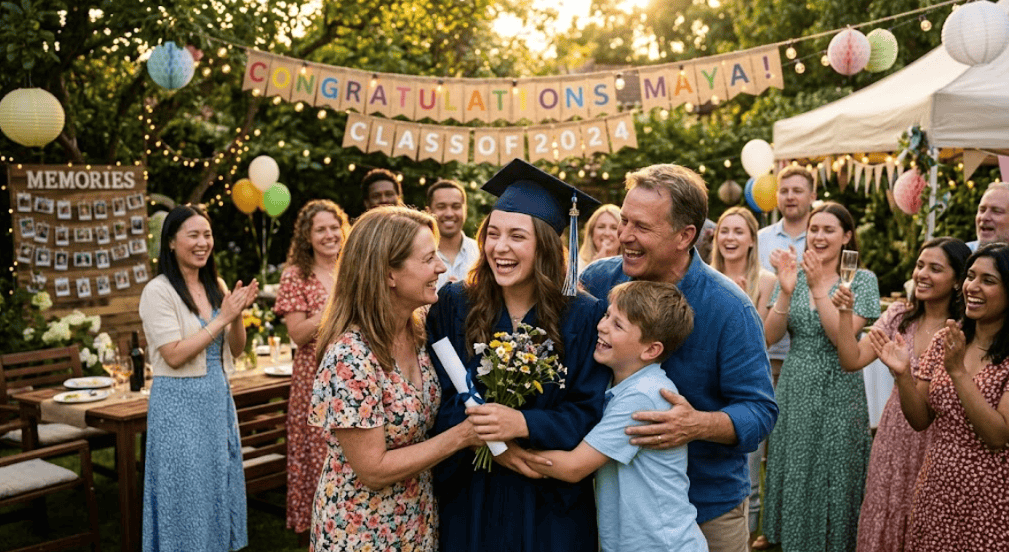
7. The Memory Table: A Decoration That Makes Guests Cry (in the Best Way)
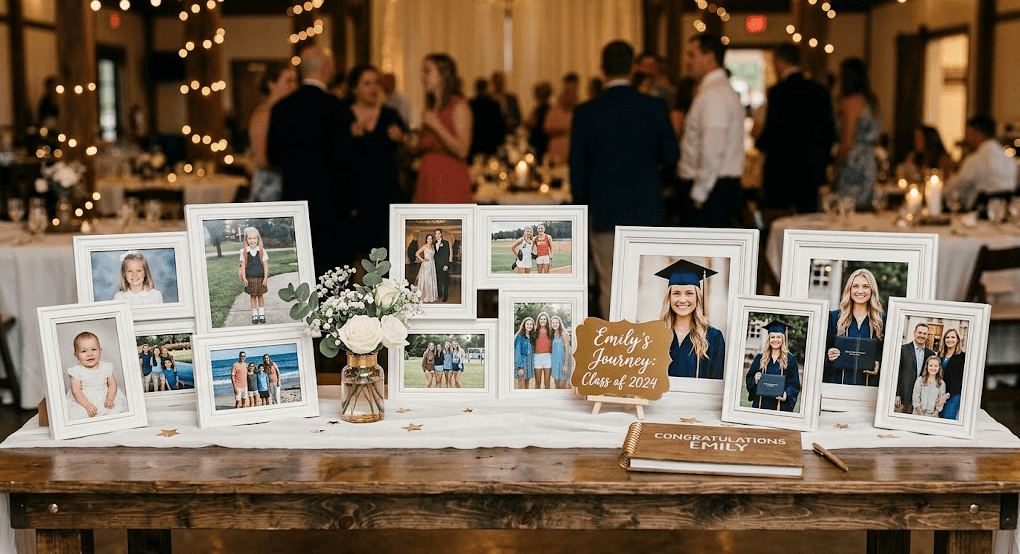
Every professionally designed graduation party I have ever seen at an upscale venue includes some version of a memory or milestone display. This is a dedicated table or wall that tells the graduate’s story — from baby photos to kindergarten graduation to this moment. And it is something you can create beautifully at home, often better than a professional can, because you have access to the real photos and real memories.
The key to making a memory table look professionally curated rather than like a collection of random framed photos is consistency. Choose one frame style — I am partial to simple white or gold frames — and use only that style throughout the display. A collection of mismatched frames in different colors and materials looks cluttered. A collection of matching frames looks intentional.
At Sara’s party, I printed 15 photos in black and white and one in color — her most recent graduation photo. Having one color photo among the black and white creates a natural focal point that draws the eye. I arranged them at varying heights using small boxes covered with cloth hidden underneath some of the frames, which creates that layered museum-display look without any special equipment.
Add a small chalkboard or printed sign that says something like “A Star is Born” or “From This to That” above the display, and you have a memory table that guests will spend considerable time looking at. At Sara’s party, her grandmother stood at the memory table for nearly twenty minutes, sharing stories with other guests. That is the kind of decoration that actually adds meaning to a celebration.
8. DIY Floral Arrangements That Look Like They Cost a Fortune
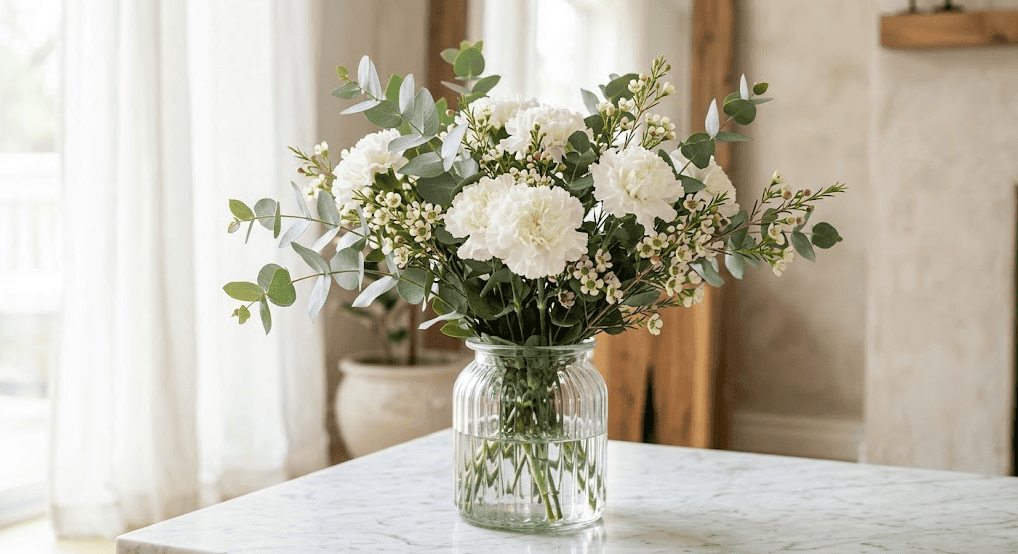
Fresh flowers are the fastest way to elevate the look of any party, but they can also be the fastest way to blow your budget. A professional florist arrangement can cost $60, $100, or more per piece. But with a simple understanding of how professional arrangements are structured, you can create something strikingly similar for $15 to $25 using flowers from your local grocery store or farmer’s market.
The professional rule of thumb for flower arranging is to use one dominant flower, one secondary flower, and one greenery or filler element. For Sara’s party, I used white carnations as the dominant flower (inexpensive and beautiful), white and cream wax flowers as the secondary, and eucalyptus branches as the greenery. That combination, in a simple clear vase, looked like something from a wedding florist’s portfolio.
The trick that most home arrangers miss: strip all the leaves from the bottom half of each stem before putting them in the vase. Leaves left underwater will rot quickly, cloud the water, and shorten the life of all the flowers dramatically. Clean stems in clear water make the vase itself part of the visual.
Another professional trick: add a small amount of sugar and a few drops of bleach to the vase water. This keeps the water clear and the flowers alive longer. At Sara’s party, the flowers were still gorgeous two days later — several guests actually asked if they were artificial because they had held up so well. That is exactly the kind of reaction you want from a DIY arrangement.
9. Lighting That Transforms a Backyard Into an Event Venue
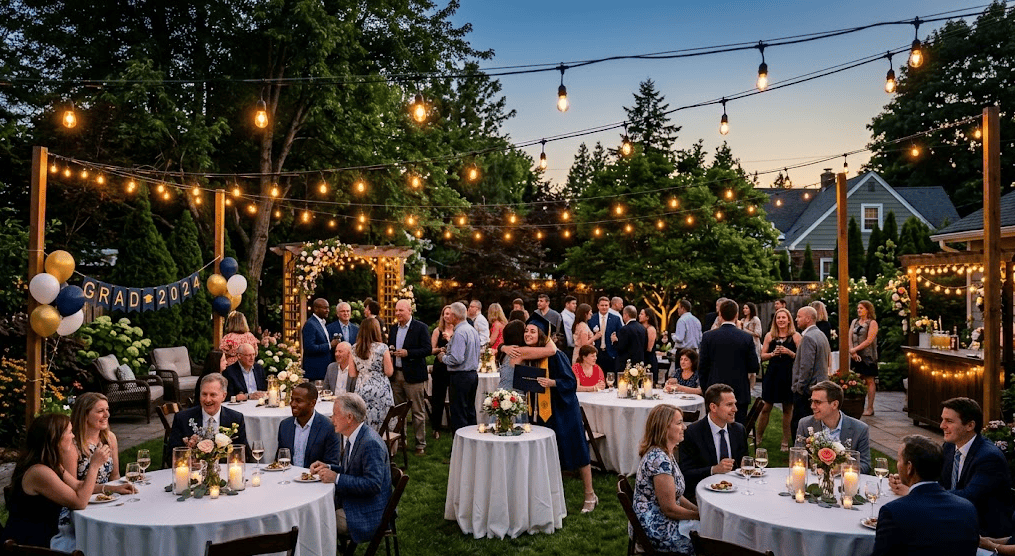
No single element transforms a party space more dramatically than lighting. Event designers know this secret and use it extensively — the right lighting can make a budget backyard look like a luxury outdoor venue. And the best news? String lights cost less than $15 at most home improvement stores, and they work absolute magic.
For outdoor graduation parties, stringing warm white Edison bulb lights from fence post to fence post creates an instant “outdoor bistro” effect that is universally beautiful. At Sara’s party, we used four strands of 25-foot warm white lights zigzagged across the backyard. After sunset, when those lights came on, multiple guests commented that it looked like a scene from a movie. The transformation was genuinely dramatic.
For indoor parties, paper lanterns in your color palette hung at varying heights from the ceiling create incredible visual depth. Combine them with battery-operated candles on tables (real candles are often not allowed in rented venues and can be a fire hazard at home parties with children present), and the warm flickering light makes everything look softer, more romantic, and more expensive.
One detail I always add: fairy lights inside tall glass vases or lanterns placed around the venue. You can buy copper wire fairy lights that curl and twist beautifully inside a vase, and when turned on in a dim setting, they look like captured fireflies. This detail cost me about $8 per vase at Sara’s party, and they became one of the most-photographed elements of the whole setup.
10. The Dessert Table Styling: Where Visual Impact Meets Edible Indulgence
A styled dessert table is one of the most Instagram-worthy elements of a modern party, and it is also the area where careful DIY work pays off most visibly. A well-styled dessert table looks like something from a professionally photographed food blog, and it does not require a bakery-level budget to achieve that effect.
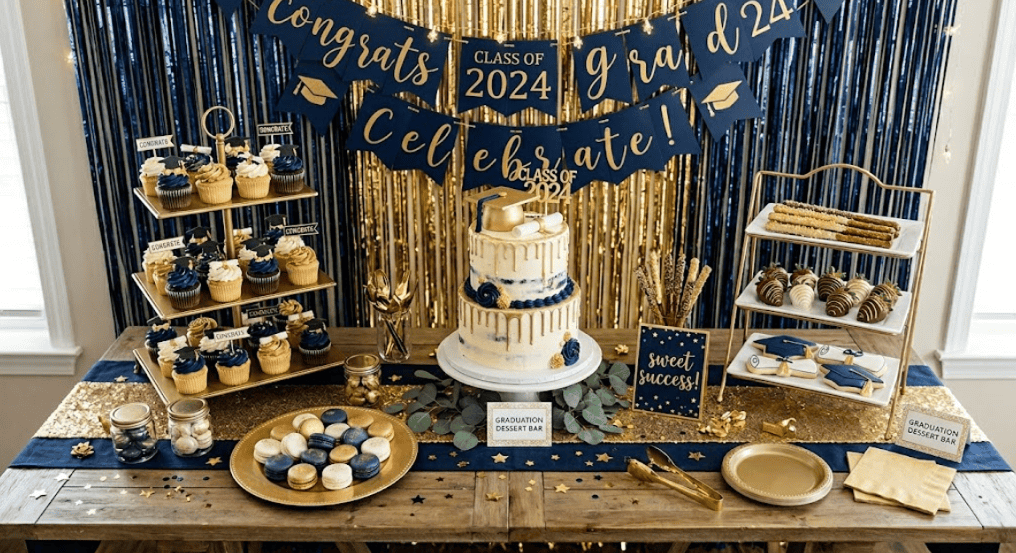
The structural secret to a professional-looking dessert table is varying height. Never place everything flat at the same level. Use cake stands, stacked books covered with contact paper, overturned mixing bowls covered with fabric, or wooden crates to create different levels. Professional dessert table stylists typically use three to four different heights across a table, and the visual effect is dramatically more interesting than everything sitting at the same elevation.
For Sara’s dessert table, I used a three-tiered stand in the center for cupcakes, a large cake plate elevated on a wooden box covered with a white cloth for the main cake, small ramekins of M&Ms and Jordan almonds in the school colors at ground level, and a cookie tower on the opposite side. Between all the food items, I placed small decorative elements: gold confetti stars, a few flowers from the main arrangements, and small “Class of 2024” picks in the baked goods themselves.
The backdrop behind the dessert table matters enormously. A simple curtain of streamers or a fringe wall in your palette colors hung behind the table creates an instant focal point that photographs beautifully. Streamers cut to about 3 feet in length and taped across a curtain rod create what is called a “fringe wall” — it is dramatic, festive, and costs less than $10 in streamers.
11. Graduation Cap Decorations and Tabletop Details That Tie Everything Together
The small details are what separate an event that looks good from one that looks truly professional. Professional event designers call these “finishing touches” — the small branded or themed elements that appear consistently throughout the space and tie every area together into one cohesive experience.
Mini graduation caps are one of the easiest and most effective finishing details you can make. Cut small squares of black cardstock, fold them into box shapes, attach a small square of cardboard to the top, and add a small tassel made from embroidery floss. These tiny caps can be placed on top of cupcakes, used as napkin rings, tied to balloon clusters, or simply scattered decoratively around tables and surfaces. They are immediately recognizable, theme-appropriate, and extraordinarily charming.
Diploma scroll place cards are another beautiful detail. Roll small pieces of cream cardstock into scroll shapes, tie them with a thin ribbon in your accent color, and write or print each guest’s name on a small tag attached to the ribbon. These serve double duty as both seating cards and a visual detail that photographs beautifully and makes guests feel like their presence was thoughtfully considered.
At Sara’s party, I also placed small frames at each table setting with a quote about education and new beginnings. I printed these from Canva using a clean, readable font on cream cardstock. The cost was negligible, but the effect was that every guest had something beautiful and meaningful to look at from their seat. Several guests asked if they could take theirs home — which is perhaps the best possible review a DIY decoration can receive.

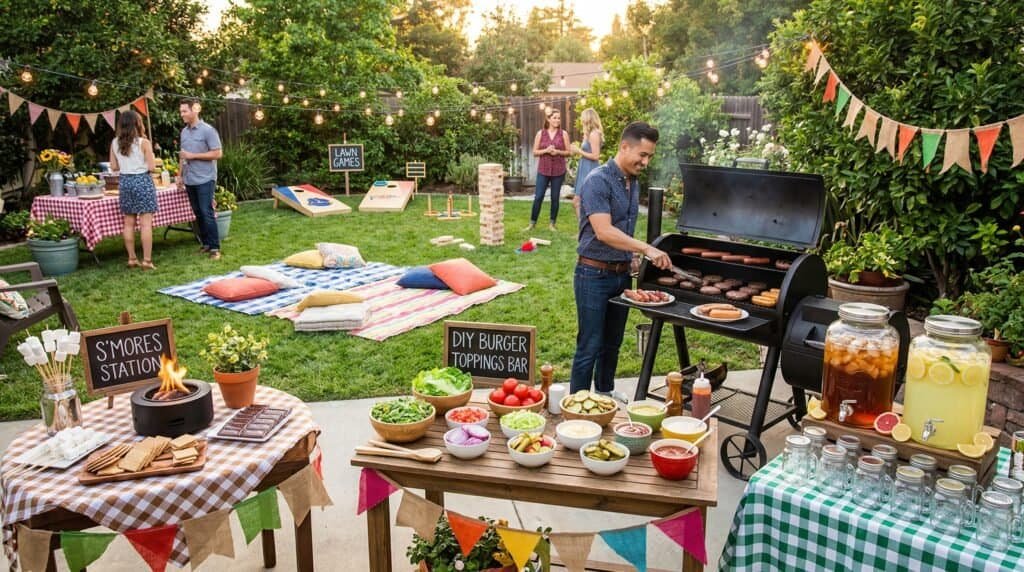
12. Outdoor Party Setup: Making Nature Work for You, Not Against You
Outdoor graduation parties have an inherent advantage that indoor parties do not: natural beauty. Grass, trees, garden beds, blue sky — these are all free decorations that professionals use extensively when designing outdoor events. The trick is to work with these elements rather than trying to cover them up.
When planning your outdoor setup, look for natural focal points in your space — a large tree, a garden wall, a fence line — and build your decoration around them. For Sara’s party, the back fence became our primary backdrop, and we draped balloon garlands along it rather than trying to construct a separate free-standing backdrop. The fence provided structural support for free, and the natural wood color complemented our navy and gold palette beautifully.
Wind is the great enemy of outdoor party decorations. Tablecloths, streamers, paper flowers, and lightweight decorations will all behave unexpectedly in any breeze. The professional solution is to weight everything down thoughtfully. Use heavy vases rather than lightweight ones, secure tablecloths with binder clips hidden under the table edge, and avoid paper decorations in areas with significant airflow. I learned this the hard way at a previous outdoor party when an entire paper flower backdrop went sailing across the yard ten minutes before guests arrived.
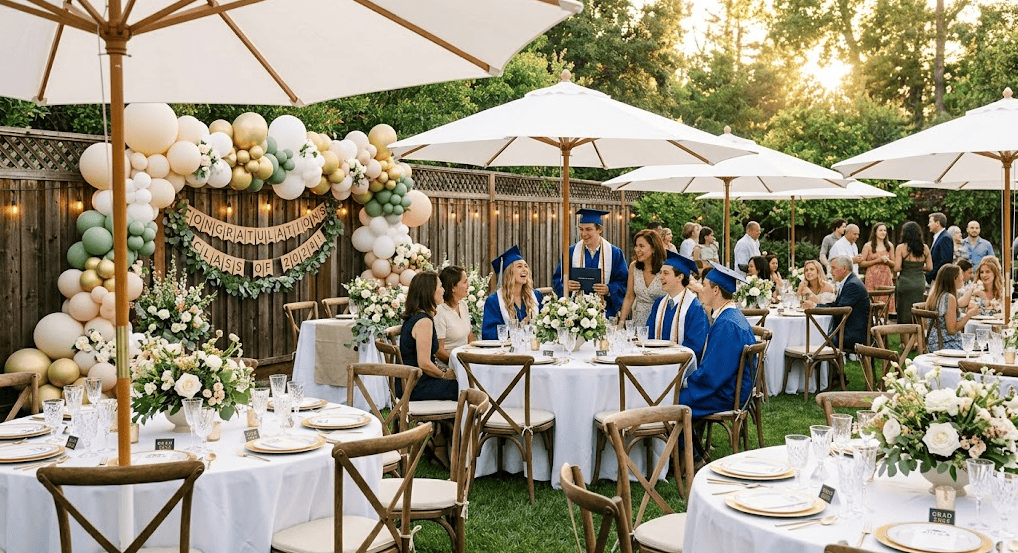
For shading and atmosphere, a simple white canopy tent from a warehouse store or a set of large parasols in your accent colors create immediate visual drama while serving a practical purpose. Large white parasols positioned around seating areas at Sara’s party added both shade and an instantly chic visual element that required zero artistic skill to achieve — they were simply beautiful out of the box.
13. Budget Planning for Your DIY Graduation Decorations: A Real Breakdown
One of the most common questions I receive from people planning graduation parties is: how much should I actually budget for DIY decorations? And the answer is less than you think, especially if you are strategic about where you spend and where you save.
The golden rule of budget decoration is to spend the most on the elements that will appear most in photographs: the backdrop, the main table centerpiece, and the balloon installation. These are the things that guests photograph and that set the visual tone for the entire event. Save money on the elements that are functional rather than primarily visual: plates, napkins, cups, and tablecloths can all be inexpensive without compromising the overall look.
Here is a realistic DIY decoration budget breakdown for a party of 30 to 50 guests. A balloon garland using around 100 balloons and a decorating strip will run approximately $25 to $35. Table centerpieces for six to eight tables at $12 to $15 each comes to $72 to $120. A DIY backdrop with fabric, paper flowers, and some balloon clusters costs approximately $40 to $60. A personalized banner printed at home costs $5 to $10 in cardstock and ink. Lighting with two to four strands of string lights runs $20 to $40. Tassel garlands for table decorations cost about $10 to $15 in tissue paper. Additional small details including confetti, mini caps, ribbon, and signs adds another $20 to $30.
Grand total: somewhere between $190 and $310 for a fully decorated party that looks professionally designed. A professional event decorator would charge $800 to $2,000 for the same visual effect. That is a significant saving — and the personal touches you add along the way make the result far more meaningful than anything a stranger could create for you.
14. Timeline Planning: When to Start Making Each Decoration
One of the most stressful parts of DIY party planning is figuring out when to make everything so you are not up until 3 AM the night before frantically hot-gluing balloon tails. A realistic timeline is one of the most valuable things an experienced party planner can give you, so here is exactly what I would do if I were planning Sara’s party again.
Six to eight weeks before the party, order any supplies that need to come online: balloon decorating strips, specialty balloons in your palette, fairy lights, specialty ribbon, and any personalized items like custom banners or printed signs. Shipping delays are real, and ordering early means you have time to reorder if something arrives wrong or damaged.
Three to four weeks before, make all paper decorations: paper flowers, tassel garlands, diploma scroll place cards, mini graduation caps, and any fringe walls. Paper crafts can be made well in advance and stored without degrading. This is also the time to print and assemble any banners or signs so you can fix printing errors without last-minute panic.
One week before, do a full setup test in your actual party space if possible. Arrange tables, hang backdrop elements, position where the balloon garland will go, and photograph everything to see how it looks. This test run reveals problems you cannot see on paper — a backdrop that is too small, a balloon arrangement that clashes with the wall color, or a table layout that creates traffic flow problems. At Sara’s party, our test run revealed that our main backdrop was 18 inches too narrow for the wall space, and I had time to add additional elements to expand it before the party day.
The day before, inflate and arrange all balloons, set up centerpieces if using artificial flowers, and complete any remaining hanging or installation work. On the party day itself, add fresh flowers, set out food-adjacent decorations, do final adjustments, and enjoy the fact that you have planned well enough that you are not scrambling in the last hour.
15. The Personal Touch: Why Handmade Will Always Beat Professional-Made
I want to end this guide where it truly matters. At Sara’s graduation party, the moment I will never forget had nothing to do with how the balloon garland looked or whether the centerpieces matched the backdrop perfectly. It was when Sara’s mother — my sister — stood in the middle of the backyard we had transformed together and started crying. Not because everything was perfect. But because she could see, in every flower arrangement and hand-lettered banner and carefully matched ribbon, the hours of love and effort that had gone into creating this space for her daughter.
A professional event designer creates beautiful spaces, but they cannot put your love into the decorations. They cannot choose the photo for the memory table because they remember how Sara looked on her first day of kindergarten. They cannot write the quote for the place card frames because they know what words Sara’s grandmother always says to her. They cannot tie the ribbon in exactly the color Sara has loved since she was six years old.
That is what DIY means. Not “doing it yourself because you cannot afford to hire someone.” It means infusing a space with the specific, unrepeatable love of the people who know and cherish the graduate. And that, more than any professional balloon arch or catered floral arrangement, is what makes a graduation celebration feel truly unforgettable.
So take these ideas, adapt them to your graduate’s personality, your space, and your budget, and know that every imperfect fold of tissue paper and every slightly crooked banner letter is a piece of love made visible. That is what people remember. That is what photographs cannot fully capture. And that is what the graduate will talk about long after the confetti has been swept up and the balloons have deflated.
Final Thoughts: Your DIY Graduation Party Can Look Like a Pinterest Dream
Creating graduation party decorations that look professional is not about having artistic talent, a big budget, or years of event planning experience. It is about understanding a few key principles: color consistency, varied heights and textures, quality in the focal elements, and the kind of personal detail that only someone who loves the graduate can provide.
Start with your color palette. Build your focal pieces first. Fill in with inexpensive but consistent details. Plan your timeline so you are never rushing. And trust the process — every hour you spend crafting and preparing is an act of celebration for someone who has worked hard to reach this milestone.
I hope this guide helps you create something beautiful, personal, and truly memorable. If you try any of these ideas, I would love to see the results — share your photos and tag us, because there is nothing more inspiring than seeing real families create real celebrations for the real people they love.
Congratulations to your graduate. They deserve a party that looks exactly as wonderful as you know they are.
Read More : 30 Halloween Party Ideas for Adults