The first DIY Balloon Arch I ever attempted was for my friend Emma’s daughter’s birthday. I watched three YouTube tutorials, bought a balloon arch kit from Amazon, and spent four hours inflating, tying, and attaching 200 balloons to a white PVC frame. By the time guests arrived, it looked exactly like the photos. Guests walked in, stopped, and immediately pulled out their phones.
Since then, I’ve created a DIY Balloon Arch for bridal showers, graduation parties, first birthdays, and backyard BBQs. Along the way, I discovered that an organic DIY Balloon Arch looks much more complicated than it actually is. Once you understand the three essentials—balanced color distribution, varied balloon sizes, and proper density—the rest is simply inflating, clustering, and attaching.
In this complete DIY Balloon Arch guide, I’ll walk you through every step of the process, share the most common mistakes to avoid, and reveal the practical shortcuts I’ve learned after building more than a dozen balloon arches. Whether you’re decorating for a birthday, baby shower, wedding, or holiday celebration, this guide will help you create a beautiful, professional-looking DIY Balloon Arch on a budget.
What a DIY Balloon Arch Actually Means (And What It Doesn’t)
What it IS:
- A structured or freeform cluster of balloons that creates a wow moment at any party entrance, backdrop, or food table
- Achievable in 90–180 minutes with $18–$45 in supplies
- The single highest-impact decoration per dollar in party planning
- Customizable for any color palette, theme, or occasion
What it ISN’T:
- Complicated — the organic style requires zero special skills
- Expensive — a full arch costs less than a store-bought floral arrangement
- Something that requires a professional balloon artist
- A project that needs to start three days before the party
According to Pinterest Trends (2025), balloon arch tutorials are among the top five most-saved party DIY categories, with over 4.8 million annual saves. The most-recreated style by far is the organic arch — loose, asymmetric clusters that look “collected” rather than constructed.
What Do You Need to Make a DIY Balloon Arch?
Before anything else: the supplies. Here’s what actually matters and where to save versus spend.
| Supply | Budget Option | Better Option | Notes |
|---|---|---|---|
| Balloons | Dollar Tree: $1.25 each | Amazon 36-pack: $14–$16 | Get 3 sizes: 5″, 11″, 18″ for variety |
| Pump | Manual hand pump: $6–$8 | Electric pump: $18–$25 | Electric pump saves 90 min on 100 balloons |
| Frame (optional) | Fishing line: $4–$6 | PVC pipe kit: $12–$18 | Organic style needs no frame at all |
| Glue dots | Dollar Tree pack: $1.25 | Amazon 200-pack: $6–$8 | Essential for filling gaps |
| Command hooks | Dollar Tree 2-pack: $2.50 | 3M brand 4-pack: $5–$7 | For mounting to wall or doorframe |
| Balloon tape strip | Amazon 200-hole strip: $5–$7 | Same | Optional but speeds up cluster building |
💡 Pro Tip: The electric pump is the single most worthwhile investment in balloon arch supplies. Inflating 100 balloons by hand takes 60–90 minutes and leaves your hands cramped. An electric pump does the same job in 15–20 minutes. Borrow one from a friend or buy a $20 model on Amazon — it pays for itself after one arch.
Step 1: Choose Your Balloon Arch Style
Time: 5 minutes | Cost: $0
There are three main balloon arch styles. Which one you choose determines everything else — your balloon count, your frame needs, and your setup time.
The Organic Arch
Best for: Any occasion, most popular style, easiest to make
Frame needed: No — attaches directly to fishing line or balloon strip
Balloon count: 80–120 balloons
Setup time: 90–120 minutes
Cost: $18–$35
This is the style that dominates Instagram and Pinterest — loose clusters of balloons in varied sizes, attached to a flexible base, with intentional asymmetry. No two sections look identical. Done right, it looks like a professional installation. Done wrong, it looks like balloons tied to a string.
The key difference: size variation. Every cluster needs at least two balloon sizes. A cluster of four identical 11-inch balloons looks flat. A cluster of two 11-inch, one 18-inch, and one 5-inch balloon looks intentional.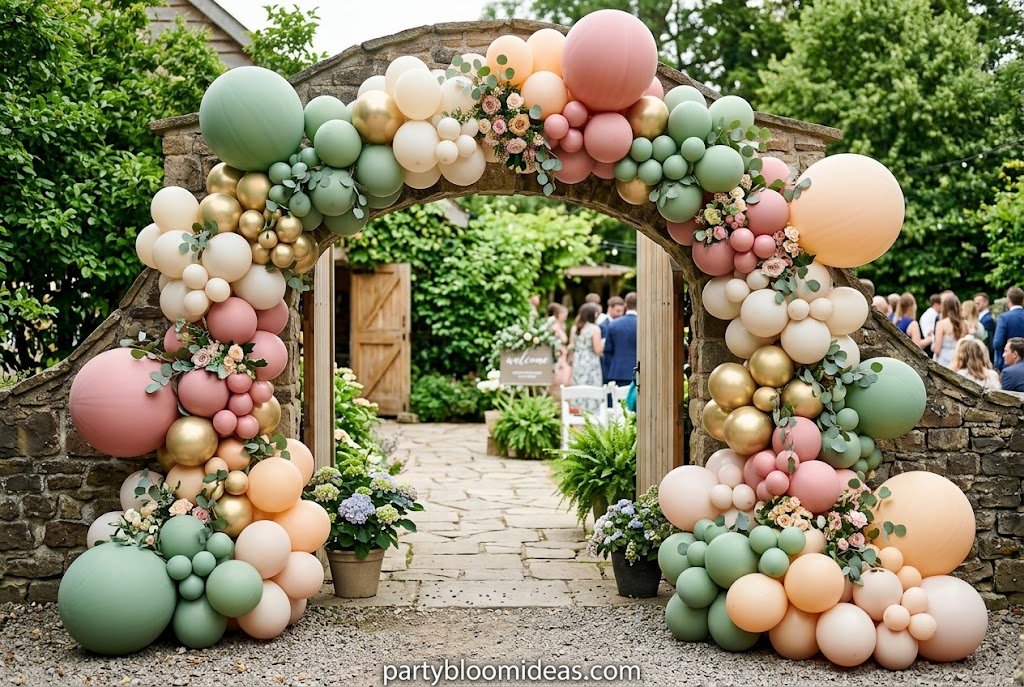
The Grid Arch
Best for: Formal events, photo backdrops, elegant occasions
Frame needed: Yes — balloon tape strip or PVC frame
Balloon count: 150–200 balloons
Setup time: 3–4 hours
Cost: $30–$55
The grid arch uses uniform-size balloons arranged in a repeating pattern — typically a checkerboard or diagonal stripe of alternating colors. It’s more structured, more formal, and takes significantly longer to build. I’d only recommend this style for events where the arch is the centerpiece and you have the time.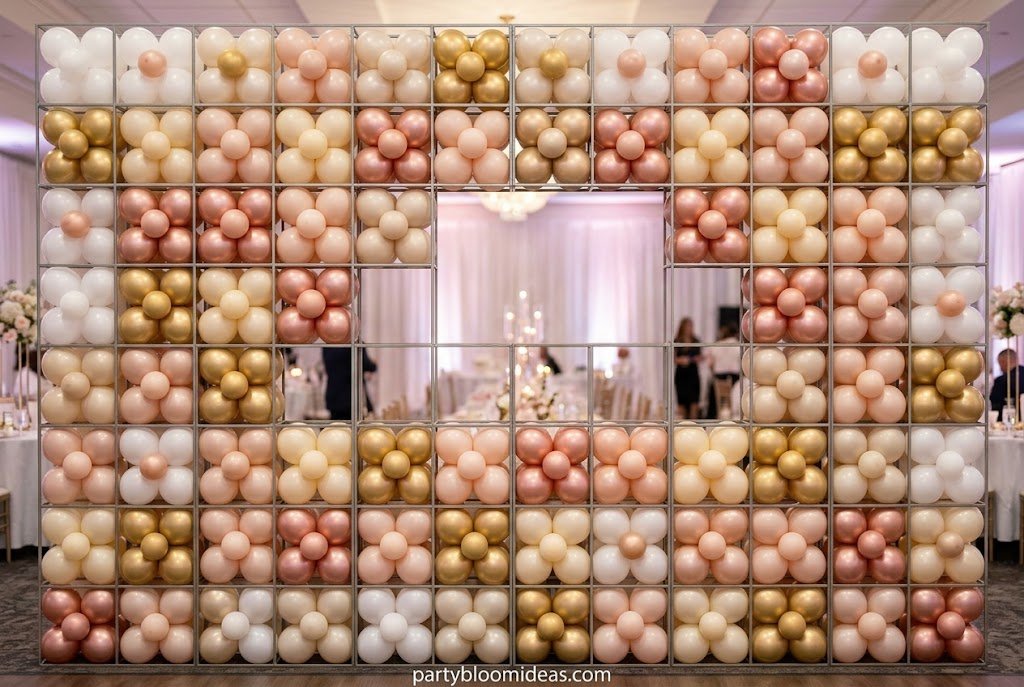
The Half Arch (Column)
Best for: Table backdrops, smaller spaces, quick setup
Frame needed: Yes — PVC column frame or weighted base
Balloon count: 40–60 balloons
Setup time: 45–60 minutes
Cost: $14–$25
A half arch is a column of balloons that rises from one side rather than spanning a full arch. Easier to build, easier to transport, and works perfectly for table corners, stage edges, and photo station sides. Two half arches flanking a backdrop often look better than one full arch.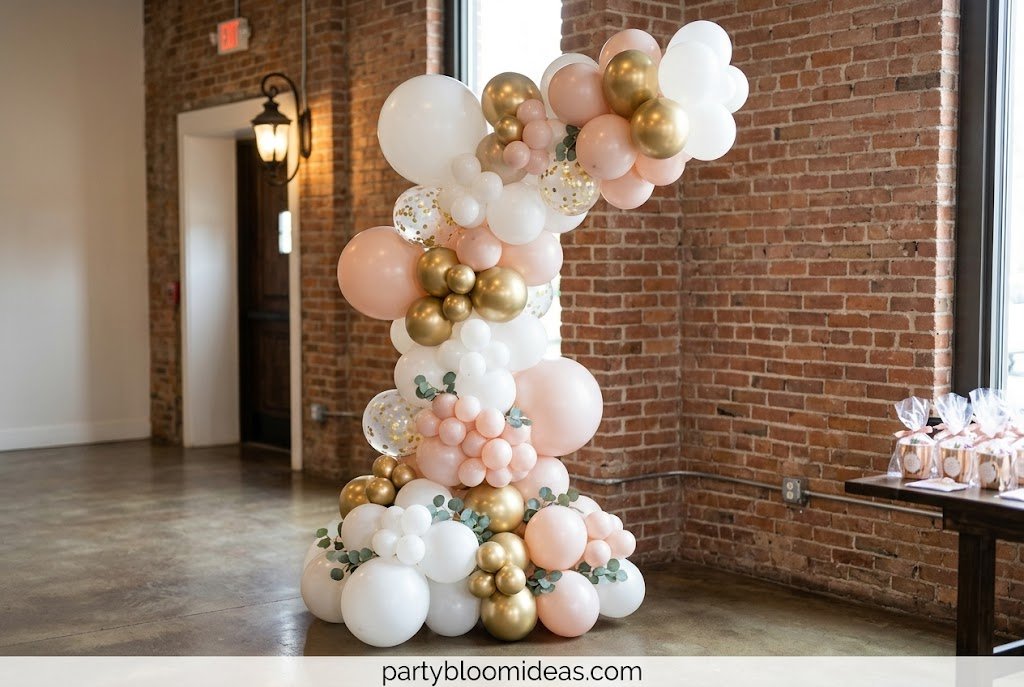
Step 2: Choose Your Color Palette
Time: 5 minutes | Cost: $0
Color palette is where most DIY balloon arches succeed or fail visually before a single balloon is inflated. The rule: two to three colors maximum, with one neutral anchor.
Color combinations that always work:
- Dusty rose + sage green + white — elegant, gender-neutral, works for bridal showers and adult birthdays
- Terracotta + cream + gold — warm, earthy, boho-adjacent
- Navy + white + gold — classic, formal, works for milestone birthdays and graduations
- Lavender + pale yellow + white — soft, spring-ready, baby shower favorite
- Black + gold + white — glamorous, NYE, adult celebrations
- Bright primary colors — red, yellow, blue — kids parties, carnival themes
The neutral anchor (white, cream, or clear balloons) is critical. When you’re building clusters, white balloons fill gaps without competing with your accent colors. I use white as at least 30–40% of my balloon count in every arch.
💡 Pro Tip: Buy all your balloons from the same brand when possible. Different brands manufacture slightly different shades of “dusty rose” or “sage.” A 12-pack from Amazon Basics and a 12-pack from Qualatex will give you two visibly different pinks, and the difference shows in a finished arch.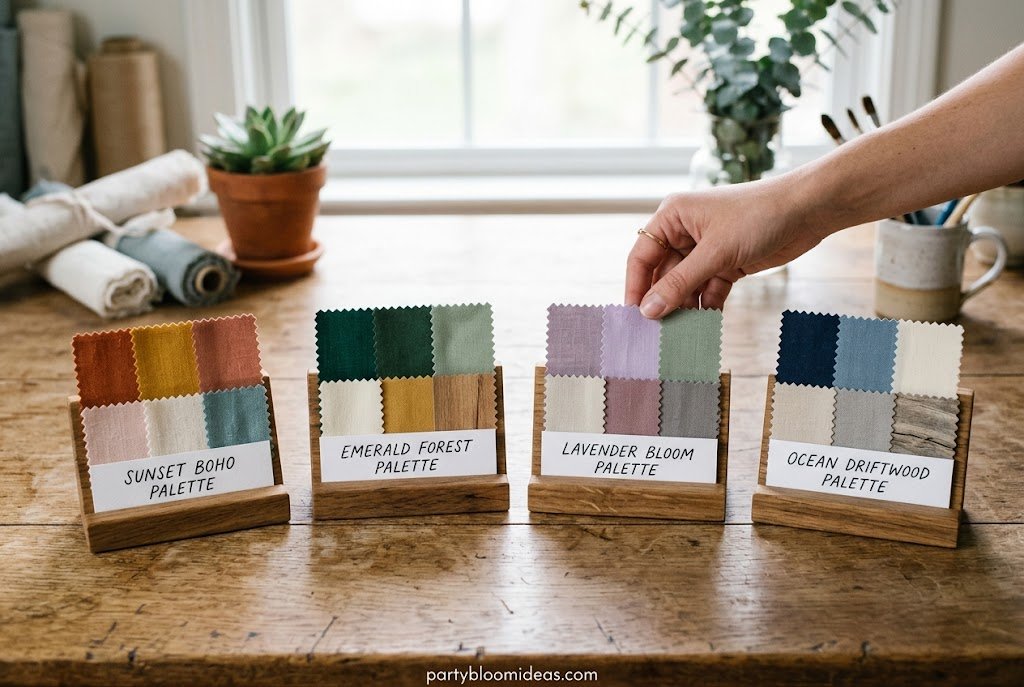
Step 3: Inflate Your Balloons
Time: 15–30 minutes with electric pump | Cost: $0 (supplies already purchased)
For an organic arch serving as a party backdrop (roughly 6–8 feet wide, 5–6 feet tall), you need approximately:
- 40–50 large balloons (11-inch) — your main volume
- 25–30 medium balloons (9-inch)
- 15–20 small balloons (5-inch) — for gap filling
- 8–12 oversized balloons (18-inch) — for visual anchor points
Don’t inflate all balloons to the same size. The organic look requires variation — some 11-inch balloons inflated to 9 inches, some to 12 inches. This inconsistency is what makes it look natural rather than manufactured.
Tie each balloon individually as you inflate. Don’t leave them in a pile — they pop each other. I inflate in batches of 20 and cluster immediately before moving to the next batch.
The first time I made an arch I inflated everything before starting the build. By the time I reached the end, the first balloons had lost pressure and the size variation I’d created was gone. Now I inflate in batches. It takes more trips to the pump but the finished product is significantly better.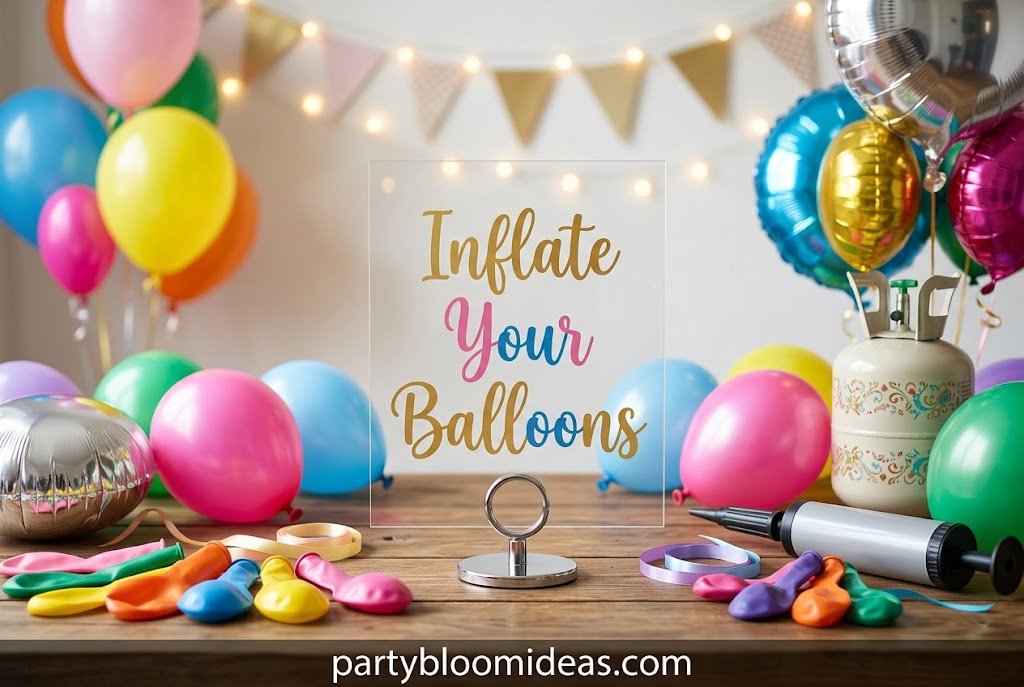
Step 4: Build Your Frame (or Go Frameless)
Time: 15–30 minutes | Cost: $4–$18 depending on method
The Frameless Method (Organic Arch on Fishing Line)
This is my default approach for most parties. Cut a length of 20-pound fishing line about 30% longer than your target arch span. Tie one end to a Command hook on the wall. Build your arch by tying or gluing balloon clusters directly to the fishing line, working from one end to the other.
Fishing line is invisible in photos, holds up to 150+ balloons when properly secured, and costs $4–$6 for a spool that lasts multiple arches.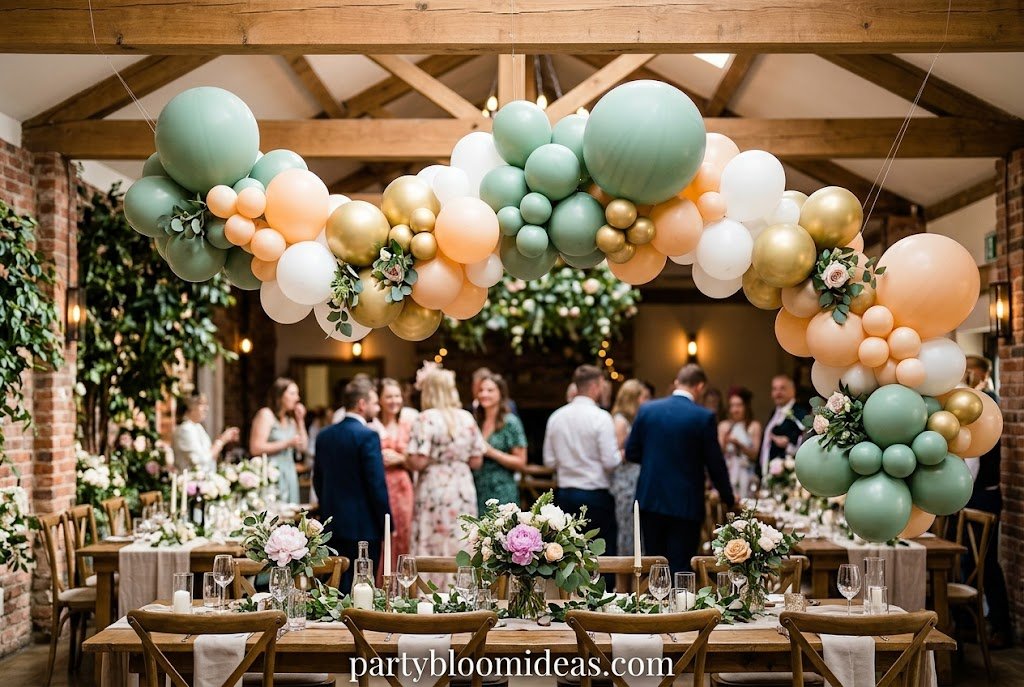
The PVC Pipe Frame Method
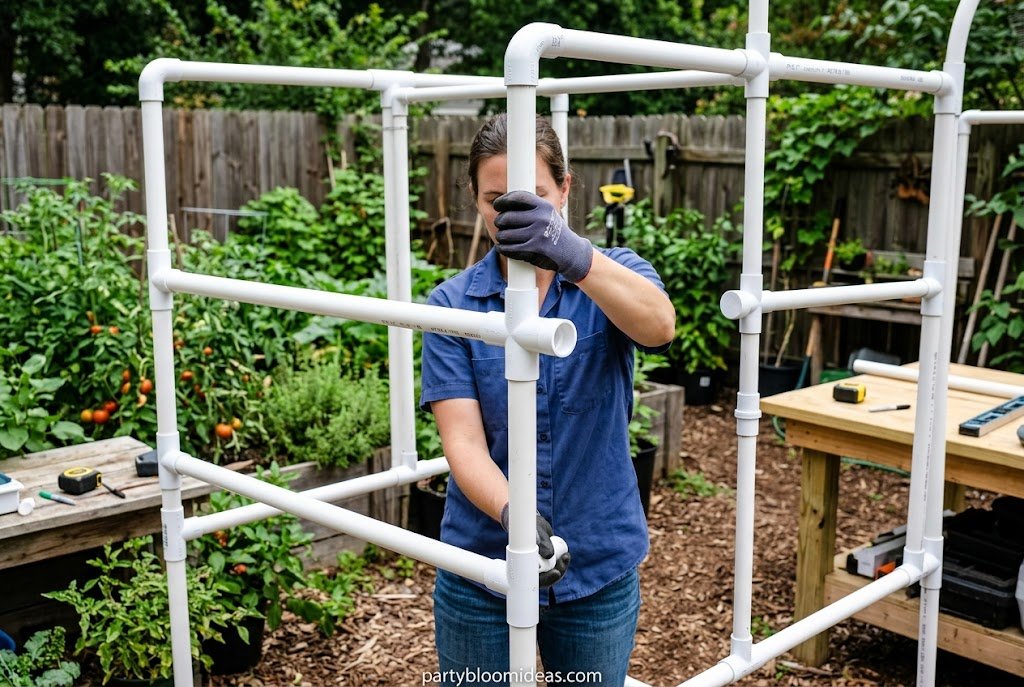
For freestanding arches that don’t attach to a wall, you need a frame. A basic PVC pipe arch frame for a standard 6-foot span requires:
- Two 6-foot lengths of 1/2-inch PVC pipe ($3–$4 each at Home Depot)
- One 4-foot length of 1/2-inch PVC for the curved top section
- Two PVC elbows ($0.75 each)
- Two weighted bases (fill PVC end caps with sand or gravel): $3–$5 in materials
Total frame cost: $10–$15. Assembly time: 20–30 minutes. Once built, this frame is reusable across multiple parties.
The Balloon Arch Kit Method
Amazon sells complete balloon arch kit frames — flexible plastic strips with holes, plus a pump and basic balloon assortment — for $18–$30. They work. They’re faster than building from scratch. The limitation is size: most kits max out at 5–6 feet wide, and the included balloons are usually single-size, which limits the organic effect.
I’ll be honest about the kits: they’re a great starting point for a first arch, but the balloons included are usually a single size in two colors, which makes the finished product look flat. Supplement with additional balloons in one larger size ($8–$12 for a 20-pack on Amazon) and the result improves dramatically.
Step 5: Attach the Balloons
Time: 45–90 minutes | This is the main event
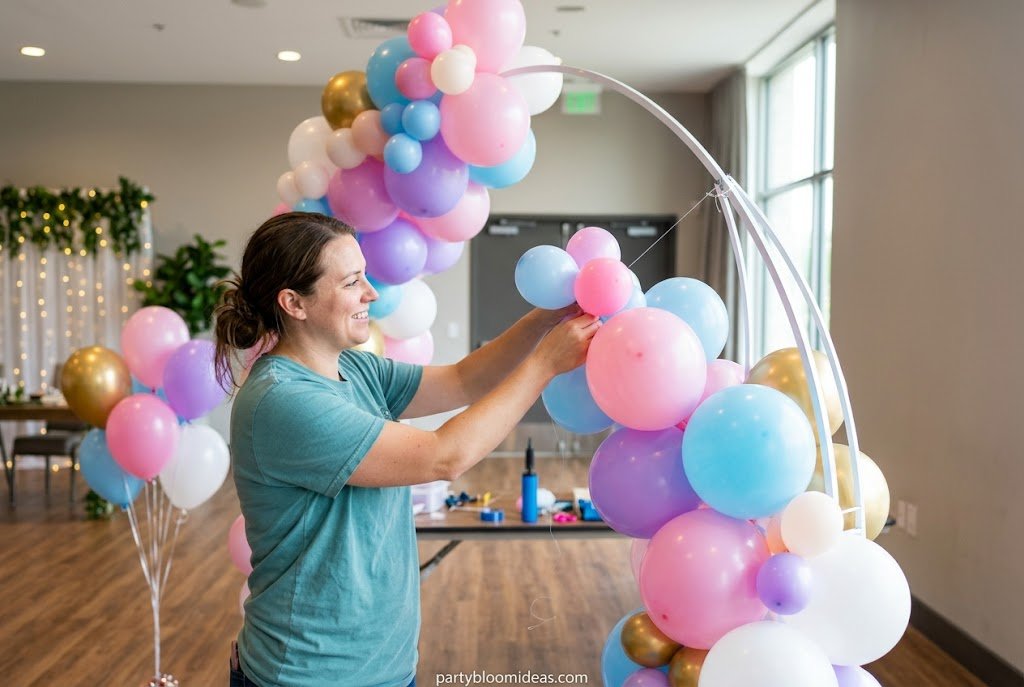
This is where the arch actually comes together. The method depends on your frame choice, but the principle is the same: work in clusters of four, distribute colors evenly, and vary sizes throughout.
The Cluster Method (Organic Arch)
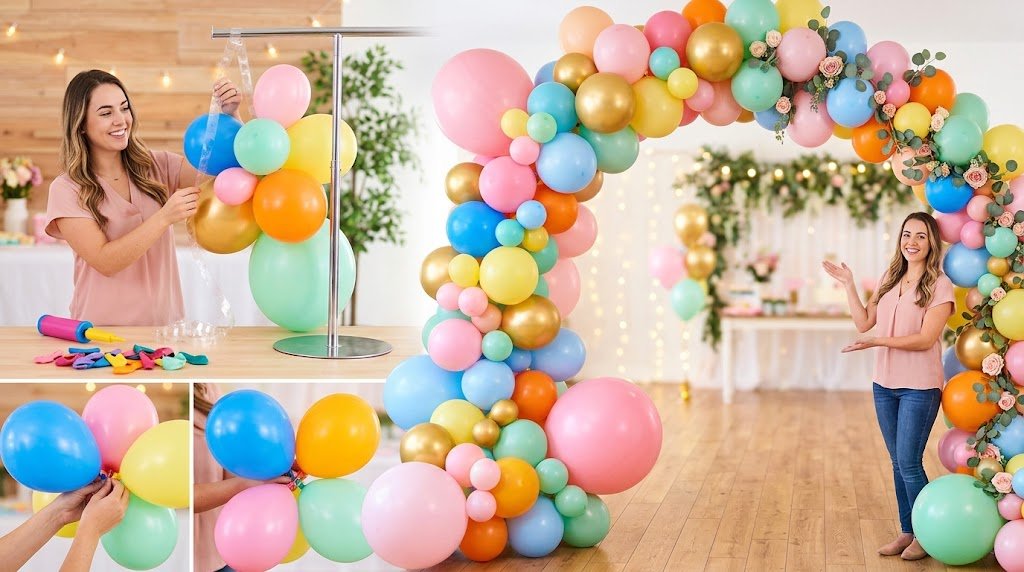
- Take four balloons — two 11-inch, one 9-inch, one 5-inch — in your color palette
- Tie the two 11-inch balloons together at their necks (a “duplet”)
- Repeat with the smaller two balloons
- Twist the two duplets together at their crossing point — you now have a four-balloon cluster
- Attach the cluster to your fishing line or PVC frame by wrapping the necks around the line twice
- Repeat, rotating which colors fall in which position, until the arch is full
Work from both ends toward the center, not from one end to the other. This ensures the arch stays balanced. Leave the center for last and use your largest balloons there — they create the visual peak of the arch.
At a baby shower I helped style last spring, we did a 6-foot organic arch in dusty pink, sage green, and white. Total balloon count: 94. Total time from first inflation to final placement: 2 hours and 10 minutes. Guests walked in, their shoulders dropped, and four of them asked immediately how we made it.
Step 6: Fill Gaps and Style
Time: 15–20 minutes
Once your main clusters are in place, step back and look at the arch from across the room. You’ll see gaps — places where the base structure shows through. This is where the small balloons and glue dots come in.
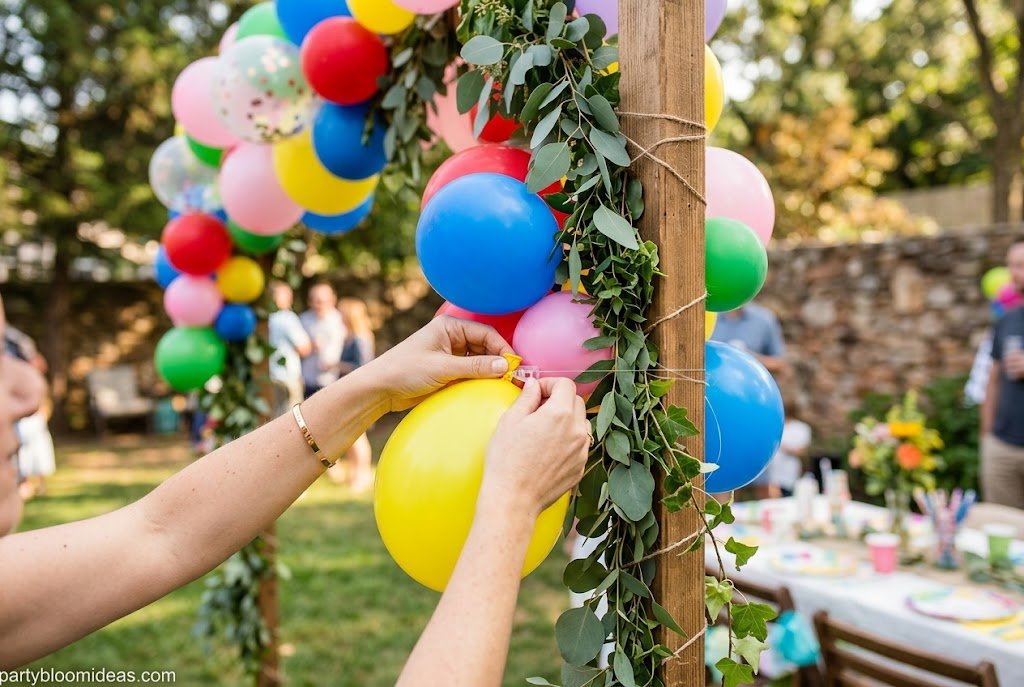
- Use glue dots to attach small (5-inch) balloons directly onto the surface of larger balloons, tucking them into gaps
- Add greenery or dried florals with glue dots — eucalyptus stems tucked into the arch add texture and make it look less like a balloon arch and more like an installation
- Add any foil elements (star balloons, number balloons) at this stage — attach them to the back of the arch so they extend forward
💡 Pro Tip: Fresh eucalyptus from Trader Joe’s ($3.99 a bunch) tucked into an arch at 5–6 points looks extraordinary and costs almost nothing. It adds a natural texture that photographs beautifully and makes the arch feel genuinely elevated. Emma started doing this after I suggested it at her bridal shower — she’s done it on every arch since.
Step 7: Hang, Position, and Final Check
Time: 10–15 minutes
Once the arch is fully built, final positioning makes or breaks the finished look.
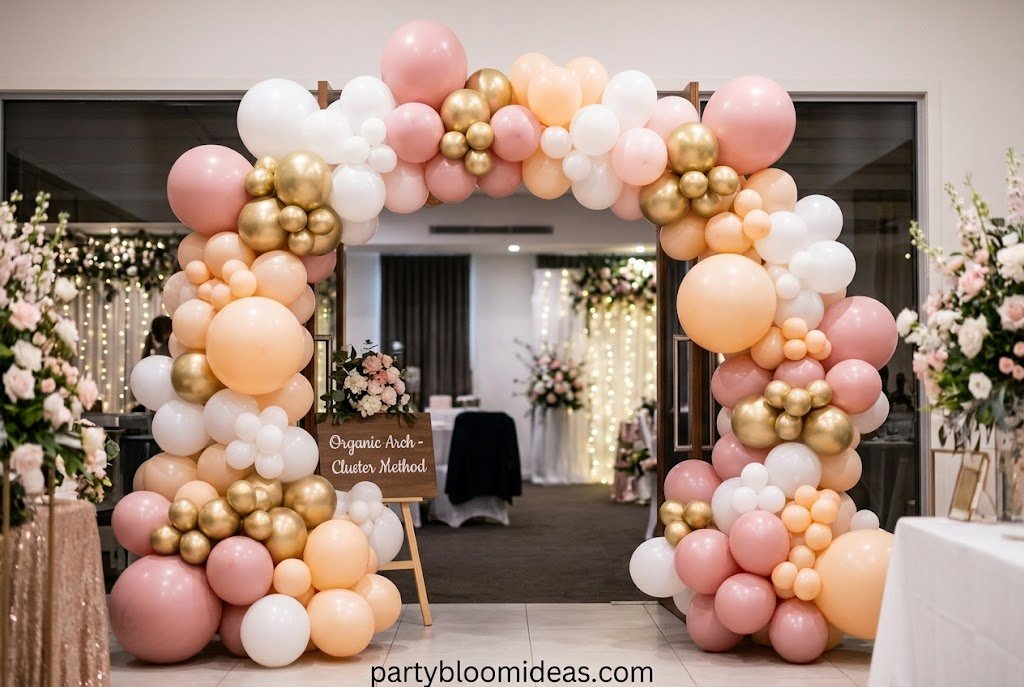
- Height: The center of the arch should be at least 7 feet high for a doorframe or backdrop — lower than that and tall guests will brush the balloons
- Backdrop pairing: A balloon arch against a white wall reads as a complete installation. Against a cluttered wall, it reads as chaos. Clear the wall before you hang
- Photo test: Take a photo from the angle where most guests will photograph it. The arch should fill 60–70% of the frame. If it’s too small, add balloons to the outer edges
- Lighting: Natural light from the side makes balloon arches photograph beautifully. A flash directly overhead flattens them. For evening events, position a warm light source (lamp or LED) at a 45-degree angle from the arch
How Long Does a DIY Balloon Arch Last?
Latex balloons at room temperature without helium last 12–24 hours before they start to lose pressure. Air-filled arches (the method in this guide) last 2–5 days before visible deflation. Factors that affect longevity:
- Heat: Balloons expand and pop more quickly in warm rooms or direct sunlight. Keep arches away from windows and heat vents
- Humidity: High humidity slightly extends balloon life. Low humidity (dry climates, winter heating) shortens it
- Balloon quality: Qualatex and Sempertex balloons consistently outlast Dollar Tree and generic Amazon balloons. For a party-day-only arch, the cheaper balloons are fine. For an arch you want looking good for 3–4 days, invest in quality
According to the Balloon Council (2024), properly inflated latex balloons used in air-filled installations typically maintain full inflation for 12–24 hours at room temperature. For multi-day displays, hi-float treatment ($8–$10 at party supply stores) extends balloon life to 3–5 days.
What Are the Most Common DIY Balloon Arch Mistakes?
- Not enough balloons. The most common mistake I see. A sparse arch looks worse than no arch. If you think you have enough balloons, add 20% more. Density is what makes arches look professional.
- All the same size. Uniform-size balloons look flat and manufactured. Use at least two sizes, ideally three. The size variation is what creates the organic, dimensional look.
- Wrong color distribution. Clustering all of one color together makes the arch look striped rather than blended. Distribute each color throughout the arch, rotating positions within each cluster.
- Building too far in advance. Latex balloons at room temperature lose pressure overnight. Build the arch the morning of the party — not the day before. I learned this at a graduation party I helped plan two years ago. The arch I built the evening before had visibly deflated half-sized balloons by the time the party started.
- Skipping the small balloons. Small (5-inch) balloons are gap fillers. Without them, the frame or fishing line shows through. They take 10 extra minutes to add and transform the finished look.
- Ignoring the backdrop. A balloon arch against a cluttered or visually busy wall looks worse than no arch. The wall is as important as the arch.
🎉 Quick Summary
✅ Best for: Party entrances, photo backdrops, food table focal points — any occasion from kids birthdays to bridal showers to corporate events
💰 Budget range: $18–$45 for a full organic arch; $30–$55 for a grid arch
⏱ Setup time: 90–120 minutes for organic; 3–4 hours for grid
🌟 Top pick: Organic arch on fishing line — easiest, most forgiving, best-looking style for beginners
📌 Don’t skip: Size variation in your balloons. It’s the difference between “I bought balloons” and “I built a balloon arch.”
People Also Ask
How many balloons do I need for a balloon arch?
For a standard organic arch covering a 6–8 foot doorframe or backdrop, plan on 80–120 balloons in mixed sizes. For a fuller, more professional look, 120–150 is better. The most common mistake is underestimating — a sparse arch looks worse than an overbuilt one. When in doubt, buy 20% more than you think you need.
Do you need helium for a balloon arch?
No — balloon arches are air-filled, not helium-filled. Helium balloons float upward and can’t be structured into an arch formation. Air-filled balloons stay in place, last longer than helium, and cost significantly less. An electric pump inflates 100 air-filled balloons in 15–20 minutes. No helium tank needed.
How long does it take to make a DIY balloon arch?
An organic arch for a standard 6–8 foot span takes 90–120 minutes from first inflation to final styling, assuming you have an electric pump. Without a pump, add 60–90 minutes for manual inflation. A grid arch with 150–200 uniform balloons takes 3–4 hours. Build the arch the morning of the party — not the day before — for best results.
Frequently Asked Questions
What balloons are best for a DIY balloon arch?
For quality: Qualatex 11-inch latex balloons are the industry standard — they inflate consistently, have strong necks for tying, and last longer than generic brands. For budget builds: Amazon Basics balloon packs or Dollar Tree balloons work fine for same-day arches. Get three sizes (5-inch, 9-inch, 11-inch) for organic style. Avoid foil balloons as your main arch material — they don’t cluster well and pop easily against latex.
How do I attach a balloon arch to a wall without damage?
3M Command hooks are the standard solution — they hold up to 5 lbs, remove cleanly without wall damage, and are available at Dollar Tree (basic) and Target/Amazon (heavy-duty). For a fishing line arch, two Command hooks at either end of the wall span is enough. For a heavier PVC frame arch, use four hooks — two at the top corners and two at the base. Always press the Command hook adhesive firmly for 30 seconds and wait 1 hour before loading with weight.
Can I make a balloon arch the night before?
You can, but air-filled latex balloons lose 10–20% of their pressure overnight at room temperature. By morning, smaller balloons (5-inch) will visibly deflate. If building the night before is necessary, use hi-float treatment ($8–$10 at party supply stores) inside each balloon before inflating — it extends life to 3–5 days. Build the arch in a cool room away from heat vents. The morning-of build is still recommended when time allows.
How much does a DIY balloon arch cost?
A basic organic arch with Dollar Tree or Amazon basic balloons runs $18–$25 in supplies. A fuller arch with quality balloons, mixed sizes, and optional greenery tucking runs $30–$45. A complete balloon arch kit from Amazon (frame + pump + balloons) costs $20–$35 but typically produces a smaller, less full arch than building from scratch. Compare: a professional balloon arch installation from a balloon artist costs $150–$400 for the same result.
What is the easiest balloon arch to make?
The organic arch on fishing line is the most beginner-friendly style. It requires no frame construction, no precise measurements, and no special skills. The organic aesthetic is also the most forgiving — imperfect clusters and uneven spacing look intentional rather than wrong. Start with two colors plus white, get three balloon sizes, and follow the four-balloon cluster method described in this guide. Your first arch will look significantly better than you expect.
How do I keep a balloon arch from falling down?
For wall-mounted arches: two 3M Command hooks rated for 3–5 lbs each, positioned at the arch endpoints, hold a standard 80–120 balloon arch without issue. For freestanding arches: weighted PVC base pipes filled with sand are the most reliable option. Fill a 12-inch length of capped PVC pipe with fine gravel or sand ($3–$4 at Home Depot) and the base will hold a 6-foot arch upright even with mild indoor air movement.
Should I use latex or foil balloons for an arch?
Latex balloons for the structure — they’re flexible, cluster easily, and create the organic texture that makes arches look professional. Foil balloons (stars, numbers, letters) as accent pieces only — insert 2–4 foil elements at strategic points for visual interest, but don’t use them as primary arch material. Foil balloons pop against latex, can’t be tied into clusters, and their smooth surface contrasts poorly with the organic balloon texture.
Do I need a special pump for balloon arches?
An electric balloon pump ($18–$25 on Amazon) is strongly recommended for any arch requiring more than 40 balloons. Manual hand pumps work but require 60–90 minutes of physical effort for 100 balloons. A dual-nozzle electric pump inflates two balloons simultaneously at adjustable pressure settings, which also helps maintain consistent balloon sizes. Borrow one from a friend or party supply rental if you don’t want to buy.
How do I add flowers or greenery to a balloon arch?
Tuck stems directly into the gaps between balloon clusters — no glue needed for fresh stems with enough rigidity. For eucalyptus, lavender, or similar light stems, insert the cut end between two balloons and the surrounding pressure holds it in place. For heavier florals, use glue dots on the stem and press firmly against an adjacent balloon. Add greenery after the arch is fully built, working from the center outward. Use 3–5 insertion points maximum — too much greenery fights the balloons rather than complementing them.
What’s the difference between a balloon arch and a balloon garland?
They’re often used interchangeably, but technically: a balloon arch spans from one point to another in a curve (doorframe, backdrop corners), while a balloon garland is a linear strand of balloons that can be draped along a table edge, staircase, or wall in any direction. Both use the same cluster-building technique. Garlands are more versatile in placement; arches create more dramatic visual impact at party entrances.
Can I make a balloon arch outside?
Yes, with precautions. Heat and direct sunlight accelerate balloon expansion and popping — in summer heat above 85°F, balloons can pop within 2–4 hours. Build an outdoor arch in shade or semi-shade. Inflate balloons slightly undersize (about 80% full) to give them room to expand in heat. Avoid direct sunlight on the finished arch. Wind is the other issue — secure all anchor points with additional weight or tie-down. An outdoor arch should be built and positioned the morning of the event, not in advance.
Conclusion
A DIY balloon arch is one of the easiest ways to transform any celebration into a memorable event without spending a fortune. With the right color palette, a mix of balloon sizes, and a little patience, you can create a professional-looking display that’s perfect for birthdays, bridal showers, baby showers, graduations, holidays, and more. Whether you choose a simple organic design or a more structured arch, following the step-by-step process in this guide will help you avoid common mistakes and achieve beautiful results. Gather your supplies, start inflating, and enjoy creating a stunning balloon arch that will impress your guests and become the highlight of your party photos.
Read More : 17 High-Energy Birthday Party Games for 4-Year-Olds (2026)
10 Father’s Day Party Ideas (2026) Sunday, June 21, 2026
21 Exciting Birthday Party Games for 12-Year-Olds (2026)