How to Make a DIY Balloon Arch is one of the most searched party decoration tutorials because it helps create a professional-looking backdrop without spending a fortune. Whether you’re decorating for a birthday party, baby shower, wedding, or graduation celebration, this step-by-step guide will show you exactly how to make a DIY balloon arch using affordable supplies and simple techniques.
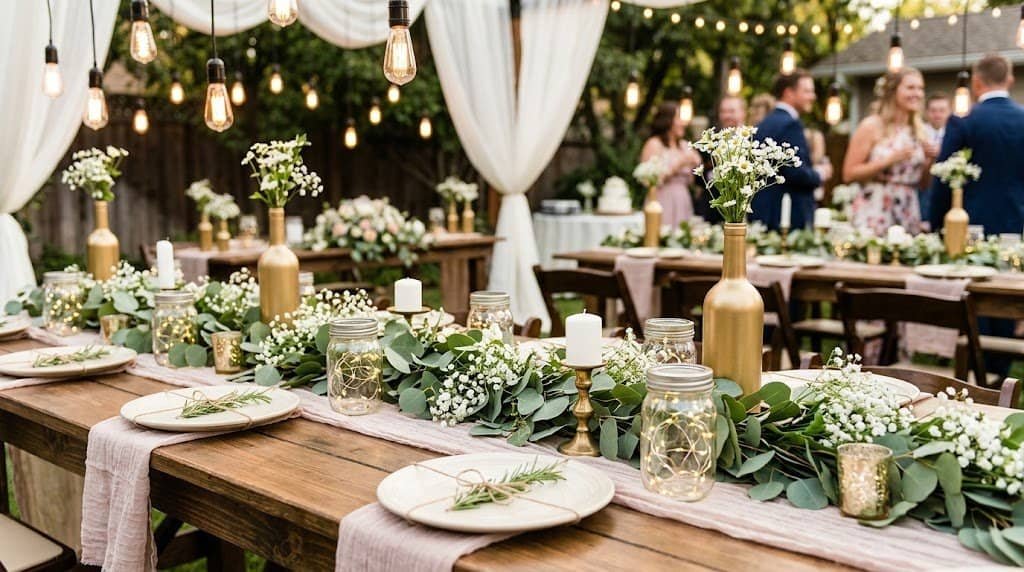
Emma threw her daughter’s fifth birthday party last spring, and I still think about the moment I walked through that back gate. There was a balloon arch spanning the entire fence line — peachy salmon, soft white, a pop of mauve, a few sage green leaves tucked between clusters. It looked like something off a professional party photographer’s portfolio. I walked over and asked how much she spent on a decorator.
She laughed. “I did it myself. Forty-five bucks from Amazon and two hours on a Saturday morning.”
That’s a DIY balloon arch done right. Not a lopsided dollar-store mess. Not a perfectly symmetrical corporate-event grid. An organic arch — a little irregular, a little romantic, completely on purpose.
Here’s what I’ve learned after helping build arches for bridal showers, kids’ parties, baby showers, and at least three graduation weekends: the technique is simpler than it looks, and the mistakes are all avoidable. Here’s the full step-by-step guide — what to buy, what to skip, and how to make it look like you knew what you were doing the whole time.
What Is a DIY Balloon Arch, Really? (And What It Isn’t)
What it IS:
- A cluster-based garland of inflated latex balloons shaped into an arch or curve
- Organic, irregular, and intentionally imperfect — clusters vary slightly in size
- Achievable without a professional balloon artist or a $300 rental
- Done with fishing line, balloon tape, or a PVC frame depending on your setup
What it ISN’T:
- A balloon column (those are vertical towers — different build)
- A rigid, perfectly uniform grid (that’s a balloon wall, and it takes twice as long)
- Something that requires a helium tank (most arches are air-filled)
The trick is understanding that the organic arch style — the one that actually looks expensive — is more forgiving, not less. Slightly uneven clusters? That’s the look. Balloons at slightly different angles? Correct. The only thing that kills it is using too few balloons and leaving gaps, or using three colors that fight each other. We’ll cover both.
What You’ll Need Before You Start
Supplies:
- 80–120 latex balloons (11-inch size, matte finish — see note below on foil)
- 1 roll of balloon decorating strip / balloon tape ($4–$8 on Amazon)
- 1 hand pump or electric balloon pump ($8–$25)
- Clear fishing line or balloon garland string
- Removable adhesive hooks (Command strips work) or PVC pipe frame
- Optional: faux eucalyptus or greenery sprigs ($6–$12 at Hobby Lobby)
- Optional: 5-inch “filler” balloons in white or neutral for gap-filling
Total cost: $25–$65 depending on whether you need a frame
Step 1: Choose Your Color Palette
This step matters more than people think. I’ve seen arches fail before a single balloon was inflated — just because the colors were wrong.
Best for: This decision sets everything. A good palette has 3–4 colors maximum: one dominant (40–50% of balloons), one secondary (25–30%), one accent (15–20%), and optionally one neutral like white or champagne to separate and breathe.
How to pick:
- Pull from your party’s existing colors (napkins, tablecloth, invitation)
- Matte latex reads more expensive than shiny latex — almost always choose matte
- Avoid more than 4 colors. Every arch I’ve seen go wrong was chasing too many shades
Specific palette examples:
- Boho Birthday: Terracotta, dusty rose, sage, ivory
- Baby Shower: Sage green, cloud white, soft yellow, champagne
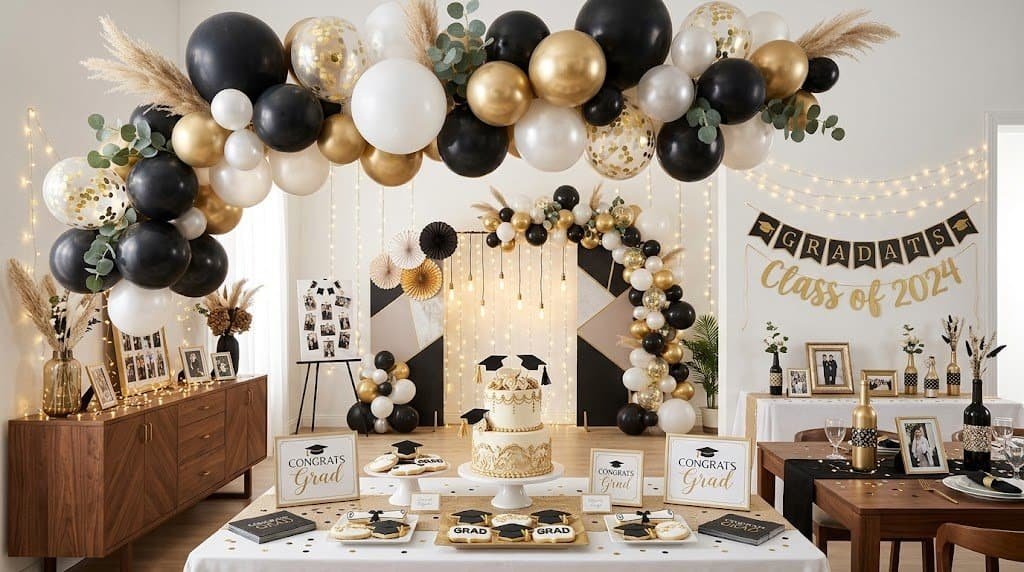
- Graduation: School colors + white + gold (3 colors max)
- Bridal Shower: Blush, mauve, white, soft burgundy
Balloon count by arch size:
| Arch Size | Balloons Needed | Estimated Time |
|---|---|---|
| 3-foot half arch | 40–50 balloons | 60–90 minutes |
| 5-foot half arch | 60–80 balloons | 90–120 minutes |
| 6–8 foot full arch | 100–120 balloons | 2–3 hours |
| 10+ foot statement arch | 130–160 balloons | 3–4 hours |
💡 Pro Tip: Buy 20% more balloons than you think you need. Some will pop during inflation. Some will look wrong once clustered. You want options.

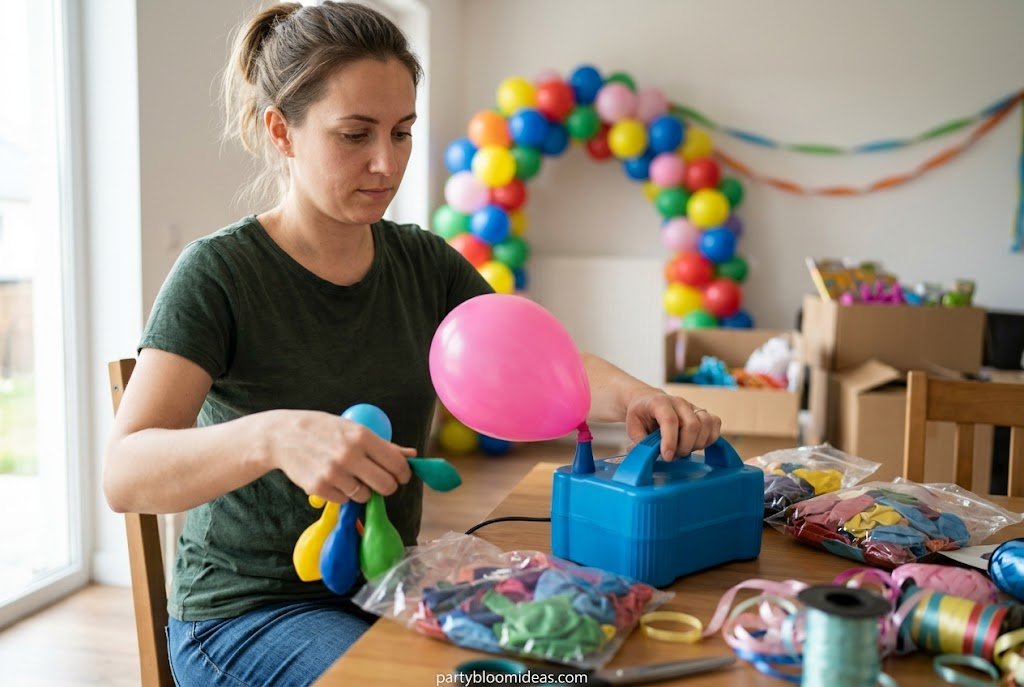
Step 2: Inflate Your Balloons
The single biggest mistake I see? Inflating all balloons to the same size. Organic arches need variation. That’s what makes them look intentional rather than manufactured.
The sizing rule:
- 70% of balloons: full 11-inch inflation
- 20% of balloons: slightly under-inflated (roughly 9 inches) — these become filler clusters
- 10% of balloons: 5-inch minis (sold separately) — these go in gaps at the end
Tools:
- Hand pump: Free arm workout, $8 from Amazon. Fine for under 60 balloons.
- Electric pump: $18–$25, inflates a balloon in 3–4 seconds. Worth it for anything over 80 balloons.
- Never use your mouth. Latex balloons inflated with breath deflate 2–3x faster than pump-inflated ones and will look sad by hour four of the party.
Knot tip: Tie the knot close to the balloon’s neck, leaving only a 1-inch tail. Longer tails make clustering harder.
Time required: 45–60 minutes for 100 balloons with an electric pump. 90+ minutes by hand.
At my niece’s birthday three years ago, I tried to inflate 80 balloons with a hand pump solo. My forearm was useless for two days. Buy the $18 electric pump. It’s not optional.
Step 3: Build Your Frame (Or Go Frameless)
Here’s where most tutorials split into two camps. Let me give you the honest breakdown:
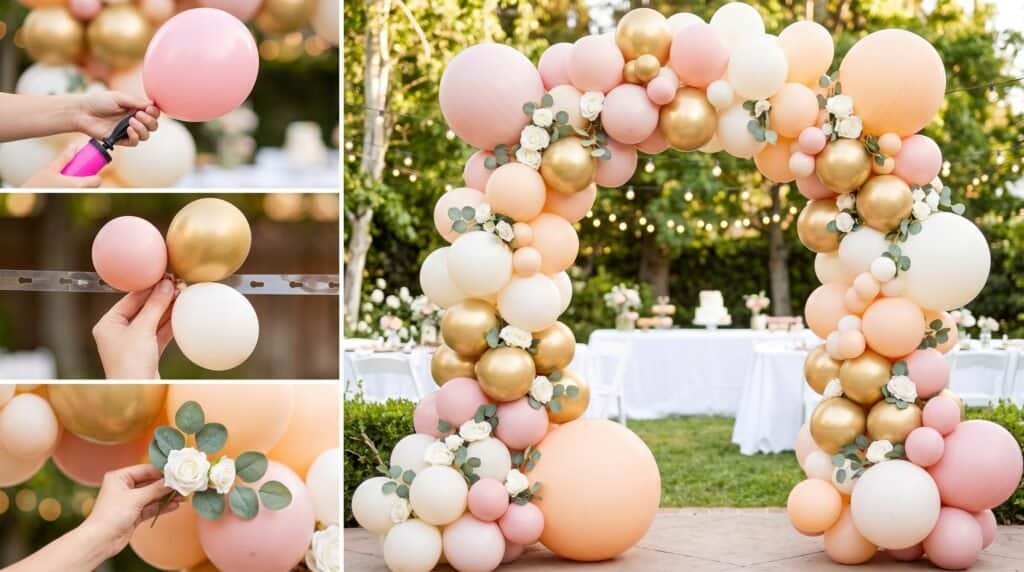
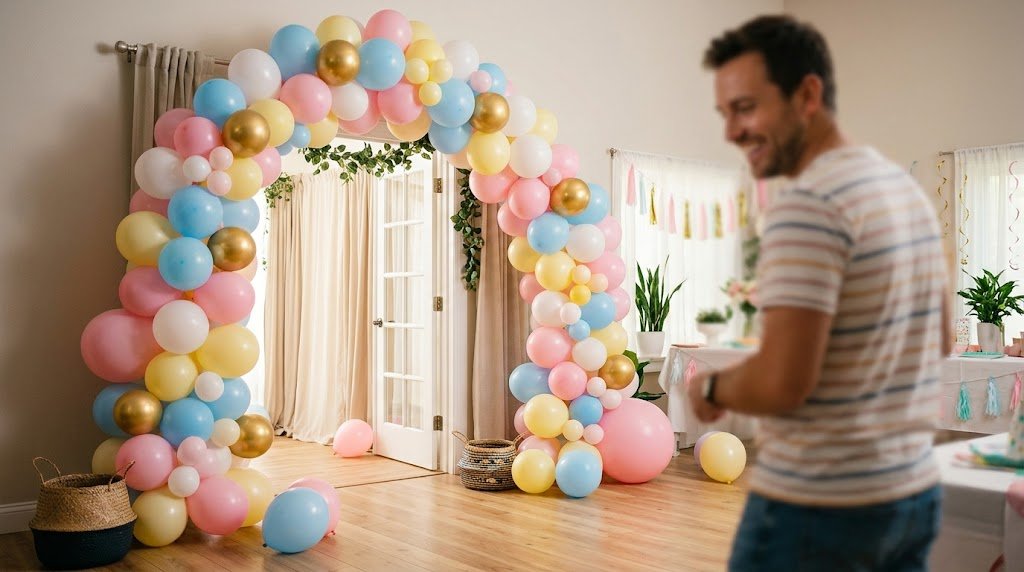
Option A: No Frame (Tape Strip Method)
How it works: Thread balloons through the holes in balloon tape strip, cluster them in groups of 4, and hang the completed garland with Command hooks.
Best for: Indoor arches, doorway frames, backdrop arches that lean against a wall
Cost: ~$5 for the tape strip
Pros: No construction, nothing to transport, tape goes in the trash after Cons: Arch needs a surface to lean against — it won’t stand on its own
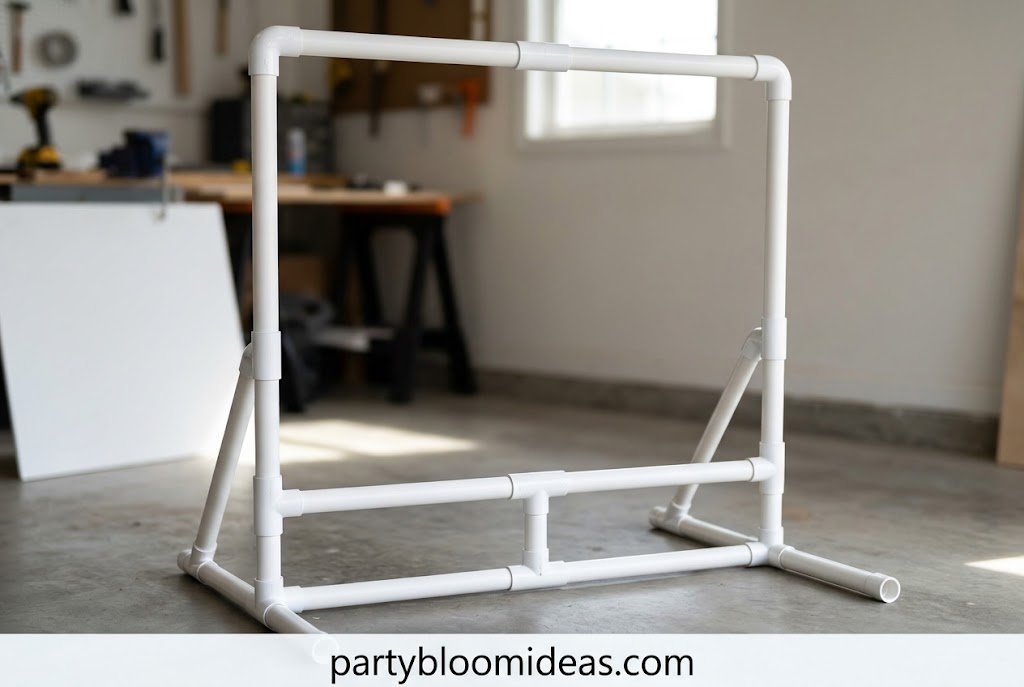
Option B: PVC Pipe Frame
How it works: Two PVC pipes ($4 each at Home Depot, ½-inch diameter) anchored in Christmas tree stands or PVC bases, connected at the top with a flexible coupler or electrical conduit.
Best for: Outdoor arches, entrance arches that need to stand alone, arches over tables
Cost: ~$25–$40 total for materials
Pros: Freestanding, adjustable height, reusable Cons: Requires an hour of construction; you need two people to raise it
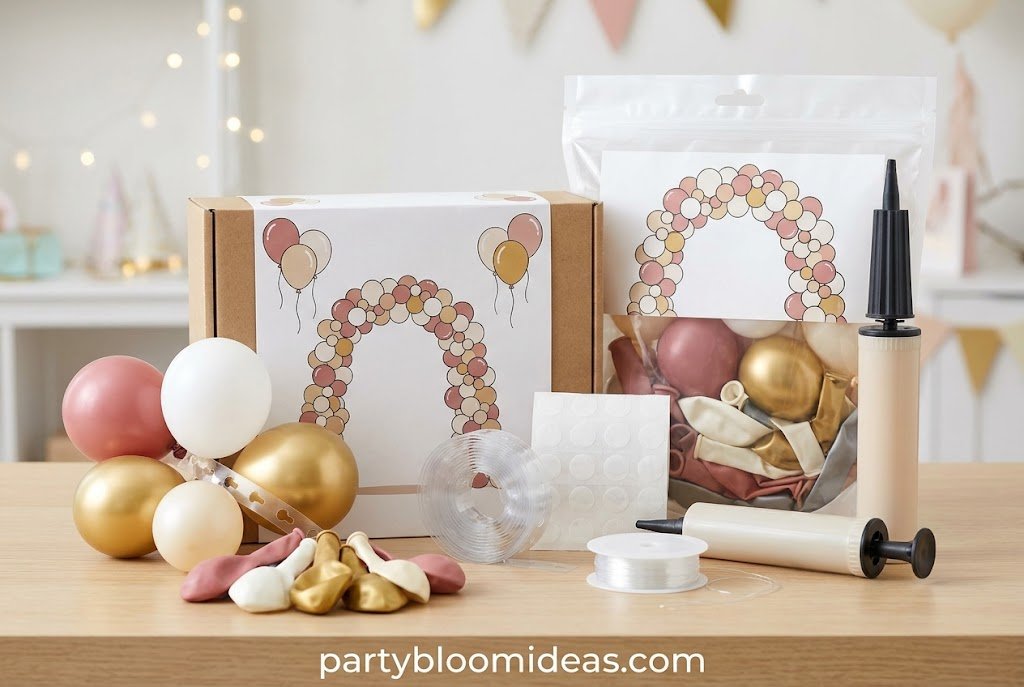
Option C: Balloon Arch Kit
How it works: Pre-packaged kit includes flexible strip, sometimes a frame — marketed for $15–$45 on Amazon.
Best for: First-timers who want everything in one box
Honest take: The kits save you maybe 10 minutes of research and cost 30–50% more than buying components separately. They’re fine. They’re not magic.
| Frame Type | Cost | Setup Time | Best For | Freestanding? |
|---|---|---|---|---|
| No frame (tape strip) | $5–$8 | 30 min | Indoor, against wall | No |
| PVC pipe frame | $25–$40 | 60–90 min | Outdoor, entrance | Yes |
| Balloon arch kit | $20–$45 | 45 min | Beginners | Partial |
| Tension rod | $12–$18 | 15 min | Doorways | Yes (in frame) |
Step 4: Create Your Balloon Clusters
This is the actual technique that separates an arch that looks professional from one that looks like a sad birthday balloon fell apart.
The quad cluster method:
- Take 4 balloons — 2 of one color, 1 secondary, 1 accent
- Pair them up: tie the knots of 2 balloons together to make a duplet
- Make a second duplet
- Twist the two duplets together once at the center — you have a quad cluster
- The cluster should look like a little four-petal flower from above
Attaching to tape strip:
- Push balloon necks through the tape strip holes, alternating which direction they face
- Vary the color distribution cluster to cluster — don’t create a repeating pattern
Attaching to PVC frame:
- Use monofilament fishing line (6-lb test is enough) to tie clusters to the frame
- Work from the bottom upward on each side, filling toward the top last
💡 Pro Tip: Rotate your clusters 45 degrees as you attach them. If every cluster faces the same direction, you’ll see gaps. Rotating creates that full, rounded look.
Step 5: Fill Gaps and Add Greenery
Once your main clusters are on, step back 6–8 feet and look for bare spots. There will be some. This is normal.
Gap filling:
- Use 5-inch balloons in white or neutral — blow them up small and tuck them between clusters
- Use small pieces of balloon tape to anchor tucked-in balloons without retying
- Greenery sprigs (eucalyptus, ivy, ferns): insert stems directly between clusters — no glue needed, the balloons hold them
The greenery rule: One bundle of faux eucalyptus ($8 at Hobby Lobby) is usually enough for an 8-foot arch. You want moments of green, not a hedge. 3–4 small sprigs tucked in at organic intervals. Done right, it looks curated. Done wrong, it looks like you tried to hide bad balloon work behind plants.
I’ve tested this at seven different parties. The greenery always elevates the arch — but only when it’s sparse. The moment it becomes 50/50 balloon-to-greenery, something feels off.
💡 Pro Tip: Fresh eucalyptus ($5–$7 per bunch at Trader Joe’s) smells incredible and photographs beautifully. The slight wilting over a 4–6 hour party actually adds to the organic look. Worth it for events where photos matter.
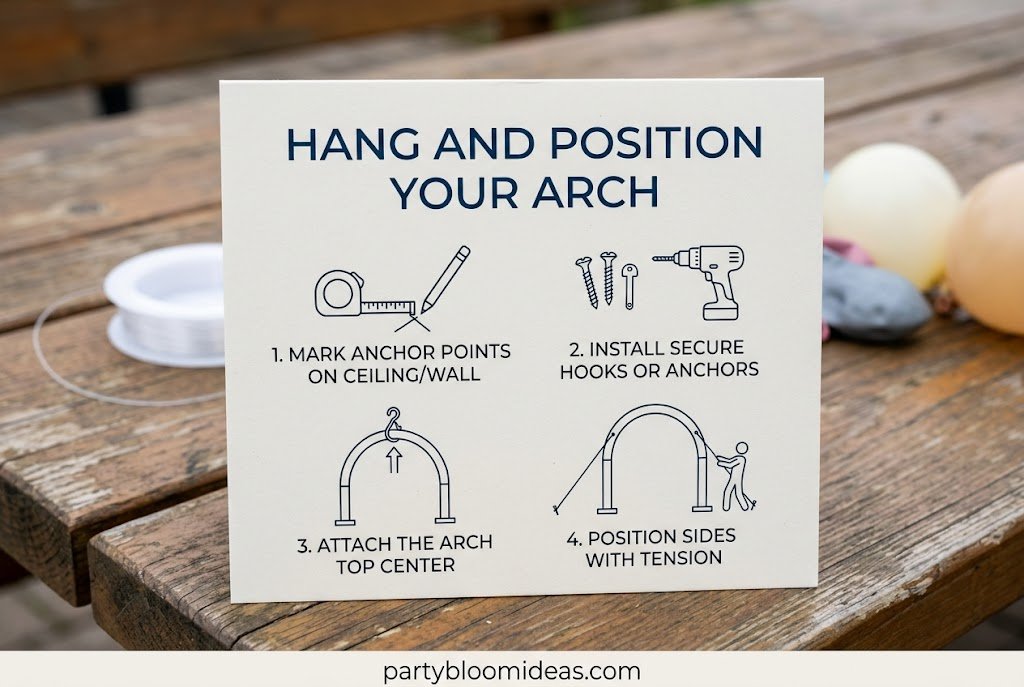
Step 6: Hang and Position Your Arch
Indoor positioning:
- Command Large hooks hold up to 5 lbs each — enough for a 6-foot garland
- Use 3–4 hooks for an arch that covers a doorway
- Space hooks at 12-inch intervals along the top curve
Outdoor positioning:
- Zip ties to fence posts, patio uprights, or shepherd’s hooks
- PVC frame weighted with sandbags or concrete in Christmas tree stands
Timing: Set up the arch no more than 12 hours before the party. Air-filled latex looks best within 4–8 hours of inflation. If you need to build earlier, store in a cool, shaded room — heat and sunlight degrade latex fast.
At a graduation party I helped with two summers ago, we built the arch the night before and left it on the sunny back porch. By party time, 30% of the balloons had shrunk noticeably. The arch still worked, but it was noticeably less full. Build day-of when possible.
Step 7: Final Styling and Troubleshooting
The 6-foot test: Stand 6 feet back. Look for:
- Any obviously bare patches → tuck in 5-inch fillers
- Any color clustered too heavily in one spot → you can untie and redistribute
- Any cluster leaning too far in one direction → rotate by loosening the fishing line knot
Common last-minute fixes:
| Problem | Fix |
|---|---|
| Balloon popped mid-arch | Tuck a same-color balloon in the gap; tie it to neighboring neck |
| Arch drooping on one side | Add a Command hook mid-sag, or redistribute weight by removing 1–2 clusters |
| Colors look too similar | Add white 5-inch fillers as separation between similar shades |
| Arch looks too sparse | You needed more balloons. Add another layer of clusters on top of existing ones |
| Greenery falling out | Bend stems into a small hook shape before inserting — holds without glue |
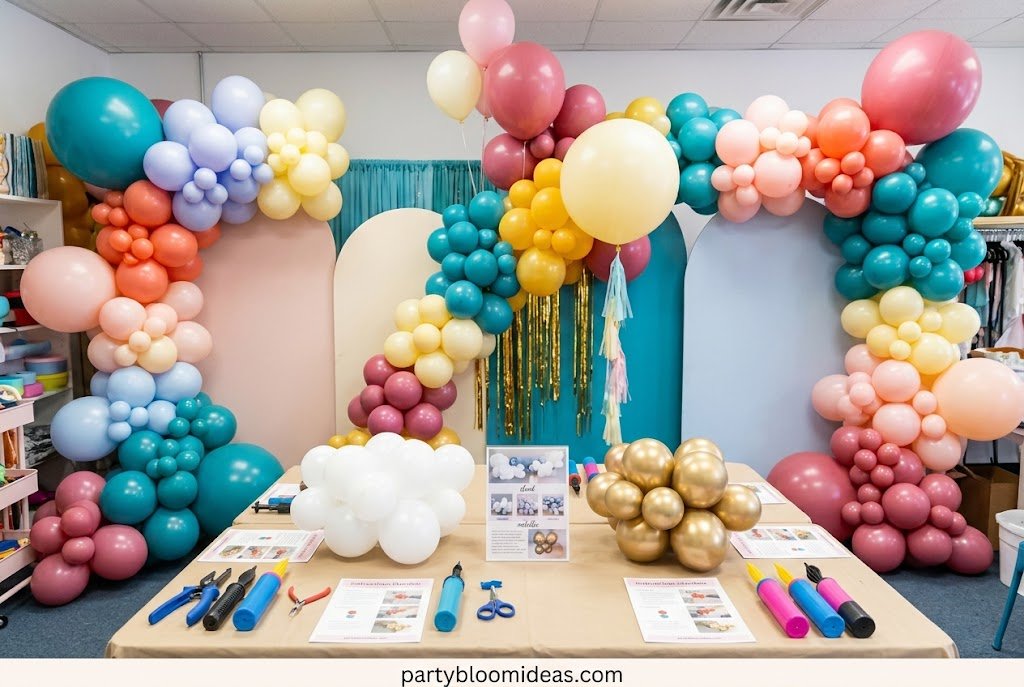
3 Balloon Arch Styles — Which One Is Right for Your Party?
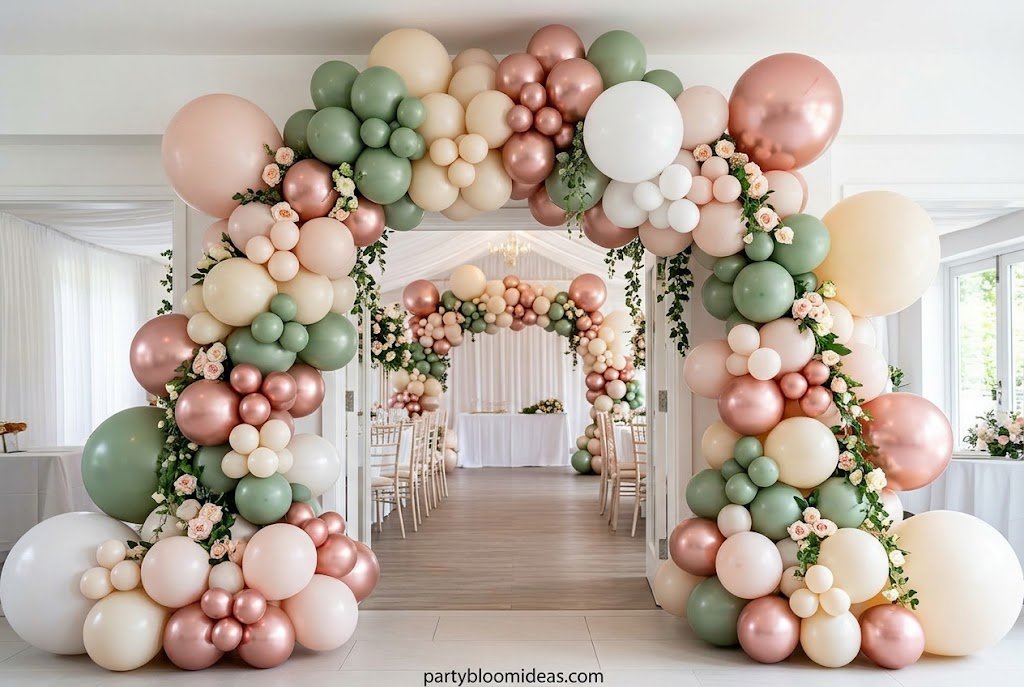
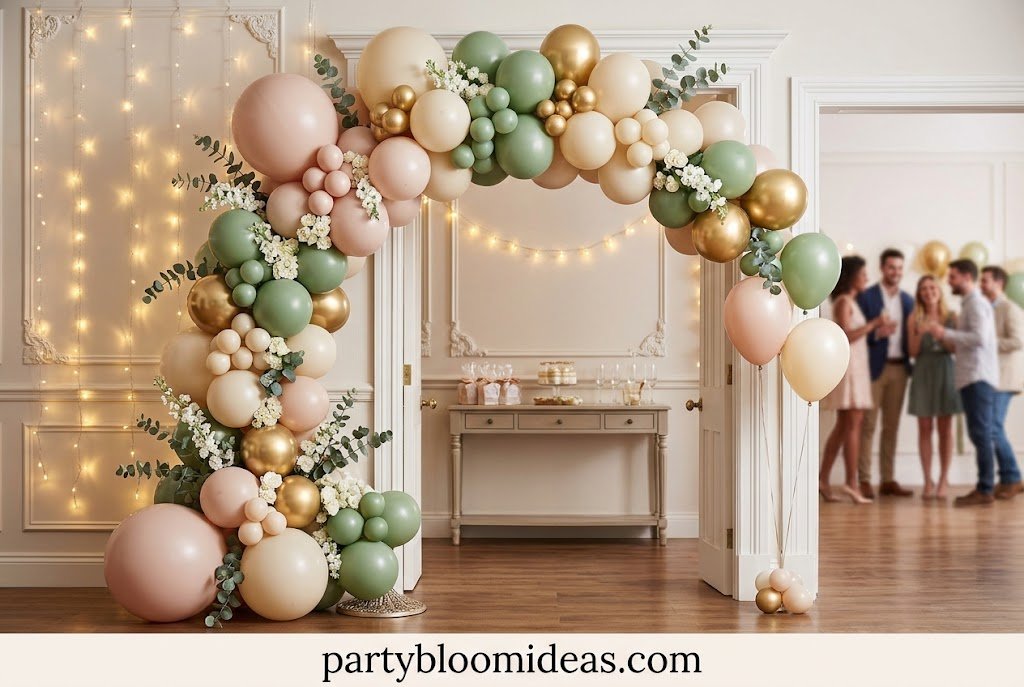
Organic Arch (Most Popular)
Best for: Birthdays, bridal showers, baby showers, graduation parties Irregular cluster sizes, mixed colors, flowing shape. This is the style you see everywhere right now — and for good reason. It’s the most forgiving to build and the most photogenic. Budget: $35–$65 for an 8-foot arch. Wow factor: 9/10.
Half Arch
Best for: Backdrop accents, photo backdrops, table or dessert station framing Sweeps from one corner point (on the ground or a stand) up and across. Only one side, which cuts your balloon count nearly in half. Great when you want visual drama without the arch dominating the whole space. Budget: $20–$40. Wow factor: 8/10.
Grid Arch
Best for: More formal events, corporate parties, brand activations Balloons arranged in a uniform geometric grid — very structured, very symmetrical. Takes 40–60% more time than an organic arch and requires a frame. Looks intentional but not organic. Budget: $50–$80. Wow factor: 7/10 (style-dependent).
What’s Overrated (Honest Takes)
Foil number balloons inside an arch: The shiny silver or gold foil number balloons are all over Pinterest right now, and I’ll be honest — I think they’re a visual mistake inside an organic arch. The sheen clashes with matte latex. If you want numbers, display them separately on a table stand or as a standalone piece. Keep them out of the arch itself.
Confetti-filled balloons: They look amazing in photos and deflate into a confetti disaster you’ll be finding in your carpet for six months. Skip them for the arch; they’re also heavier and make clustering harder.
Chrome/metallic latex: Shiny latex balloons photograph as hot spots — bright glare in every image. The matte finish versions look more intentional and expensive in photos. After seeing the difference at a bridal shower last fall, I never buy chrome again.
People Also Ask
How long does a DIY balloon arch last? Air-filled latex balloon arches typically last 12–24 hours when kept in a cool, shaded indoor environment. Direct sunlight, heat, and outdoor humidity all speed up deflation. Build as close to party time as possible — ideally the morning of a daytime event.
Do you need a frame to make a balloon arch? No. The tape-strip frameless method works well for arches that lean against a wall, hang in a doorway, or drape across a backdrop. You only need a freestanding frame (PVC pipe or a commercial stand) if your arch needs to stand independently without a wall.
How many balloons do I need for a balloon arch? A 6-foot organic balloon arch requires approximately 80–100 balloons. A 10-foot full arch needs 130–160. Budget for 20% extra to account for pops and size variation.
Can I make a balloon arch without helium? Yes — most DIY balloon arches use air inflation, not helium. Air-filled balloons last significantly longer than helium-filled ones and are attached to the frame rather than floating. Helium is only needed if you want floating balloon clusters, not an arch structure.
How far in advance can I make a balloon arch? Ideally, build no more than 12 hours before the event. If you must build the night before, store in a cool interior room away from sunlight and heat sources. Avoid anything above 75°F — heat causes latex to degrade and balloons to shrink faster.
🎉 Quick Summary
✅ Best for: Birthdays, bridal showers, baby showers, graduation parties, welcome home events 💰 Budget range: $25–$65 for a 6–8 foot arch ⏱ Setup time: 2–3 hours (with electric pump) 🌟 Top pick style: Organic arch with matte latex in 3–4 colors + eucalyptus accents 📌 Don’t skip: Buy 20% more balloons than you think you need, and use an electric pump — it changes everything
Frequently Asked Questions
What size balloons are best for a DIY arch? 11-inch latex balloons are the standard. They cluster well, inflate to a manageable size, and are widely available. Use a mix of 11-inch (main clusters) and 5-inch balloons (gap fillers). Avoid 12-inch or larger for the body of the arch — they become unwieldy and the clusters look bloated.
How do I keep balloons from popping while building? Don’t over-inflate. Leave a slight give in the balloon when you press it — it should feel firm but not drum-tight. Avoid inflating near sharp surfaces. If you’re using wire or zip ties on a frame, wrap the wire ends in floral tape first. Temperature also matters: popping increases in hot, sunny conditions.
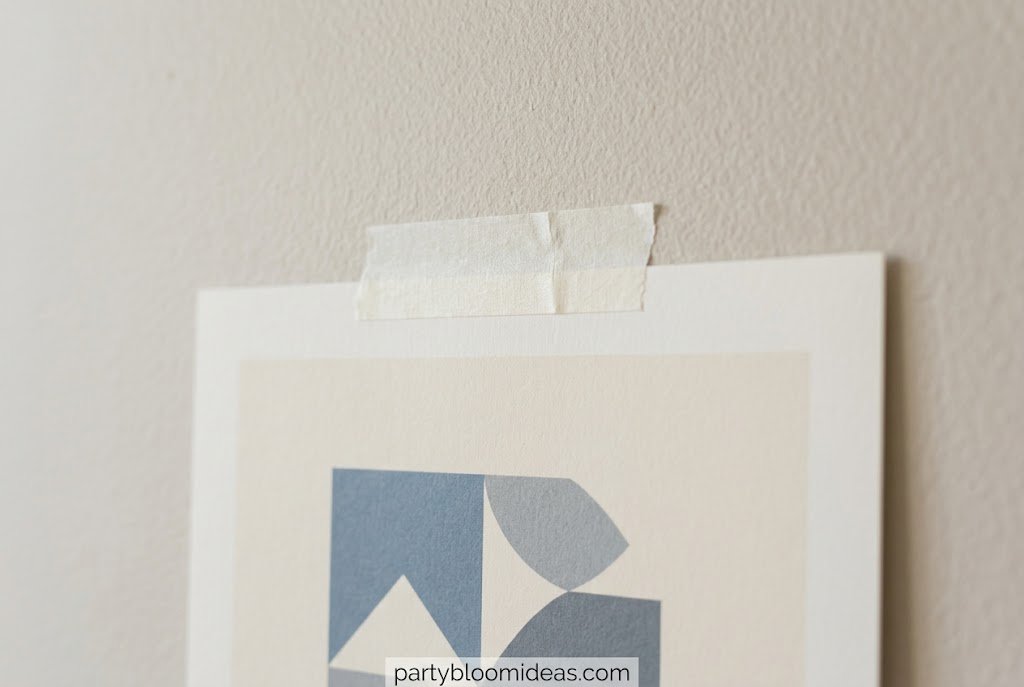
What’s the best way to attach balloon clusters to a wall without damage? Command Large picture-hanging strips (the white removable kind) hold up to 5 lbs each and leave no damage on painted drywall. Plan on 3–4 strips for a 6-foot garland. Press firmly for 30 seconds per strip, and let them set for an hour before hanging if possible.
Can I use a regular wall without a doorframe for a balloon arch? Yes. Use 4–6 Command hooks spaced evenly across the desired arch shape. Map out your hook placement with a light pencil mark first. The arch will lean slightly against the wall, which is fine for photos.
How do I make a balloon arch look full and professional? Three things: enough balloons (don’t under-buy), varied inflation sizes (full, medium, and small), and clusters rotated in alternating directions. Most amateur arches look sparse because hosts used 50 balloons for a space that needs 100.
What is balloon tape / balloon decorating strip? It’s a long, perforated plastic strip with holes every 1–2 inches. You push balloon necks through the holes to cluster them without tying knots to each other. It’s the foundation of the frameless method. Find it on Amazon (bulk rolls of 5 meters, $4–$6) or at Hobby Lobby in the party supplies section.
Can I make a balloon arch the night before? You can, but results will vary. Air-filled latex holds well overnight in a cool, dry room. Avoid garages (temperature swings), outdoor patios (humidity and heat), or warm interior spaces. Test one cluster overnight first if you’re unsure about your environment.
How do I make a half-arch balloon garland? Start your tape strip at a floor-level anchor point (a balloon weight or a Command hook near the baseboard), curve it upward and across to a higher anchor point on the opposite side. The curve creates the half-arch shape. Fill from the lower end upward so the weight is naturally distributed.
What balloons are best for outdoor arches? Latex balloons degrade faster outdoors due to UV exposure and temperature swings. For outdoor arches, inflate slightly under-full (which gives them room to expand in heat), build as close to the event as possible, and position in shade whenever you can. Expect 6–8 hours of good appearance outdoors vs. 12–24 indoors.
Is there a difference between balloon tape and balloon strip? They’re the same product, sold under different names. “Balloon tape,” “balloon decorating strip,” “balloon garland tape,” and “balloon chain” all refer to the same perforated plastic strip. Buy whichever is cheapest on Amazon — the product is identical.
How do I hang a balloon arch over a table? Use a tension rod placed slightly behind the table, or two Command hooks at equal heights on the wall behind the table, spanned with fishing line. Drape your balloon garland over this support structure. For a table arch that sweeps down both sides, use two floor-standing balloon columns on either end.
What should I do if balloons start deflating during the party? Keep your pump nearby with 8–10 extra inflated balloons in a bag. If a cluster shrinks visibly, swap the offending balloon by untying it from the cluster and inserting a fresh one. It takes 2–3 minutes and guests usually don’t notice.
Can I add flowers to a balloon arch? Yes. Faux greenery and silk flowers work best (insert stems between clusters; the balloons hold them in place). Fresh flowers can be added in small water tubes (floral tubes with a rubber cap) tucked into the arch. Real flowers add texture and smell beautiful but require same-day installation.
How do I transport a finished balloon arch? You don’t — not easily. It’s much better to transport supplies and build on-site. If you must move a completed garland, loosely roll it into a large garbage bag and transport in the back of an SUV. Never put a garland in a car trunk with the lid closed.
How much does it cost to hire someone vs. doing it yourself? Professional balloon arch installation typically runs $150–$400 for a standard 6–8 foot arch, depending on complexity and your area. DIY costs $25–$65 for the same size. The DIY version takes 2–3 hours of your time. For a single event, DIY wins on cost; if you’re doing multiple events in the same year, the skills and supplies carry forward.
Conclusion
A DIY balloon arch might look like a professional party decoration, but it’s actually one of the most beginner-friendly projects you can create for any celebration. With the right color palette, enough balloons, and a little patience, you can build a stunning arch that transforms your party space without spending hundreds on a decorator.
Whether you’re decorating for a birthday, baby shower, bridal shower, graduation, or special event, the organic balloon arch style offers the perfect mix of elegance, creativity, and affordability. Focus on balanced colors, varied balloon sizes, and thoughtful finishing touches like greenery, and you’ll end up with a photo-worthy centerpiece your guests will remember.
The best part? Once you’ve built your first balloon arch, you’ll realize it’s a skill you can reuse for countless celebrations to come.
Read More : 17 Halloween Wood Crafts That Sell Fast (DIY Ideas for Craft Fairs & Etsy)
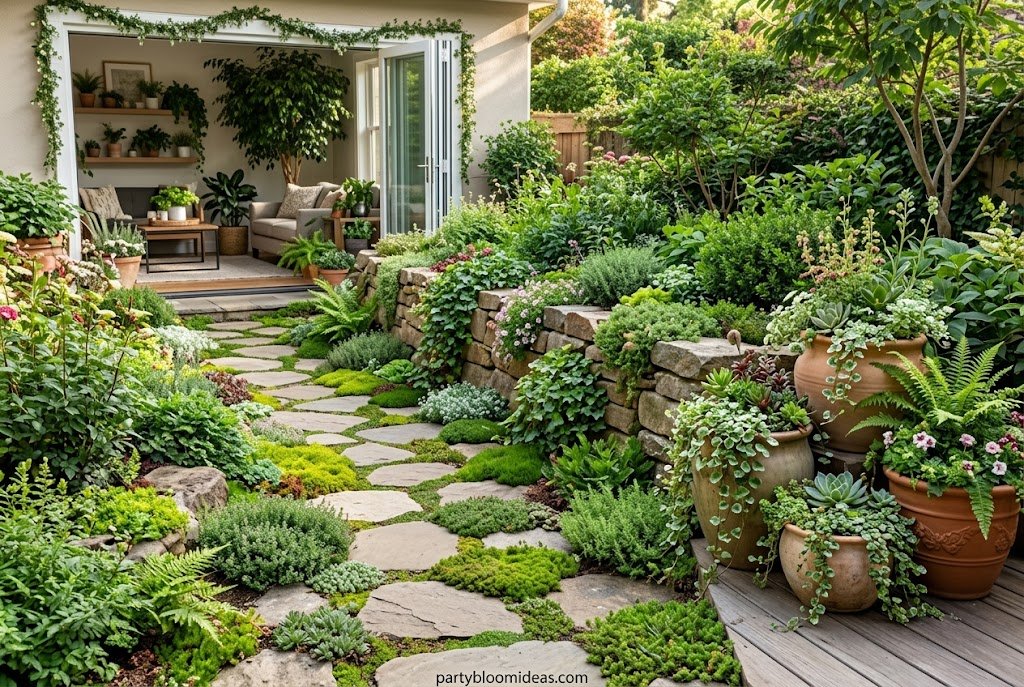
How to Throw a Perfect Spring Garden Party on Any Budget