📸 Quick Answer
A DIY photo booth needs three things: a backdrop (balloon arch, sequin curtain, twinkle lights), basic props (6–8 max), and good lighting facing guests. Total cost: $15–$90. Setup time: 10 minutes to 3 hours. No special equipment needed — a phone on a tripod works perfectly.
DIY photo booth ideas are one of the easiest ways to make any celebration fun, interactive, and memorable — and you don’t need a rental company or a big budget to pull one off. The whole thing comes down to a good backdrop, a few coordinated props, and lighting that faces your guests.
What Does a DIY Photo Booth Need? (The Basics)
What it IS:
- A designated corner or wall with a backdrop
- Good lighting facing guests — this matters more than anything else
- 6–8 props, maximum
- A phone or camera on a tripod, or a sign that says “selfie station”
What it ISN’T:
- A rented booth with a printer (great if you want it — just not DIY)
- A complicated setup requiring a backdrop stand
- A project that needs more than $90 or three hours
The trick is restraint. One good backdrop + good lighting + a few coordinated props = a photo booth guests will actually use. Hosts who over-build their photo booths often get fewer photos than the hosts who keep it simple.
The Best DIY Photo Booth Backdrop Ideas for Any Party
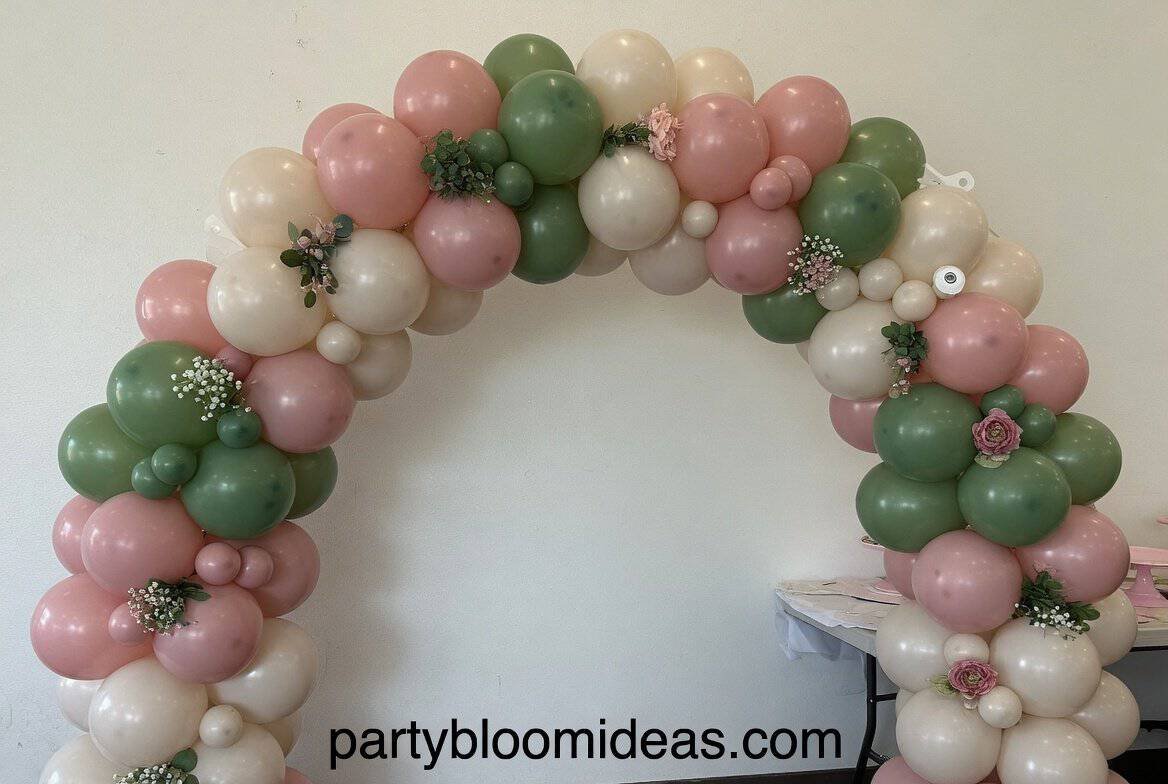
Balloon Arch Backdrop
Balloon arches are the most crowd-pleasing backdrop you can make, and they photograph beautifully on a phone camera. Build the arch the night before — it takes about two and a half hours — and a dusty rose, sage, and cream color combo will look like it came from a rental company.
What you need:
- 150–200 balloons in 3 coordinating shades (~$25–$35 — 2 bags per color at a dollar store)
- Balloon strip tape ($6)
- Command hooks rated for 5 lbs ($8)
- Optional: cluster of greenery or faux flowers tucked into gaps ($10–$15)
Total cost: $25–$55 | Best for: 15–30 guests
💡 Pro Tip: Mix 5-inch and 11-inch balloons throughout. Size variation is what makes a balloon arch look full and organic instead of flat — it’s the single trick that separates a good arch from a great one.
Best for: Birthdays, baby showers, bridal showers, graduation parties. Difficulty: Medium | Setup time: 2–3 hours.
The mistake most hosts make is building the arch too small. Aim for at least 5 feet wide and 6 feet tall — anything smaller looks like a balloon cluster floating near someone’s head.
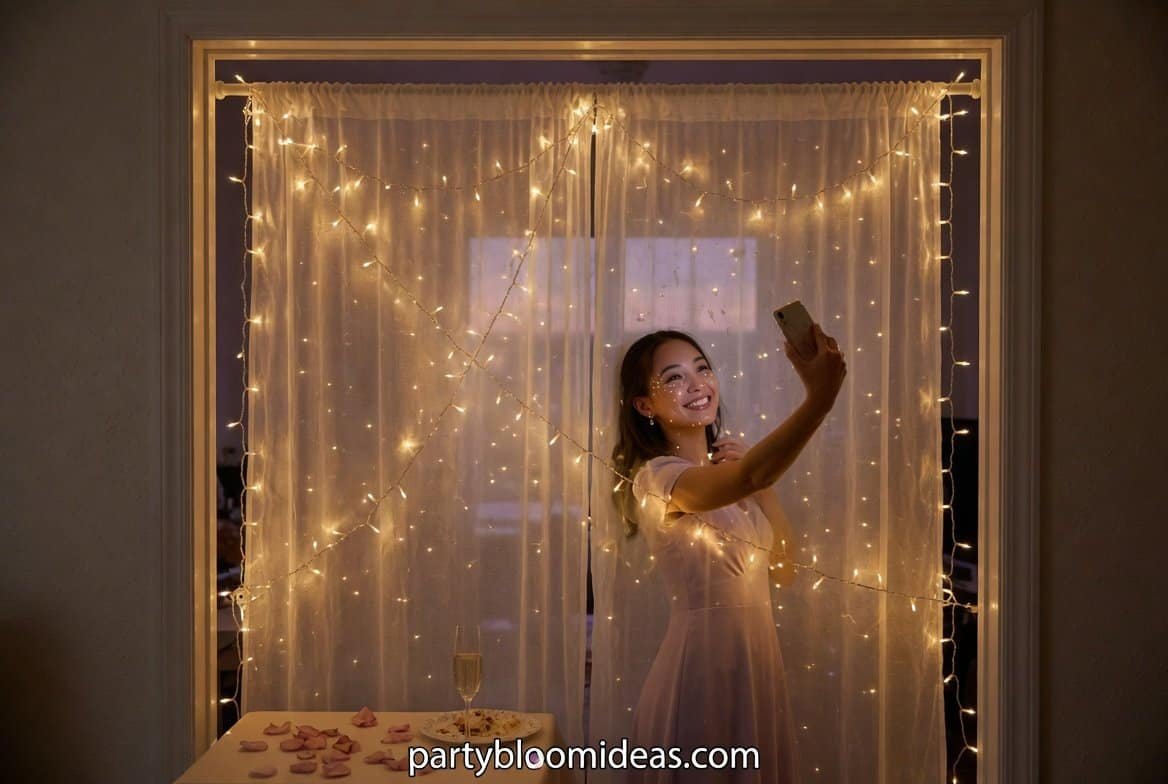
Twinkle Light Curtain Selfie Station
This is the go-to for anyone who wants maximum impact with minimum effort — and twinkle-light backdrops have surged in popularity for good reason. Two strands of warm white fairy lights draped over a sheer white curtain, mounted to a tension rod in a doorway: twenty minutes, about $28 total.
What you need:
- 2 strands of warm white fairy lights ($14 for a 2-pack)
- 1 sheer white curtain panel ($8–$12)
- Tension rod or curtain rod ($8–$15)
Total cost: $22–$35
The warm glow makes the corner feel inviting, not just functional, and guests gather near it naturally.
💡 Pro Tip: Shoot photos at dusk or in a dimmed room. Fairy lights photograph dull in bright daylight — in low light, they create a warm glow that makes everyone look genuinely beautiful. This is one of the most underrated tips in DIY photo booth planning and accounts for much of the difference between a great photo and a mediocre one.
Best for: Evening parties, bridal showers, birthday dinners, intimate gatherings. Difficulty: Easy | Setup time: 20 minutes.
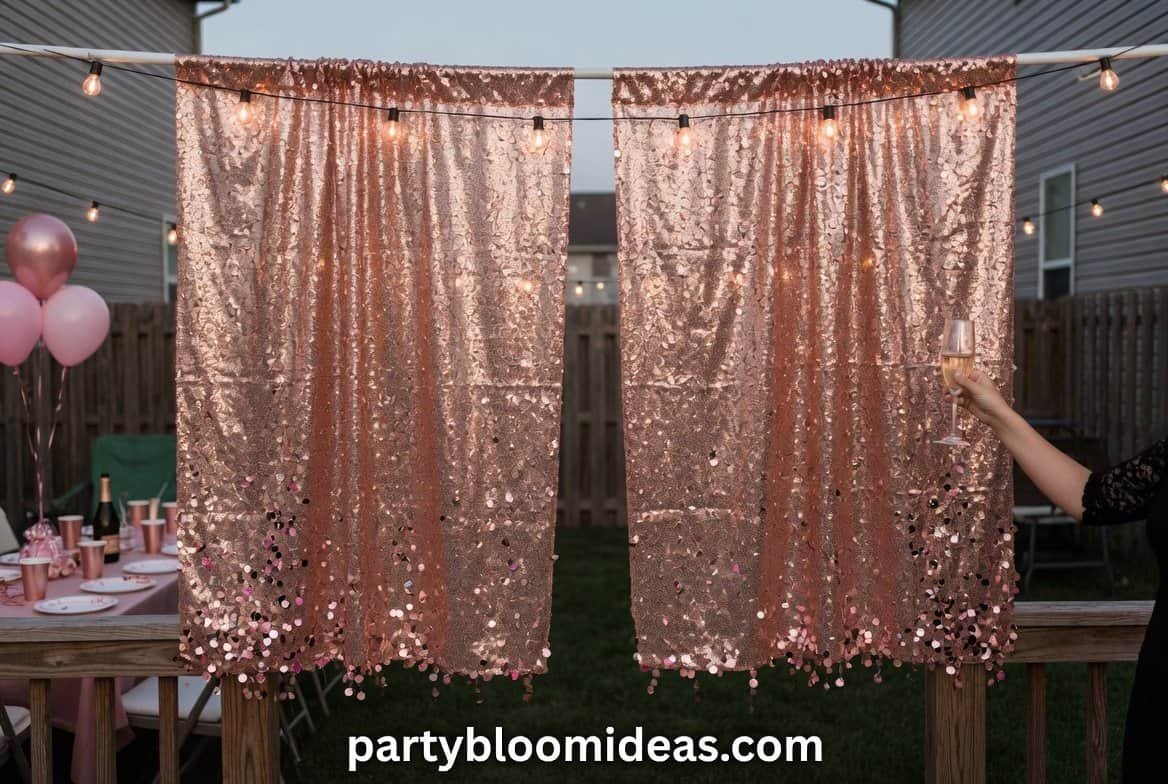
Sequin Curtain Backdrop
This is one of the most underrated party backdrops you can buy. Two sequin panels clipped to a tension rod, and you’re done — rose gold panels can make a plain backyard look like a boutique event venue, and the panels cost about $25.
What you need:
- 2 sequin curtain panels ($12–$18 each — off-brand works identically)
- Tension rod ($8) or Command hooks
Total cost: $25–$40 | Reusable for future parties
The party-store version costs $60–$80; the off-brand version photographs the same. The sequins don’t know they were cheap — buy the less expensive version.
Best for: New Year’s Eve, adult birthdays, bachelorette parties, holiday gatherings. Difficulty: Easy | Setup time: 10 minutes | Wow factor: 8/10.
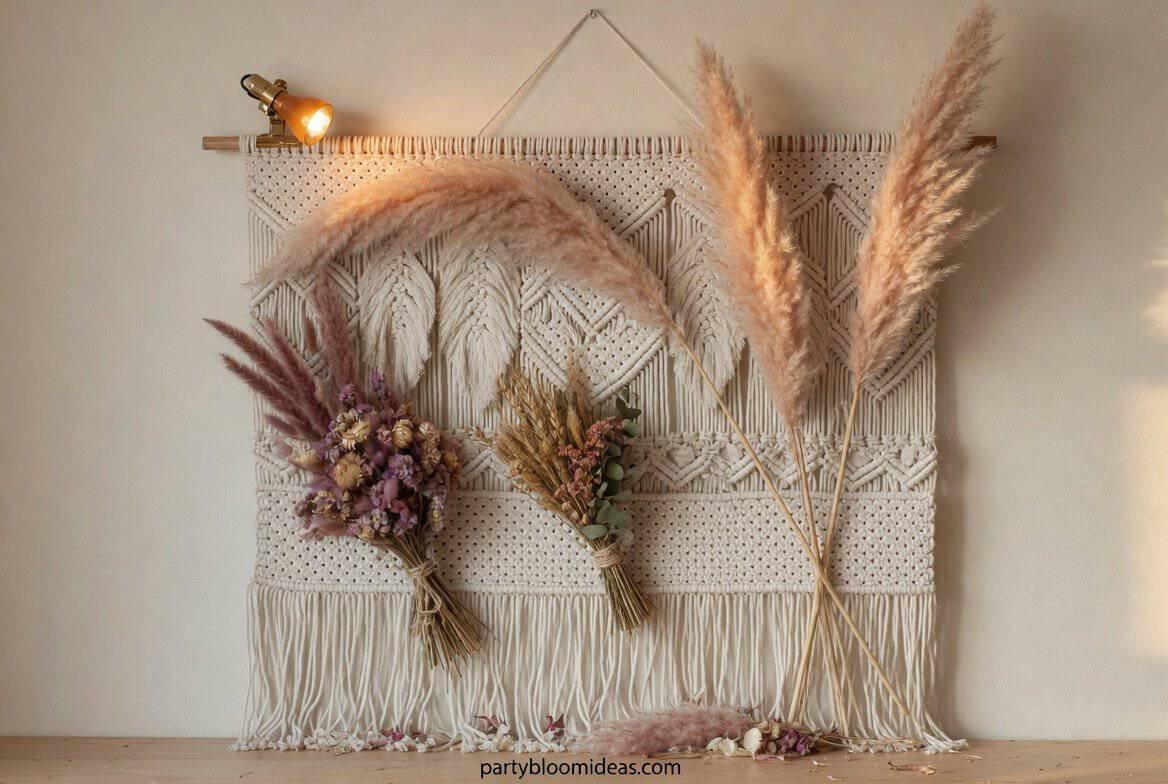
Boho Macramé + Pampas Grass Photo Backdrop
For a boho bridal shower or birthday where you want a backdrop that looks collected — not assembled — this is it. Pampas grass stems tucked into a macramé wall panel with two dried flower bundles looks like a Pinterest editorial for around $48.
What you need:
- Pre-made macramé wall panel, 24×36″ ($18–$28)
- 3–5 pampas grass stems ($10–$15 at a craft store — use a coupon)
- 1–2 dried flower bundles ($8–$12)
- Warm clip light or lamp nearby ($9–$20)
Total cost: $35–$60
💡 Pro Tip: Place pampas stems asymmetrically — tuck them into one side of the macramé, not centered. Symmetry looks manufactured; asymmetry looks collected, and the backdrop reads like it cost far more than it did.
Best for: Bridal showers, boho birthdays, outdoor garden parties. Difficulty: Easy | Setup time: 30 minutes.
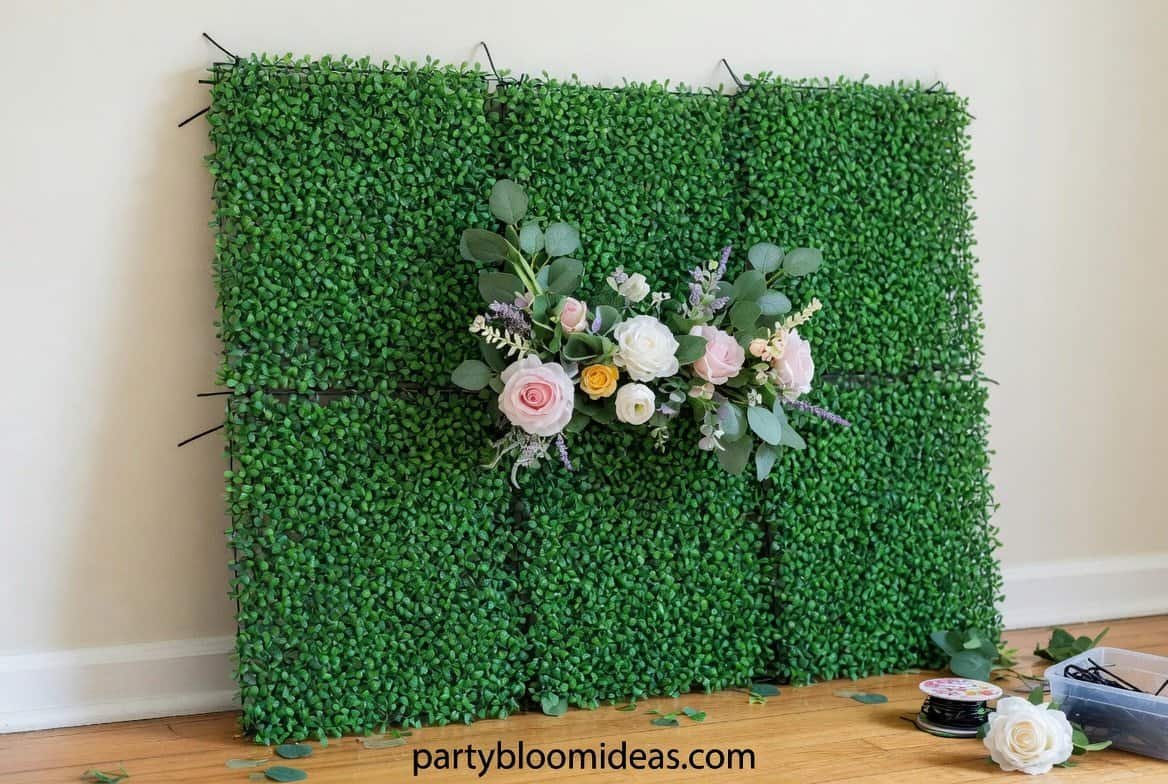
Faux Greenery Wall Photo Backdrop
This is the closest DIY equivalent to a rented greenery wall, and unlike most backdrops, it’s completely reusable. Four to six faux boxwood panels zip-tied together and leaned against a wall — that’s the whole setup, and guests assume you rented it.
What you need:
- 4–6 faux greenery/boxwood panels, 20×20″ ($15–$20 each)
- Zip ties or floral wire to connect panels
- Optional: 10–15 faux florals or a custom sign tucked into the center ($10–$20)
Total cost: $60–$90 (reusable for multiple parties)
Done right, a greenery wall looks like a florist built it. Done wrong — misaligned panels, two different shades of green from different brands — it looks exactly like what it is. Buy all panels from the same listing.
Best for: Bridal showers, baby showers, garden parties, outdoor events. Difficulty: Medium | Setup time: 1–2 hours.
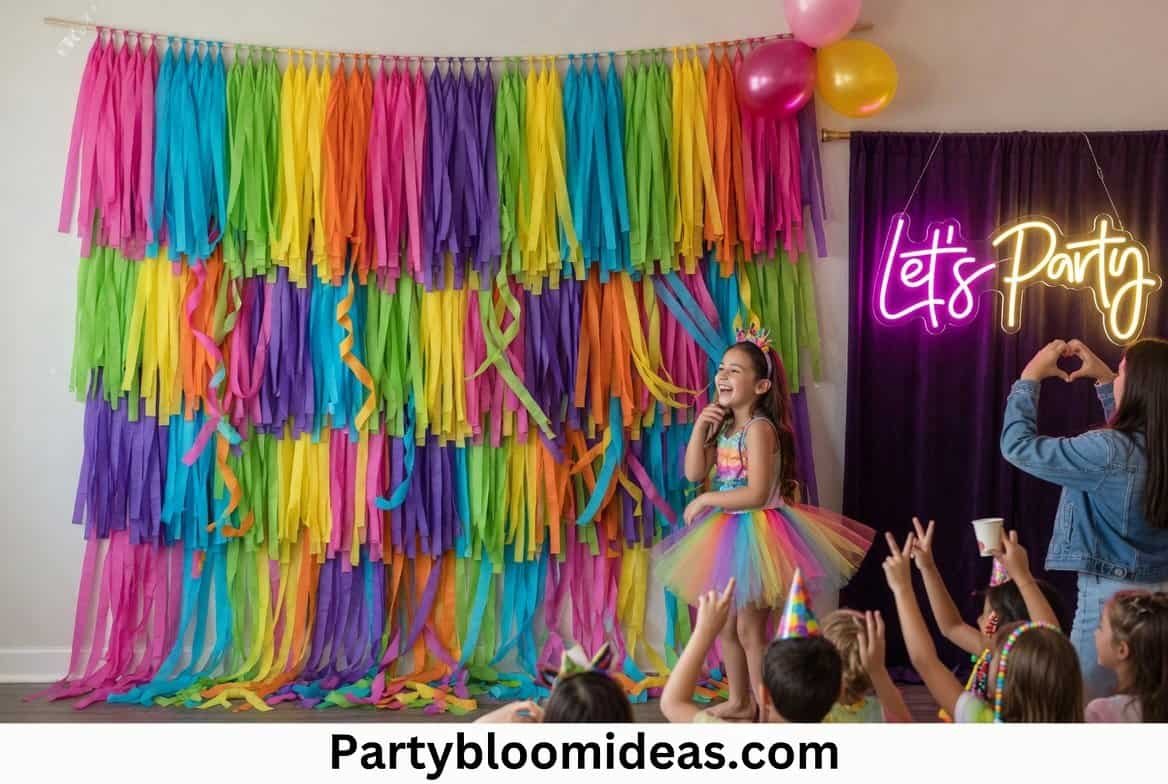
Streamer Fringe Backdrop (The Budget Hero)
If you have $15 and forty-five minutes, this is your move. It’s a kids’-party favorite — every single kid at the party ends up taking a photo in front of it, including the ones who said they didn’t want to.
What you need:
- 4–6 rolls of tissue paper streamers in 2–3 colors ($8–$12)
- Wooden dowel or tension rod ($3–$8)
- Tape or hot glue
Total cost: $12–$18
Best for: Kids’ parties, teen birthdays, budget hosts, fiesta themes. Difficulty: Easy | Setup time: 45 minutes.
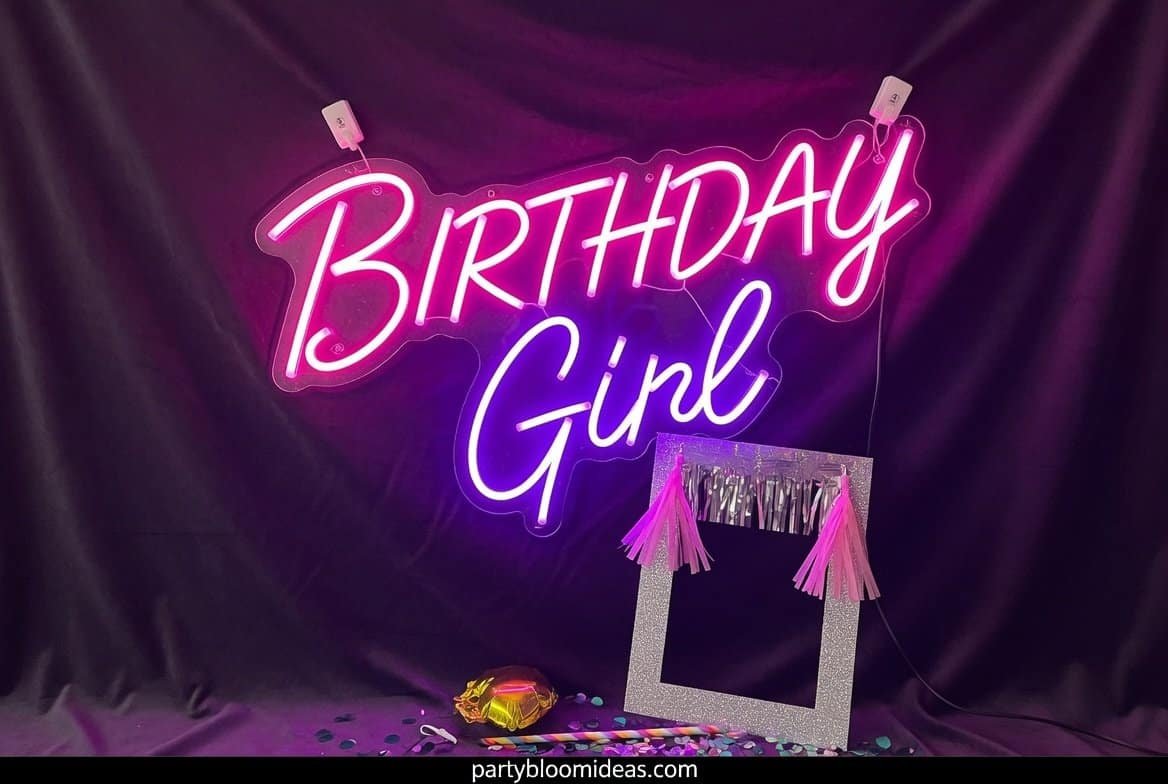
Neon Sign Photo Corner
One LED neon sign mounted against a dark curtain backdrop — that’s a complete photo booth setup. The neon provides the lighting, creates the mood, and gives guests something to photograph with. Most guests never notice the difference between LED neon and real glass neon, and the real glass version costs $150–$300+.
What you need:
- LED neon sign ($25–$45 — “Let’s Party,” “Birthday Girl,” custom names)
- Dark curtain or tablecloth as backing ($8–$12)
- Command hooks
Total cost: $35–$60
💡 Pro Tip: Real glass neon is beautiful — and also $150–$300 and fragile. LED neon signs photograph identically and can be hung anywhere. Get the LED version.
Best for: Teen parties, adult birthdays, New Year’s Eve, bachelorettes. Difficulty: Easy | Setup time: 15 minutes | Wow factor: 9/10.
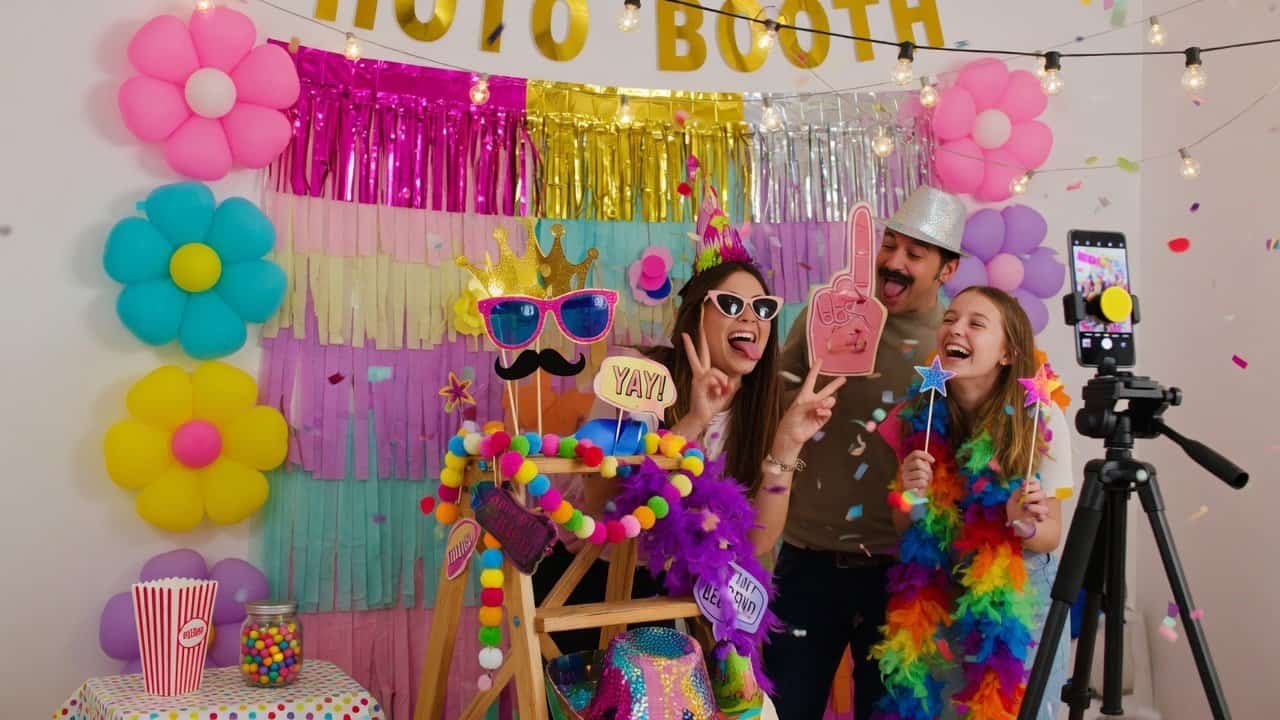
How to Make DIY Photo Booth Props (That Actually Photograph Well)
Make these:
- Oversized glasses frames (foam board + paint + 12-inch wooden dowel) — $4–$6 total
- Speech bubble signs (“Finally 30!”, “She Said Yes!”, party-specific messages) — free printable templates online
- Themed hats or crowns cut from foam board
- Custom hashtag or party name sign
Skip these:
- Feather boas — they shed, photograph messy, and end up on the floor by hour two
- Pre-packaged party store prop kits ($15–$20 for 20 flimsy paper props that bend immediately)
- Wooden dowels shorter than 12 inches — props fall out of frame in photos
DIY prop method: Download free SVG prop templates online (search “photo booth props SVG free”). Print, cut from foam board ($1.25 per sheet), and hot glue to 12-inch wooden dowels. Total cost: $8–$15 for a complete set that photographs far better than store-bought kits.
What Lighting Works Best for a DIY Photo Booth?
A $9 ring light will do more for your photo booth than a $90 backdrop with bad lighting — lighting is roughly 80% of the result. A gorgeous greenery wall in a shaded corner still produces dark, muddy photos; it isn’t the backdrop’s fault.
Lighting ranked best to worst:
- Natural light from a nearby window (morning or golden hour)
- Warm-toned ring light ($9–$22) at face height, facing guests
- Fairy lights layered in front of the backdrop
- Overhead fluorescent or cool-toned LED (avoid — washes everyone out)
Light should face guests — not come from behind or above. If your backdrop is in a shadowy corner, a $9 clip light aimed at guests’ faces will fix it entirely.
DIY Photo Booth vs. Renting a Photo Booth: Which Is Better?
Americans spend a meaningful amount on birthday party décor each year, and photo booth setups are among the most popular DIY additions. Here’s how DIY compares to renting:
| DIY Photo Booth | Rented Photo Booth | |
|---|---|---|
| Cost | $15–$90 | $150–$400 |
| Setup time | 20 min–3 hours | 30–60 min (vendor sets up) |
| Print capability | No (guests use phones) | Yes — instant prints |
| Wow factor | 6–9/10 (setup-dependent) | 8–9/10 |
| Reusability | Yes | No |
| Best for | Budgets under $200 | Weddings, corporate events |
Honest takeaway: For a birthday, baby shower, or graduation with a budget under $200, DIY wins every time. If printed photo keepsakes matter — weddings, corporate events — renting is worth it.
Common DIY Photo Booth Mistakes to Avoid
The biggest mistake most hosts make is setting up the photo booth in a dark corner. Move it near natural light or add a ring light — everything else is secondary to this. Other mistakes to avoid:
- Too many props — 6–8 maximum; more creates visual chaos in every photo
- Backdrop too small — minimum 5 feet wide, 6 feet tall for waist-up shots
- No sign indicating the booth — add a chalkboard or printed sign so guests notice it
- Buying a backdrop stand — tension rods and Command hooks are cheaper and less frustrating
- Mismatched prop and backdrop colors — coordinate to 2–3 shades only
People Also Ask About DIY Photo Booths
What is the most popular DIY photo booth backdrop? Balloon arch backdrops are the most searched and most shared online. Sequin curtain backdrops are the most practical — easiest setup, lowest cost, reusable, and they photograph beautifully at any party type.
How much does it cost to DIY a photo booth? A DIY photo booth costs $15–$90 depending on the backdrop style. A streamer fringe backdrop costs $12–$18. A sequin curtain backdrop costs $25–$40. A faux greenery wall costs $60–$90 but is fully reusable. Compare that to renting a photo booth at $150–$400.
What do you need for a selfie station at a party? A selfie station needs four things: a backdrop (any of the options above), a light source facing guests, 6–8 props in a basket, and a phone or camera on a tripod. A small sign labeling the station is optional but recommended.
Frequently Asked Questions
How do I make a photo booth at home without expensive equipment? Choose a blank wall or doorway, hang a backdrop using a tension rod or Command hooks ($8–$15 total), add one light source facing guests, and set out 6–8 props in a small basket. A phone on a tripod with a $6 Bluetooth shutter remote is a completely sufficient setup. No expensive equipment required — most guests are sharing photos to Instagram anyway, and phone cameras handle that perfectly.
What’s the easiest DIY photo booth backdrop to make last minute? A sequin curtain backdrop. Two panels clipped to a tension rod takes 10 minutes and costs $25–$40. If you have even less time, a dark curtain plus one LED neon sign takes 15 minutes and requires zero assembly or decoration skills.
What props should I have at a photo booth? Oversized glasses frames, speech bubble signs with party-appropriate messages, themed hats or headbands, and a custom party hashtag or name sign. Keep it to 6–8 props maximum. Free templates are available online — cut from foam board and hot glue to 12-inch dowels for $8–$15 total.
How do I set up a selfie station in a small space? Use a doorway with a tension rod for the backdrop — it takes up zero floor space. Keep props in a small basket to the side. A selfie station can fit in 3 square feet if you use vertical space, which is especially practical for apartments and living room setups.
How do I hang a photo booth backdrop without damaging walls? Use 3M Command hooks rated for 5 lbs — they hold most backdrops cleanly and remove without wall damage. For heavier setups, hang a tension rod across a doorway and drape the backdrop over it — no wall contact required at all.
What lighting works best for a DIY photo booth? Warm white light facing guests at face height. A ring light ($9–$22) is the most reliable option, and natural window light is the best free option. Avoid cool-toned overhead lighting — it washes out skin tones and makes otherwise great photos look flat.
How do I make photo booth props from cardboard? Download free prop templates online. Cut shapes from foam board (sturdier than cardboard, about $1.25 per sheet), paint or color them, and hot glue to 12-inch wooden dowels. Total cost: $8–$15 for a complete prop set.
What size should a photo booth backdrop be? Minimum 5 feet wide and 6 feet tall for waist-up photos. For full-body shots, aim for 7–8 feet wide. A backdrop narrower than 5 feet will crop guests awkwardly at the edges — especially in group shots.
How do I make a photo booth look professional on a budget? Three things: coordinate your backdrop and prop colors to 2–3 shades only, add a facing light source (ring light or natural window), and include a custom sign with the party name or hashtag. Coordination and lighting are what separate an intentional setup from a thrown-together one.
Do I need a printer for a photo booth at home? No. Guests use their own phones or a shared camera on a tripod. If you want printed keepsakes, a Polaroid camera with film ($0.70–$1.00 per print) or a portable Bluetooth photo printer ($30–$80) are easy additions — but most guests are happy to keep digital photos.
Can I use a phone instead of a camera for a photo booth? Yes — a modern phone on a tripod is completely sufficient. Use a $6 Bluetooth remote shutter, set the phone to portrait mode, and the photos will be excellent quality. Most guests will be sharing to Instagram or texting directly, so phone quality is exactly what’s needed.
What’s the difference between a photo booth and a selfie station? A photo booth traditionally includes a camera setup and often a printer for instant photos. A selfie station is a backdrop and props area where guests take photos on their own phones. Both work for parties — selfie stations are less expensive, require zero vendor coordination on party day, and are simpler to DIY.
You Don’t Need a Big Budget for This
A reusable backdrop like a sequin curtain can carry you through a graduation party, a friend’s birthday, and a New Year’s Eve gathering for well under $50 total — and every time, the photo booth becomes the corner of the party guests gravitate toward without being directed there.
You don’t need a designer’s budget or a weekend Pinterest spiral to pull off a photo booth guests genuinely love. You need one decent backdrop, a facing light source, and the restraint to not overcomplicate it. Pick one idea from this list, set it up the night before, and watch your guests walk straight to that corner.
Read More: The Ultimate Guide to Planning a Beautiful Bridal Shower on a Budget